- What is depth of field? Explanation of its meaning and how to use it in photography
- January 31, 2025
What is depth of field? Explanation of its meaning and how to use it in photography

In photography, one of the most notable expressions of an interchangeable-lens camera is the beautiful bokeh effect. “Depth of field” is closely related to the expression of bokeh, and its range changes depending on the lens’s focal length and aperture setting. In this article, we will explain the meaning of depth of field, the elements that affect it, and its relationship with bokeh.
What is depth of field?
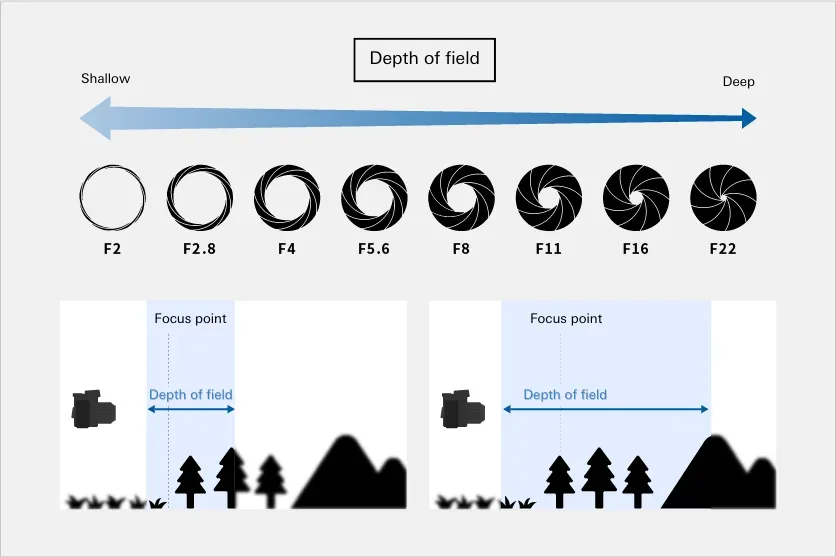
Depth of field refers to the range of the photo where the subject appears to be in focus. When taking a photo with a camera, the area that is perfectly in focus is theoretically only one point, but in practice, there is a range in front of and behind the focus point where the subject appears to be in focus. This “depth of field” is the area where the subject is perceived as being in focus.
Depth of field extends in front and behind the focused point. If you move outside this range, the image will gradually start to blur. For example, when shooting a landscape, if the objects in front and behind the main subject also appear in focus, it is the result of the depth of field.
The depth of field can vary significantly depending on the lens and the settings on the camera. A shallow depth of field means the area in focus is limited, and the blur begins quickly in front and behind the focused area, resulting in significant bokeh. On the other hand, a deep depth of field means that everything from the foreground to the background is in focus, which is typically used in landscape photography or other situations where you do not want background blur.
Elements that affect depth of field
The depth of field is primarily affected by three elements: the aperture (F-number), focal length, and the distance between the camera and the subject.
Aperture (F-number)
The F-number is a number that represents the size of the aperture. The smaller the F-number, the wider the aperture, resulting in a shallow depth of field. Conversely, the larger the F-number, the narrower the aperture, which leads to a deeper depth of field.
For example, if you shoot at an aperture like F2 or F2.8 (wide open), the depth of field will be shallow, and you will get a significant amount of background blur. This background blur helps to emphasize the subject and enhances its impact. Such a bokeh effect is commonly used in portrait, flower, and snapshot photography.
On the other hand, if you use an aperture like F8 or F11, the depth of field becomes deeper, and a wider area will be in focus. This is ideal for scenes like landscapes or architecture, where you want everything from the foreground to the background to be sharp.
Focal length
The focal length of a lens also affects depth of field. Generally, the longer the focal length (telephoto lens), the shallower the depth of field, while the shorter the focal length (wide-angle lens) leads to a deeper depth of field.
For example, with a telephoto lens of about 80mm or more, you can easily achieve natural background blur, and the separation between the subject and background becomes clearer. By utilizing the compression effect of a telephoto lens, you can create more impactful photos that highlight the subject. This effect is especially useful in portrait photography, where it helps to make the subject stand out.
In contrast, with wide-angle lenses (around 35mm or shorter), the depth of field is deeper. Since wide-angle lenses have a wider field of view, they allow you to capture expansive scenes in focus. Additionally, wide-angle lenses emphasize perspective (depth and three-dimensionality), making them ideal for capturing a strong sense of space.
Group photos
For large group photos, a lens that covers a wide angle range is an essential item. Use a wide angle focal length to capture the expressions of the people from one end to the other clearly.
In addition to camera settings and lens selection, it is important to have the people in the back row line up with a step so that their faces are not hidden. Also, the more people there are, the more difficult it becomes to capture everyone’s eyes open and their expressions brightly and clearly. It is important to take photos while checking the expressions of all the guests so as not to miss the shutter opportunity.
Wedding Reception Entrance Scene
The wedding reception entrance scene is the moment when the bride and groom shine as the main characters. Capture not only a close-up of the bride and groom, but also the overall picture, including the gorgeous atmosphere of the venue.
Depending on the venue’s production and lighting, you should also pay attention to the lighting. Be aware of how the spotlight hits the bride and groom, and if their expressions are in shadow, use exposure compensation of about +1EV to capture a bright and impressive image of the bride and groom. In addition, everyone will be pleased if you can capture the warm expressions of the guests welcoming the couple in the photo.
Wedding Reception Speech
Telephoto lenses are useful in speech scenes. Capture the emotional expressions of the person giving the speech, and don’t miss the reaction of the bride and groom listening to it. It is important to position yourself so that you can capture both of their expressions alternately.
Also, since the lighting in wedding reception venues is often set to a low level, the ISO sensitivity should be around ISO800 to ISO1600. Aim for a sharp photo without camera shake by setting a shutter speed of 1/125 seconds or faster.
Cutting the cake and first bite
The cutting of the cake and first bite are particularly exciting moments at a wedding reception. Be sure to be able to flexibly adjust the angle of view to match the movements of the couple. Use the continuous shooting mode for the cutting of the cake to capture the moment before and after the knife goes in.
For the first bite, it is important to judge the distance and timing of the bride and groom. In particular, do not miss the facial expressions of the bride and groom. Also, make sure to capture the excitement of the friends and guests.
Appearance of relatives and friends
Take natural expressions of not only the bride and groom but also the guests. Casual expressions, such as relatives and close friends enjoying conversation or moments of emotional emotion, will make a memorable photo. It is best to shoot with a standard focal length of around 50mm to 80mm and a natural angle of view. When capturing facial expressions, it is important to use the flash sparingly and maintain as natural an atmosphere as possible.
Food and venue scenery
Photos of the atmosphere of the reception hall and the food are also important memories. Food can be made to look more delicious by taking advantage of the venue’s lighting and adding moderate shadows. Use a Wide Angle lens to decorate the venue and capture the atmosphere of the entire space to the fullest.
For floral arrangements and table settings, focus on the main subject of the flowers and tableware and make use of the background blur to create an impressive photo. Try to be mindful of basic composition techniques such as diagonal composition.
Tips for taking wedding photos
From here, we will introduce general tips for taking beautiful wedding photos. When taking photos of weddings, it is necessary to capture the fleeting events with precision. To do this, in addition to choosing the right equipment, it is important to understand exposure settings and focusing.
All-in-one Zoom lenses that cover the standard to telephoto ranges are easy to use
When photographing a wedding, you need to respond quickly to the ever-changing scene. For this reason, we recommend an All-in-one Zoom lens that eliminates the need to change lenses.
If you are confident that you can take photos while making the most of your mobility, the TAMRON 35-150mm F/2-2.8 Di III VXD (Model A058) is a highly recommended lens. This high-performance lens covers the semi-wide to telephoto range, allowing you to handle a wide range of photography with just one lens. It has a bright maximum aperture of F2-2.8, and is good at taking beautiful portraits that make use of smooth bokeh.
However, since there are limits to the scenes and angles of view that you can photograph yourself, it is wise to leave the shooting of situations that require lens changing to the wedding photographer. Instead, by concentrating on photographing familiar scenes such as the natural expressions of the bride and groom, their parents, and close friends, you can leave memories from a different perspective than a professional. This will also often be appreciated by the bride and groom, their family, and their friends.
Exposure setting guidelines
Since the venue is often a dark environment, it is important to ensure exposure. The brightness of the venue varies depending on the location, and lighting used for the production also affects the brightness, so flexible settings are required. From here, we will introduce specific exposure setting guidelines.
Shooting mode
It is best to select the shooting mode appropriately according to the situation. For scenes where the subject is moving, such as entrance scenes and bouquet tosses, use shutter speed priority mode to aim for photos with less blur.
On the other hand, aperture priority mode is effective for scenes where the subject is stationary, such as conversation scenes at a table or group photos. You can take impressive photos of people while controlling the degree of background blur.
F-number (aperture value)
When taking portraits or snapshots of people, try using an aperture close to the maximum aperture, around F2.8 to F4.0. By opening the aperture, you can create beautiful background blur while ensuring exposure.
For group photos, you need to keep everyone in focus from the front to the back row, so it’s a good idea to narrow the aperture to around F8 to F11.
When photographing venue decorations or the entire space, narrow the aperture slightly to capture even the fine details and patterns sharply.
Shutter Speed
For scenes with movement, such as the cutting of a cake or a flower shower, select a shutter speed of 1/125 to 1/250 seconds or faster. This allows you to take photos with less blur even in scenes with movement, such as the moment of a bouquet toss or a flower shower.
On the other hand, in places where natural light enters, such as a chapel during the day, you can soften the light by deliberately slowing down the shutter speed to around 1/60 seconds. However, you need to be careful of camera shake when taking handheld photos.
ISO Sensitivity
First of all, it’s a good idea to set the ISO to around ISO 400 to ISO 800. In dark places with weak lighting, increase the ISO sensitivity, and if you need more brightness, consider using an external flash.
Exposure compensation
In strong light, such as backlit or spot-lit scenes, the actual photo may be dark even if the camera judges it to be properly exposed.
In such cases, adding exposure compensation of about +1EV will make the bride and groom’s expressions brighter and more impressive. In particular, with white wedding dresses, the camera may set the exposure slightly under, so it is important to use exposure compensation as needed.
Shooting with bounce flash
Bounce flash shooting can be effective in places with low ceilings and whitish colors, such as wedding reception halls. Bounce photography is a photography technique where the light from a flash or strobe is first reflected off a ceiling or wall before being directed at the subject, rather than being directed directly at the subject. By pointing the strobe (flashlight) upwards and reflecting the light off the ceiling, it is easier to capture facial expressions and shadows even in dark environments. In addition, the light is softer than when the light is directed directly, so the facial expressions of people can be captured more naturally.
If the color of the ceiling or wall is brown or other color other than white, the color may be mixed into the light and affect the color of the subject if it is reflected as is. Check the color of the reflective surface before shooting and adjust the settings and angle as necessary.
Shooting with creative composition
As a basic composition method, it is easier to achieve balance if you keep the rule of thirds in mind. Leave a moderate amount of white space within the frame to create a photo that is easy to see and does not feel oppressive. When photographing the bride and groom, try to compose the photo so that they are the main subjects, and try to avoid unnecessary elements in the background (such as equipment and people) as much as possible, or organize them with background blur.
Also, instead of shooting from the same angle, changing the viewpoint to a low angle or high angle will expand the range of expression. A low angle is particularly effective if you want to make the silhouette of the dress look beautiful.
Tips for focusing
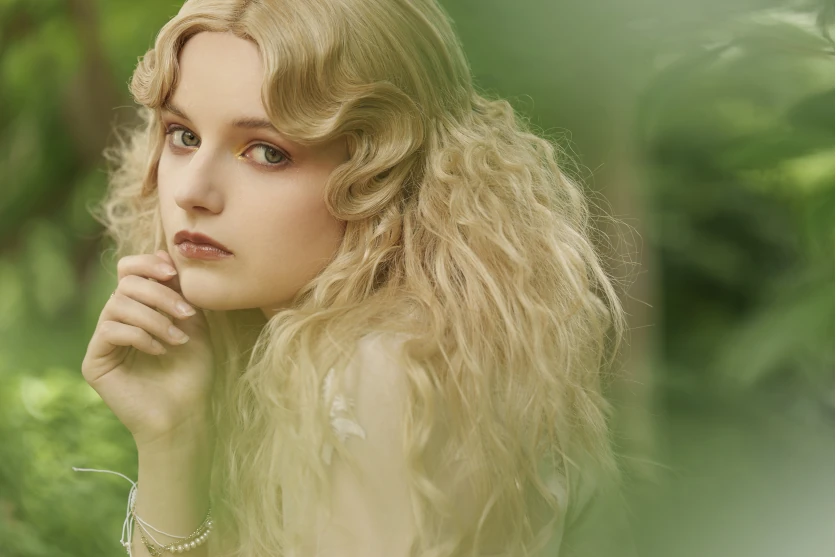
TAMRON 70-180mm F2.8 G2 (Model A065) Focal length: 116mm Exposure: F2.8 Shutter Speed: 1/250sec ISO: 200
When photographing people, it is a good idea to be conscious of focusing on the eyes. Focusing on the eye that is closer to the camera will result in a natural and impressive portrait. In addition, AF-C (continuous AF) mode is recommended for scenes where the subject is moving, such as entrance scenes and bouquet tosses. You can track the focus on a moving subject and take photos with less blur.
Prepare spare batteries and memory cards
Wedding photography takes a long time. Therefore, don’t forget to prepare spare batteries. Prepare at least two fully charged batteries and be careful not to run out of power in the middle of shooting.
Similarly, prepare two or more large capacity memory cards. In addition, it is a good idea to keep one unused as a spare in case of malfunction or damage. If possible, insert two large capacity media into the camera’s double slot and set it to write simultaneously for safety. Considering shooting in RAW format, a total capacity of 64GB or more is safe. Be sure to prepare all your equipment to ensure that your precious memories are preserved.
Wedding photography etiquette
Of course, it is important to preserve the memories of the wedding, but the most important thing is to be mindful of proper etiquette so as not to spoil the solemn atmosphere of the ceremony. At a minimum, be sure to pay attention to the points mentioned below.
First, check the rules of the venue in advance. In particular, be aware of whether or not flash can be used and any areas that are off-limits.
Also, be careful about where you stand so as not to interfere with the venue photographer’s shooting. Basically, give priority to the venue photographer’s shooting, and then take your own photos. Avoid forcing yourself to hold the camera in situations where you should be more careful.
In addition, when uploading photos to social media, you should be careful about the privacy of the bride and groom and guests. Be sure to check in advance with the bride and groom about whether or not you can post the photos and the extent of the posts.
Finally, other guests will also want to take photos. Be considerate of each other when it comes to timing the photos, so that everyone can take photos comfortably.
How to choose the right lens for wedding photography
When photographing weddings, it is important to choose a lens that can instantly respond to various scenes. Choose the best lens depending on the size and brightness of the venue, and the scene you want to shoot.
Focal length
There may not be a time to change lenses at a wedding, so it is reassuring to have one lens that can handle many scenes. In that sense, an All-in-one Zoom lens is recommended.
If the focal length covers the standard range of around 50mm and the medium telephoto range of around 100mm, it will be able to handle many scenes. Furthermore, if it covers the semi-wide-angle range of around 35mm, the range of expression can be expanded even further.
Maximum F-number
Wedding venues are often dimly lit, so a lens with a small maximum F-number is recommended. A lens with an maximum F-number of around F2.8 makes it easier to take brighter photos even in dark places or with low ISO sensitivity settings. In addition, a large-diameter lens makes it easier to make use of the bokeh in the foreground and background, allowing for impressive portraits.
Lightness and compactness
Wedding photography takes a long time, so be sure to check the weight of the lens. Telephoto lenses in particular tend to be heavy, so make sure you can carry it around freely. Also, since photography at wedding venues is often done in a small space, a compact lens that is easy to handle is useful. We recommend choosing a lens that emphasizes mobility.
Autofocus (AF) performance
When shooting at an AF, make sure that the focus is smooth and accurate even in a dark venue. In addition, since there are times when shooting in a quiet environment, it is better to have an AF operation sound as quiet as possible. By choosing a lens with a quiet AF mechanism, you can shoot without compromising the solemn atmosphere of the ceremony.
Image stabilization mechanism
Handheld shooting is the norm at weddings, so it is reassuring to have an image stabilization mechanism. Image stabilization is especially effective when shooting in the telephoto range or in a dark venue.
How to choose the right lens for wedding photography
Photographing a wedding is an important opportunity to leave lifelong memories. Take beautiful photos by learning the tips for each scene. In addition, there are many subjects that you want to photograph at a wedding, such as the facial expressions of the guests and the atmosphere of the venue, as well as the bride and groom. Follow the etiquette of the venue and photography and enjoy the shoot.

Lens Featured in this Impression
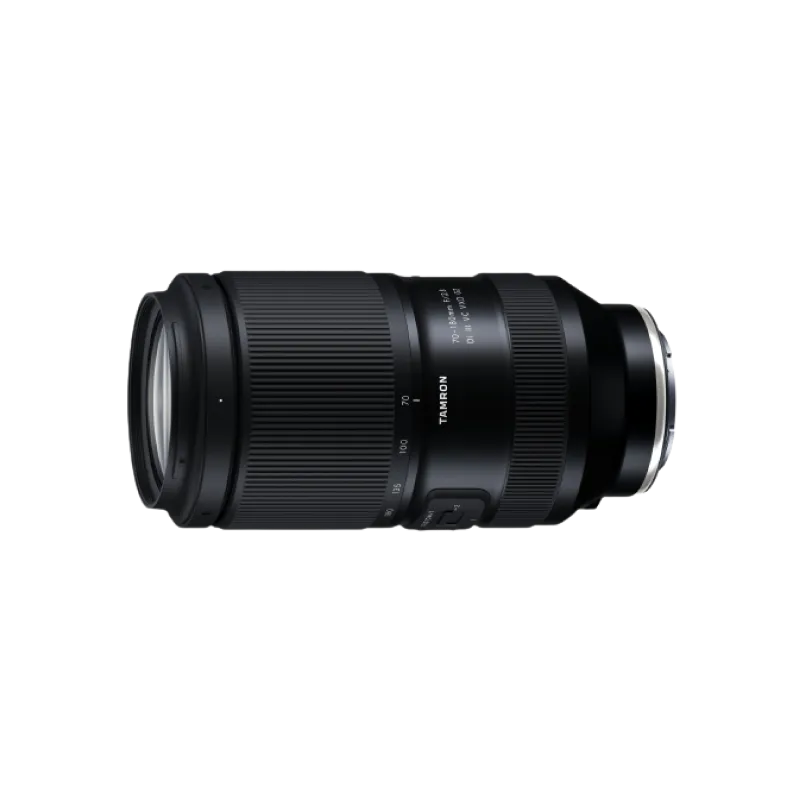
70-180mm F/2.8 Di III VC VXD G2 (Model A065)
70-180mm F/2.8 Di III VC VXD G2 (Model A065) has evolved to G2 level.This is the world’s smallest and lightest, fast-aperture telephoto zoom lens for Sony E-mount and Nikon Z mount with astounding portability and superb image quality.
Learn more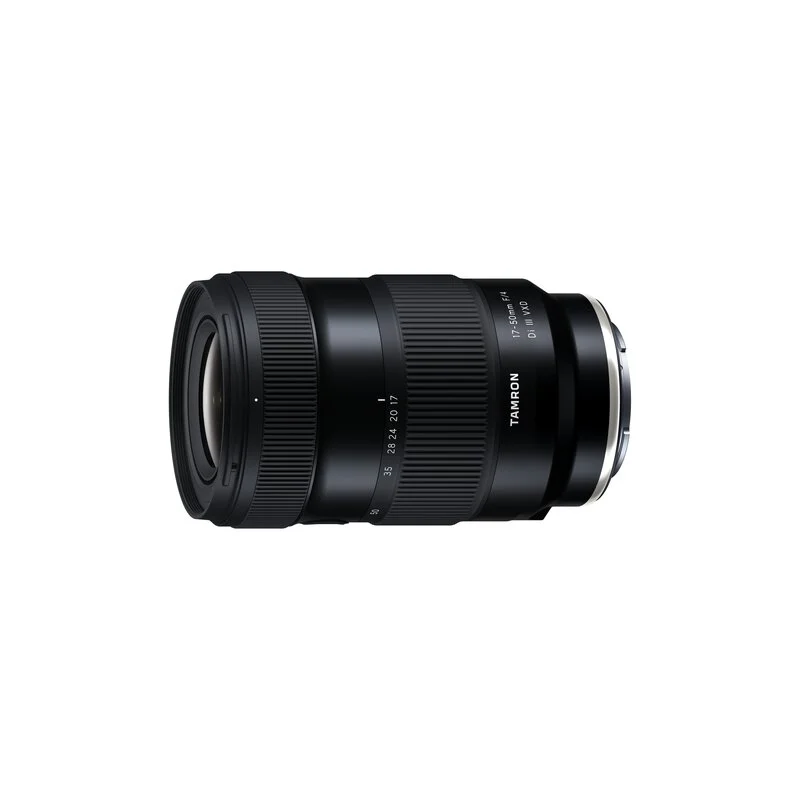
17-50mm F/4 Di III VXD (Model A068)
It's the world’s first lens covering from ultra wide-angle 17mm to the standard 50mm focal length. The highly-compact TAMRON 17-50mm F/4 Di III VXD (Model A068) for Sony E-mount full-frame mirrorless cameras offers maximum versatility for still and video creators. From landscapes to living rooms, this lens captures all that you see.
Learn more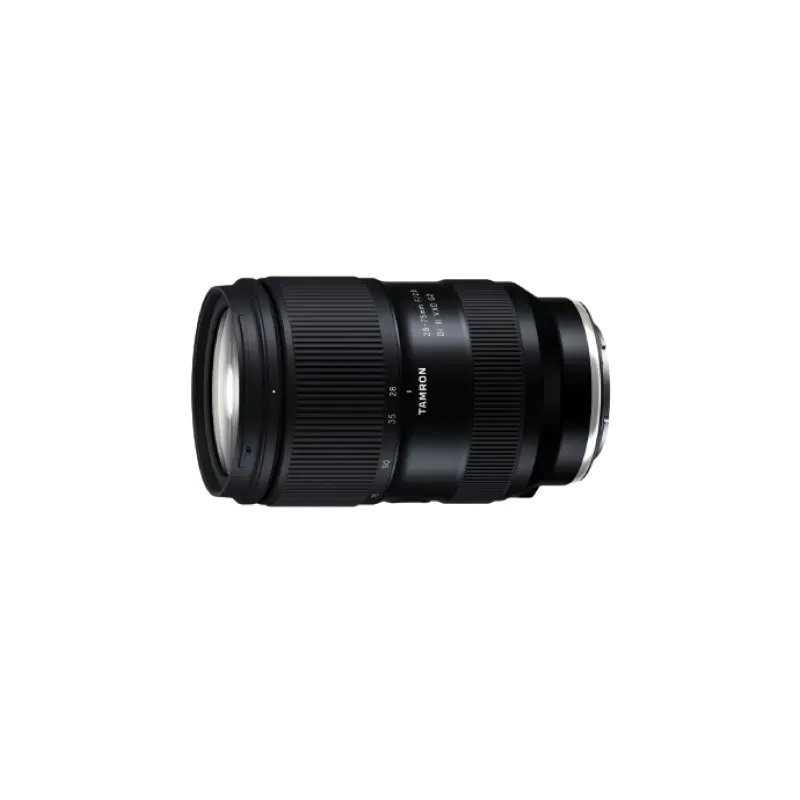
28-75mm F/2.8 Di III VXD G2 (Model A063)
28-75mm F/2.8 Di III VXD G2 (Model A063) is the second-generation fast-aperture standard zoom lens for Sony and Nikon full-frame mirrorless cameras, offering significantly improved optical and autofocus performance and new function customization
Learn more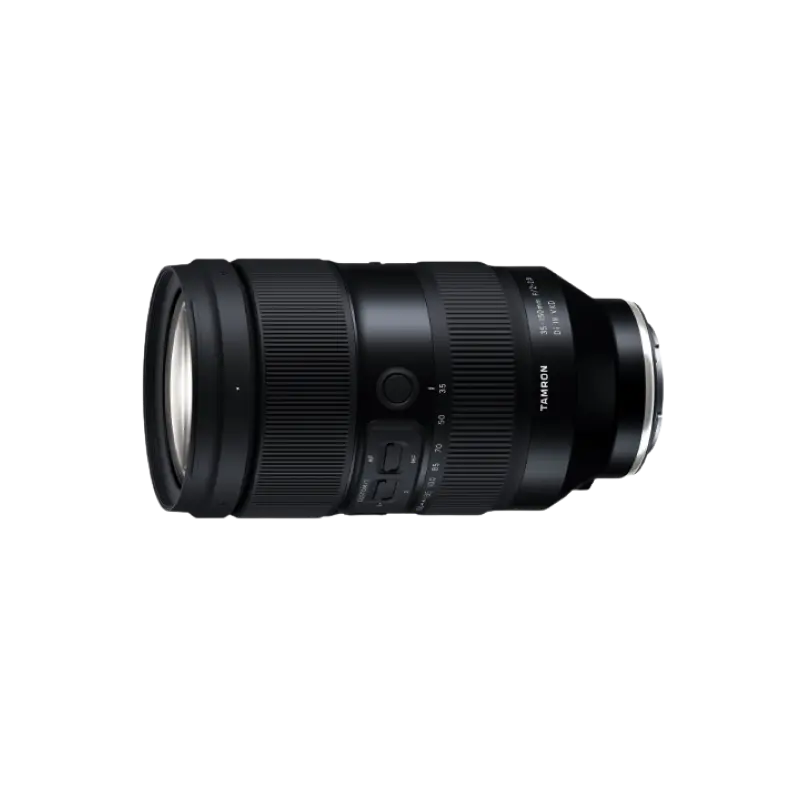
35-150mm F/2-2.8 Di III VXD (Model A058)
The 35-150mm F/2-2.8 Di III VXD (Model A058) is a high resolution travel zoom lens that covers everything from the 35mm wide angle to the 150mm telephoto focal length, the first zoom lens achieving an aperture of F2 at the wide angle end. It has a groundbreaking fast-aperture and utilizes the linear motor focus mechanism VXD (Voice-coil eXtreme-torque Drive), thereby achieving high speed, high precision autofocusing. The innovative lens design enabled us to greatly improve the lens's grip and functionality. The software, developed in-house, enables to easily customize functions and to update firmware.
Learn more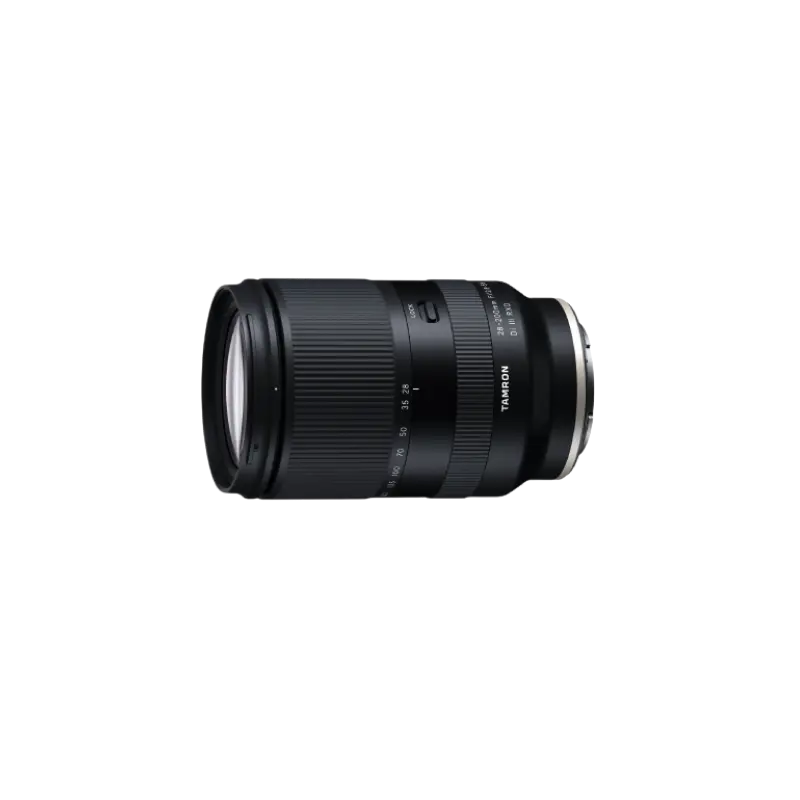
28-300mm F/4-7.1 Di III VC VXD (Model A074)
28-300mm F/4-7.1 Di III VC VXD (Model A074) is a compact and versatile all-in-one 10.7x zoom lens for Sony E-mount. The lens boasts class-leading high image quality, and is equipped with high-speed AF VXD and VC. Go from wide-angle to long telephoto in an instant and capture every moment of the world around you.
Learn more