What Is Lens Compression? How to Use a Telephoto Lens
Lens compression is a photography effect that makes subjects in the foreground and background appear closer together than they normally look to the eye. It can make distant mountains appear larger, create dense-looking cityscapes, and give portraits a more striking background.
The effect is commonly associated with telephoto lenses because their longer focal lengths allow you to photograph a subject from farther away while keeping the subject the same size in the frame.
Understanding telephoto lens compression can help you create more impactful portraits, landscapes, cityscapes, and other photographs where the relationship between the subject and background is important.
In this guide, we’ll explain what lens compression is, how perspective compression works, how to create the effect, and how to choose a telephoto lens for compression photography.
What Is Lens Compression?
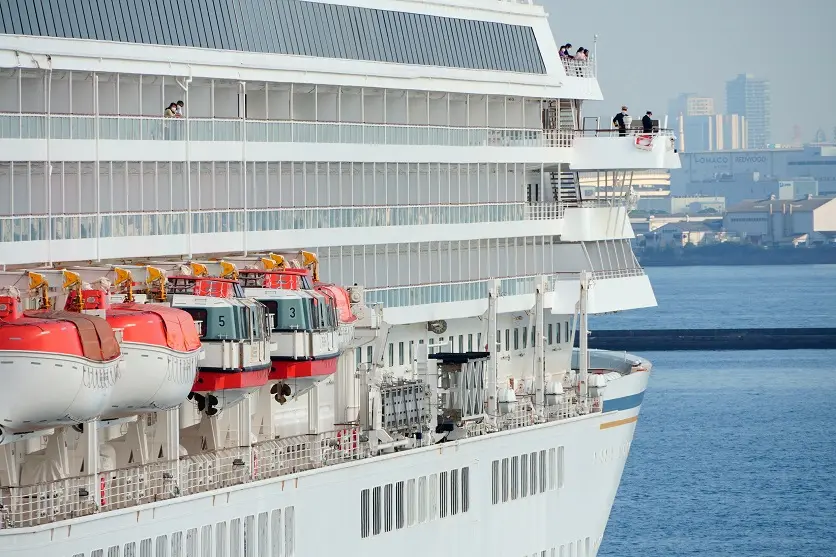
Lens compression is the visual appearance of reduced distance between a subject and its background.
For example, imagine photographing a person standing in front of a distant mountain.
With a wide-angle lens, the person and mountain may appear separated by a large amount of space.
If you move farther away from the person and use a longer focal length to keep the person approximately the same size in the frame, the mountain can appear much larger in relation to the person.
The result is an image in which the foreground and background appear closer together.
This is commonly called the compression effect or perspective compression.
How Does Perspective Compression Work?
To understand compression, it helps to think about your camera position rather than the lens alone.
Suppose you photograph a person standing several meters in front of a mountain.
First, you use a wide-angle lens from relatively close to the person.
Then, you move farther away and use a telephoto lens to frame the person at approximately the same size.
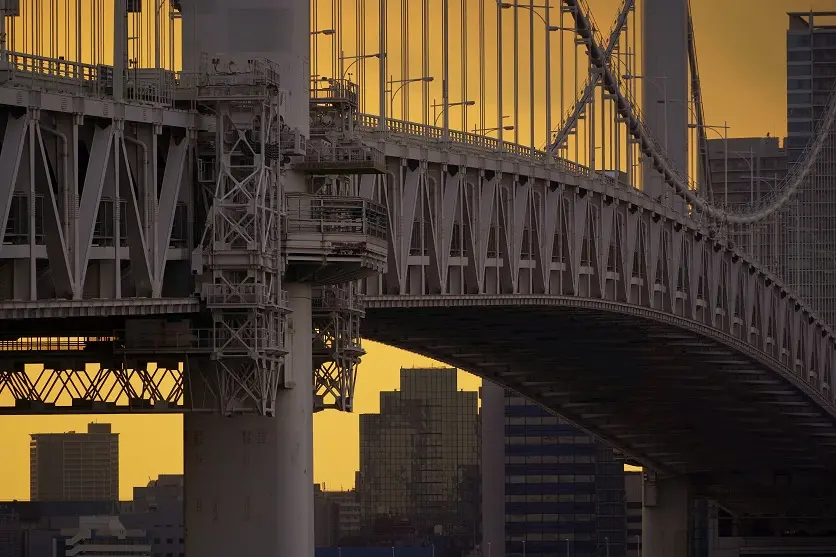
Because you are now farther from the subject, the difference between your distance to the subject and your distance to the background becomes proportionally smaller.
The distant mountain therefore appears larger relative to the subject.
This creates the visual impression that the subject and background have been brought closer together.
Does a Telephoto Lens Really Compress Perspective?
A common misconception is that a telephoto lens itself physically “compresses” the scene.
More accurately, the effect is primarily created by changing your camera position to maintain the same framing.
The telephoto lens makes this technique practical because its narrow angle of view allows you to stand farther away while still filling the frame with your subject.
This is why telephoto lens compression and perspective compression are so closely associated.
Why Telephoto Lenses Create a Strong Compression Effect
Telephoto lenses have a narrower angle of view than wide-angle lenses.
This allows you to isolate a smaller portion of a distant scene.
For example, compare photographing a person with:
- 35mm wide-angle lens
- 50mm standard lens
- 150mm telephoto lens
- 300mm telephoto lens
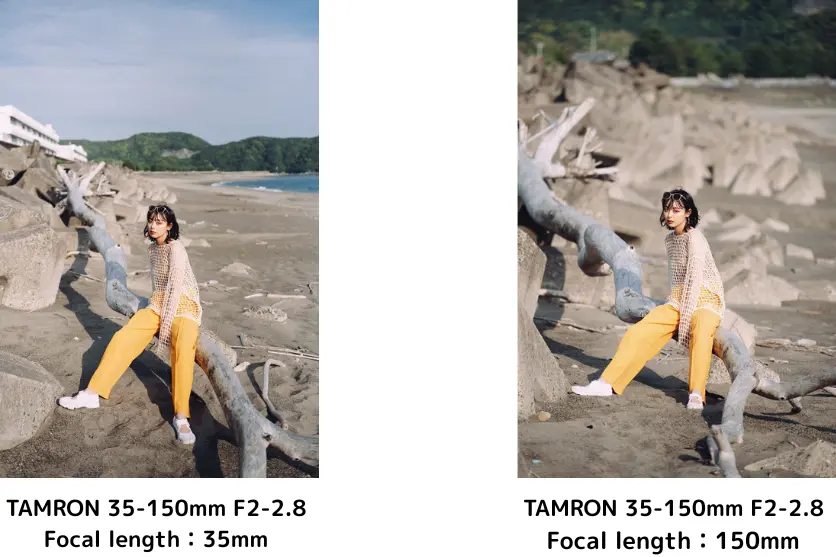
If you maintain a similar subject size in the final composition by changing your shooting distance, the longer focal lengths allow you to photograph from farther away.
Distant background elements can then appear significantly larger relative to the subject.
This is particularly noticeable when the background contains:
- Mountains
- Buildings
- Trees
- City lights
- Crowds
- The moon
- Other distant subjects
How to Create Lens Compression
Creating the compression effect is less about choosing a particular focal length and more about understanding the relationship between camera position, subject distance, background distance, and framing.
1. Find a Distant Background
Look for a background element that is far behind your subject.
Good examples include:
- Mountains behind a person
- Buildings behind a street subject
- City lights behind a portrait
- Trees behind flowers
- The moon behind a building
- Waves or islands behind a foreground subject
The greater the distance between the subject and background, the more dramatic the relationship can become when you photograph from farther away.
2. Move Farther Away From Your Subject
Instead of standing close to your subject, move farther away.
Then use a longer focal length to maintain approximately the same framing.
This change in camera position is an important part of creating the compression effect.
Try taking several photographs from different distances and focal lengths.
You’ll quickly see how the relationship between the subject and background changes.
3. Use a Longer Focal Length
A telephoto lens can make distant background elements appear larger in the frame.
You don’t necessarily need an extremely long lens.
A medium telephoto lens around 85–135mm can produce an attractive effect for portraits, while 200mm and longer can be useful for distant landscapes, wildlife, and dramatic layered scenes.
The ideal focal length depends on your subject and how far you can position yourself.
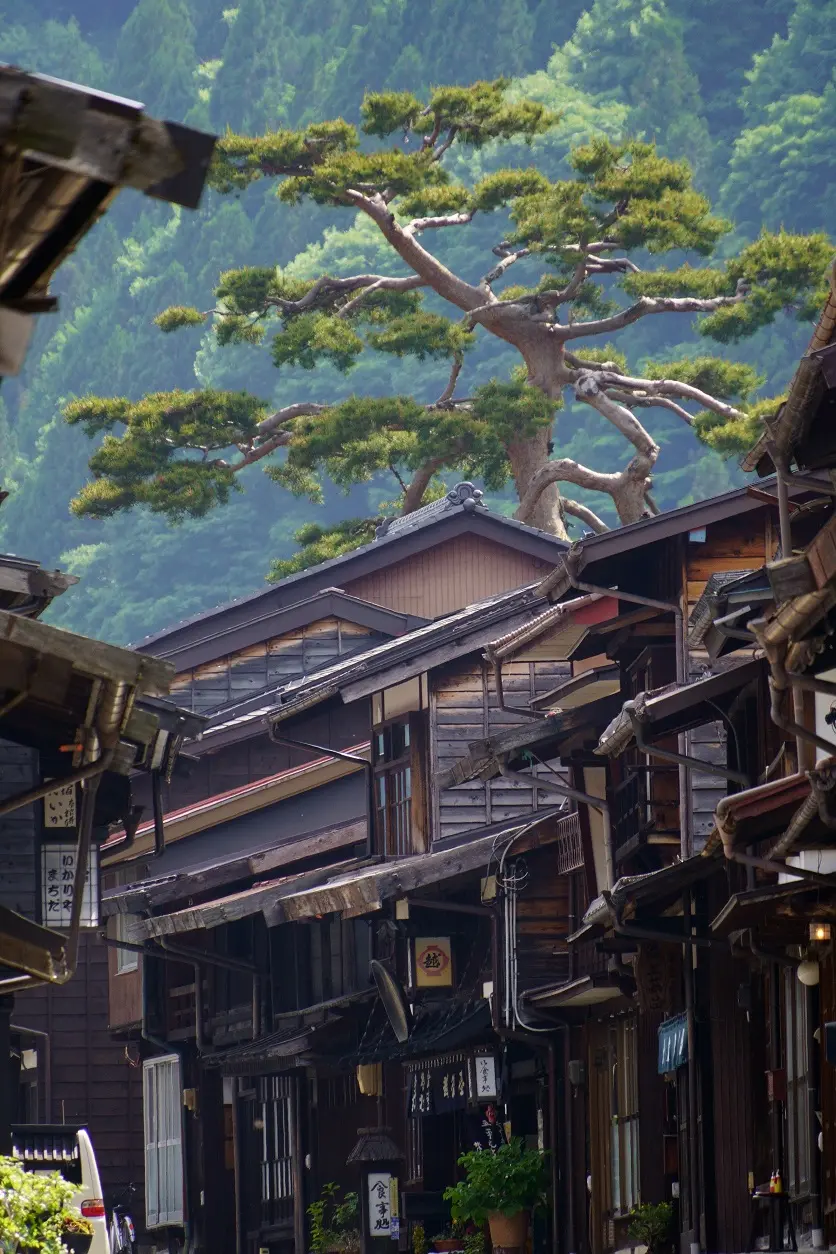
4. Look for Overlapping Elements
Compression becomes particularly interesting when several elements are positioned at different distances.
For example:
Foreground → flowers
Middle ground → buildings
Background → mountains
A telephoto lens can make these elements appear more tightly layered together.
Look for subjects with contrasting shapes, colors, or scales.
Examples include:
- Skyscrapers and mountains
- City lights and the moon
- Flowers and distant buildings
- People and large structures
- Multiple layers of mountains
The combination of overlapping elements can create a strong sense of visual density.
Use Background Blur With Compression
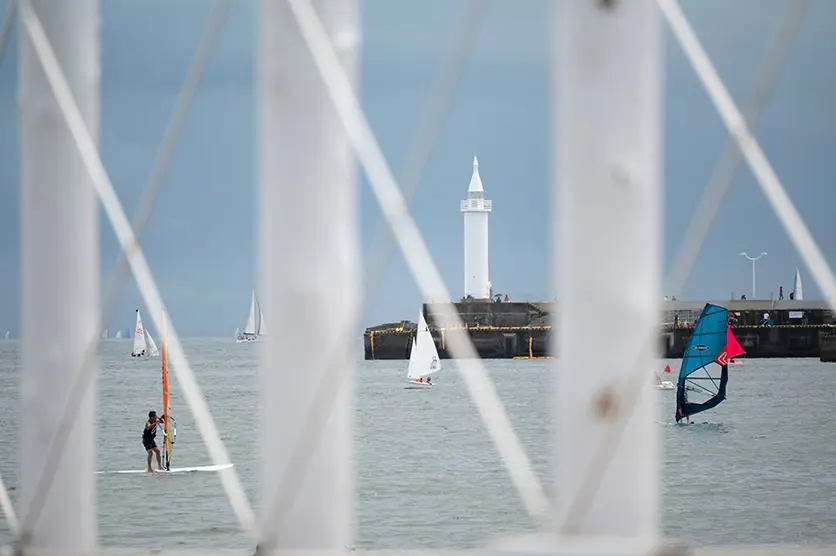
Compression can also be combined with background blur to make your subject stand out.
This is particularly effective in portrait photography.
For stronger background blur:
- Increase the distance between the subject and background
- Use a longer focal length
- Use a wider aperture
- Move closer to your subject when appropriate
A telephoto lens with a wide maximum aperture can produce attractive separation between the subject and background.
If there are small light sources in the background, they can also become large, soft circles of bokeh.
Keep in mind that compression and background blur are related but not the same thing. Compression changes the apparent relationship between foreground and background, while shallow depth of field creates blur.
Best Camera Settings for Compression Photography
There isn’t a single set of lens compression settings that works for every scene.
Your settings depend on the subject, available light, and the look you want.
Aperture
For portraits where you want strong subject separation, try a relatively wide aperture such as:
F2.8–F4
This can help create background blur while allowing more light into the camera.
For landscapes where you want multiple layers to remain reasonably sharp, try something like:
F5.6–F11
The ideal aperture depends on how much depth of field you need.
Shutter Speed
Choose your shutter speed based on subject movement and focal length.
For handheld shooting with a stationary subject, a faster shutter speed can help reduce camera shake, especially with longer lenses.
For moving subjects, increase the shutter speed accordingly.
For example:
- Portraits: around 1/125 sec. or faster
- Walking subjects: around 1/250 sec. or faster
- Fast action: 1/500 sec. or faster
These are starting points rather than fixed rules.
ISO
Use the lowest practical ISO that allows you to achieve your desired shutter speed and aperture.
In bright daylight, ISO 100–400 may be sufficient.
In low-light conditions, increasing ISO can help maintain a usable shutter speed.
Lens Compression Examples
The compression effect can be used in many different types of photography.
Portrait Photography
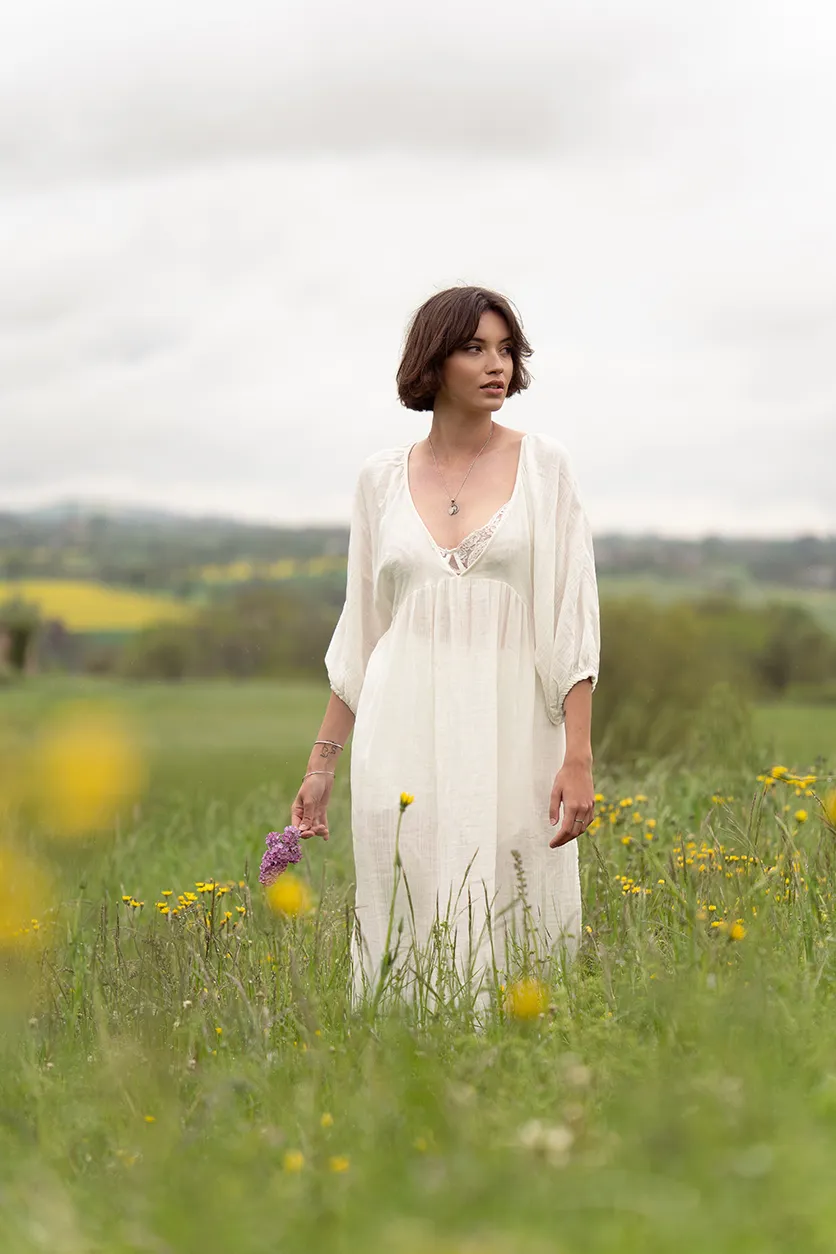
Telephoto lenses are particularly popular for portraits because they can provide flattering perspectives while allowing photographers to create strong background separation.
A focal length around 85–135mm can be useful for portraits.
Position your subject with an interesting background far behind them, then move farther away and use a longer focal length to frame the subject.
Try backgrounds such as:
- City buildings
- Trees
- Mountains
- Architecture
- Colorful lights
Combining compression and background blur can create portraits with a strong sense of depth and atmosphere.
Landscape Photography
Telephoto lenses aren’t only for photographing distant subjects.
They can also be extremely useful for compressed landscape photography.
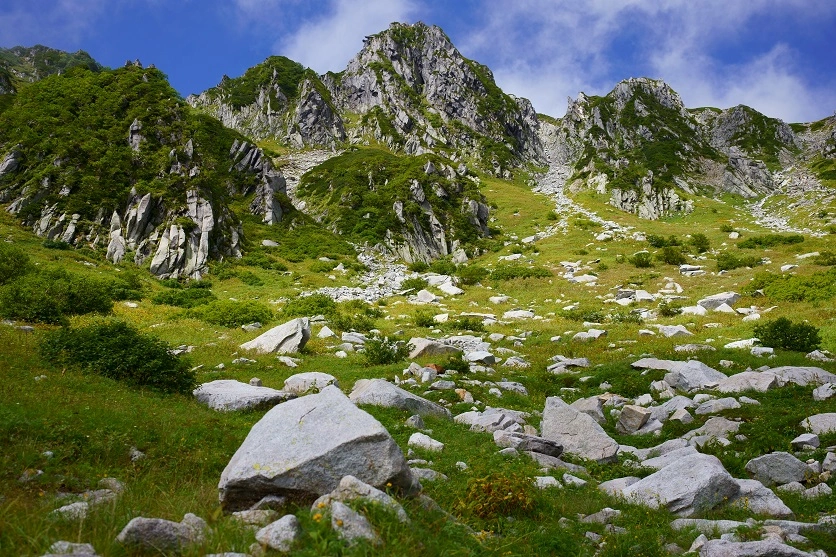
Look for layers of:
- Mountains
- Hills
- Trees
- Clouds
- Fog
- Water
- Buildings
A telephoto lens can isolate a smaller section of the landscape and make multiple layers appear more tightly packed together.
Morning mist and overlapping mountain ridges can be particularly effective.
Early morning and late afternoon light can add additional depth and contrast to the scene.
Cityscape Photography
Urban environments are excellent for experimenting with compression.
Try photographing:
- Rows of buildings
- Streetlights
- Traffic
- Crowds
- Signs
- City skylines
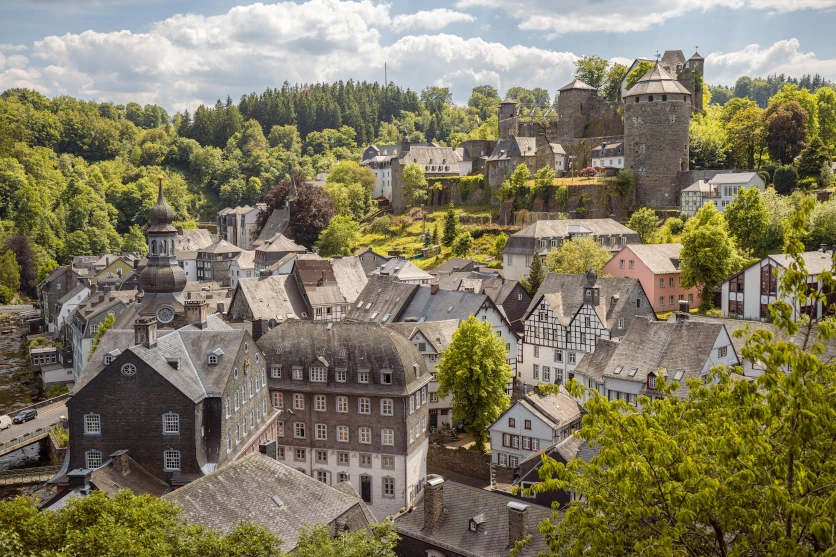
A telephoto lens can isolate distant sections of a city and make buildings appear densely packed together.
Shooting from an elevated position can make the effect even more noticeable because roads, buildings, and people can overlap across multiple layers.
Street Photography
Telephoto compression can also be used creatively in street photography.
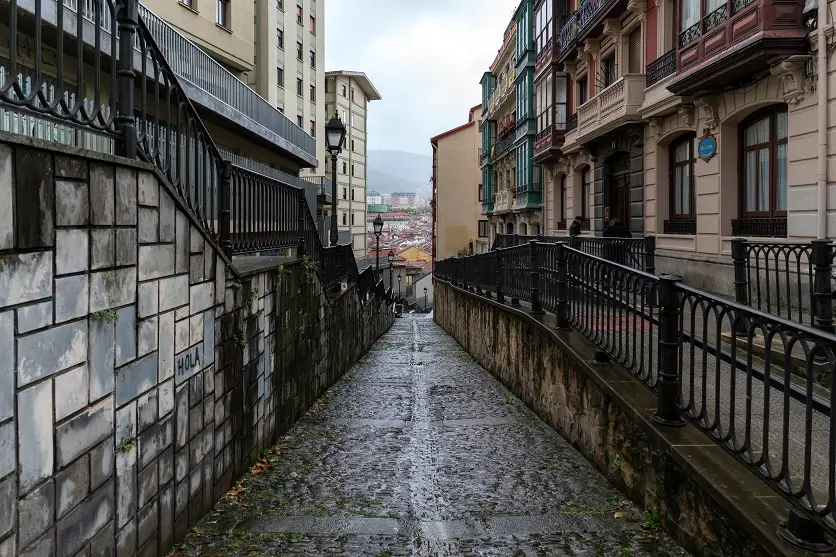
A longer lens can isolate people, buildings, signs, and traffic from a distance.
Look for scenes where multiple elements overlap.
A busy street photographed with a telephoto lens can appear significantly denser than it would with a wide-angle lens.
How to Choose a Telephoto Lens for Compression
Choosing the right lens depends on the type of compression photography you want to create.
Focal Length
Focal length is one of the first things to consider.
70–100mm:
Useful for portraits, travel, and everyday subjects.
100–200mm:
Useful for portraits, cityscapes, sports, and more distant subjects.
200–300mm:
Useful for landscapes, wildlife, sports, and stronger compression from greater distances.
300mm and longer:
Useful when you need to isolate very distant subjects or create dramatic scale relationships.
You don’t necessarily need the longest focal length available. Choose a lens based on your subject and the distance from which you can safely photograph.
Maximum Aperture
A wider maximum aperture such as F2.8 can be useful when you want:
- More background blur
- Better low-light performance
- Faster shutter speeds
- Stronger subject separation
However, smaller maximum apertures can still produce excellent compression effects, particularly for landscapes and cityscapes in good light.
Autofocus Performance
Fast autofocus is particularly important when your subject is moving.
If you’re using a telephoto lens for:
- Wildlife
- Sports
- Children
- Birds
- Events
look for a lens with accurate and responsive autofocus.
For wildlife and other cautious subjects, a quieter autofocus system can also be beneficial.
Image Stabilization
Camera shake becomes more noticeable as focal length increases.
A lens with optical image stabilization can help make handheld shooting easier, particularly with longer focal lengths.
Image stabilization is especially useful when photographing stationary subjects at slower shutter speeds.
Remember that stabilization helps compensate for camera movement, not movement from your subject.
Common Mistakes When Using Compression
Thinking Focal Length Alone Creates Compression
Simply switching from a 50mm lens to a 200mm lens does not automatically create dramatic compression.
Your camera position and framing matter.
Try moving farther away from your subject and using the longer lens to maintain a similar composition.
Choosing a Background That Is Too Close
If the background is very close to the subject, there may not be enough separation for a dramatic compression effect.
Look for distant background elements.
Using Too Wide an Aperture
A very wide aperture can make some background elements completely disappear into blur.
If you want to show recognizable mountains, buildings, or other background details, try stopping down slightly.
Forgetting Camera Shake
Long focal lengths magnify the appearance of camera movement.
Use an appropriate shutter speed, image stabilization, tripod, or monopod when necessary.
Practice With Different Focal Lengths
One of the easiest ways to understand compression is to photograph the same scene at different focal lengths.
Try photographing a subject with:
50mm → 100mm → 200mm → 300mm
For each photograph, change your shooting distance so that the main subject remains approximately the same size in the frame.
Then compare how the background changes.
You’ll begin to see how camera position and focal length work together to change the relationship between the foreground and background.
Final Tips for Using Lens Compression
The compression effect is a powerful technique for creating photographs with a strong sense of scale and visual impact.
The key is to think about the relationship between your camera, subject, and background.
For a stronger compression effect:
- Look for a distant background
- Move farther away from your subject
- Use a longer focal length
- Look for overlapping foreground and background elements
- Experiment with different shooting distances
- Use background blur when appropriate
- Choose a shutter speed suitable for your subject
- Use image stabilization when helpful
You don’t need an extremely long telephoto lens to start experimenting.
A medium telephoto lens can already produce noticeable results, while longer focal lengths can create more dramatic relationships between distant subjects.
Once you understand how camera position, focal length, distance, and framing work together, you can use telephoto lenses to create striking portraits, landscapes, cityscapes, and other images that look very different from what you see with the naked eye.
TAMRON products mentioned in this article