Camera Angles and Positions: How to Improve Your Photography
The way you position your camera can completely change how a photograph looks and feels.
Even when photographing the same subject from the same location, moving the camera higher, lower, closer, or farther away can change its apparent size, depth, perspective, and relationship with the surrounding environment.
Understanding camera angles in photography is therefore one of the simplest ways to make your images more intentional and expressive.
In this guide, we’ll explore the differences between camera angles and camera positions, explain how high, low, and eye-level perspectives affect an image, and show how to combine them with composition techniques.
We’ll also look at practical examples for photographing people, pets, landscapes, food, architecture, and vehicles, along with tips for choosing a lens that complements your chosen perspective.
What Is a Camera Angle?
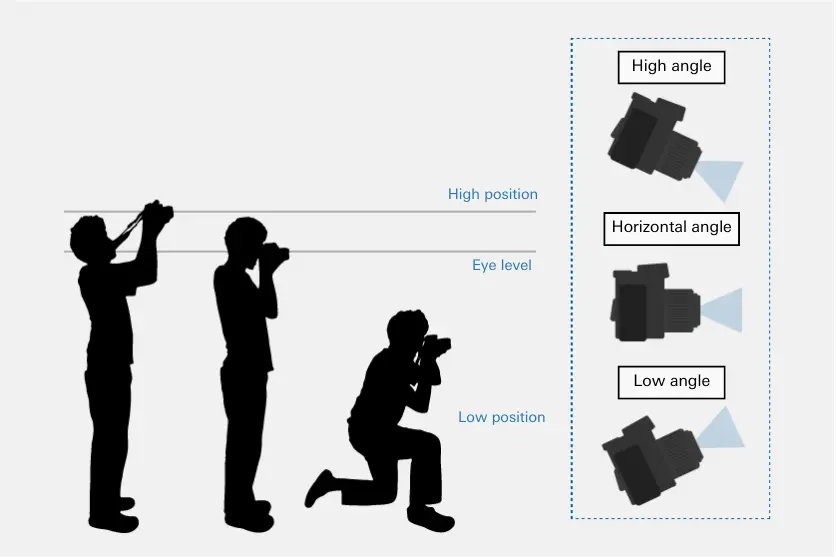
A camera angle describes the direction in which the camera is oriented relative to the subject.
Changing the angle can alter the viewer’s perception of the subject.
For example, photographing a subject from above can emphasize its relationship with the surrounding environment, while photographing from below can make the subject appear larger or more imposing.
The most common approaches include:
- High-angle photography
- Eye-level or horizontal-angle photography
- Low-angle photography
These approaches can be used with almost any subject.
The key is understanding what each perspective communicates.
High Angle
A high-angle photograph is taken from above the subject, with the camera pointing downward.
This perspective is useful when you want to show the relationship between a subject and its surroundings.
It can work particularly well for:
- Landscapes
- Cityscapes
- Groups of people
- Small animals
- Flowers
- Food
- Patterns and repeating shapes
When photographing a small subject such as a flower or animal, a high angle can show not only the subject itself but also the environment around it.
However, the direction of light should also be considered.
When the light comes from behind the subject, its front side may appear darker. This can make facial expressions or surface details difficult to see.
In these situations, adjusting exposure compensation can help.
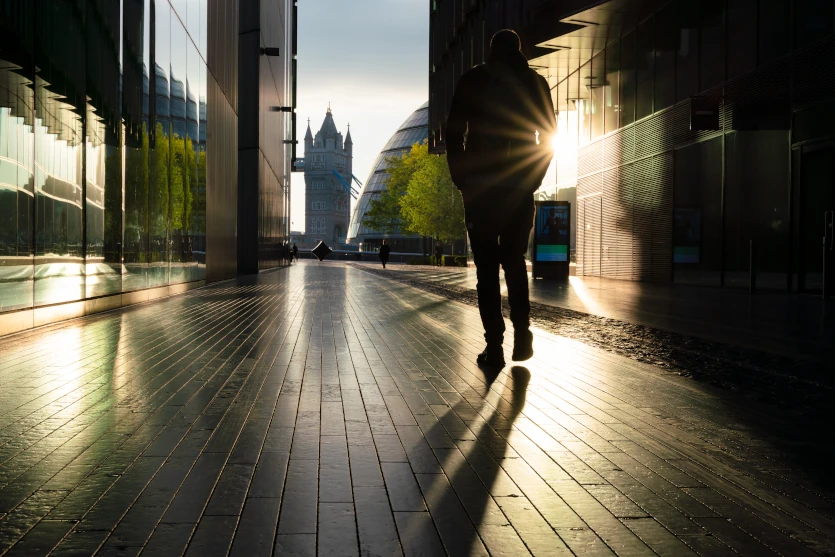
Alternatively, you can intentionally underexpose the image to turn the subject into a silhouette.
Eye-Level or Horizontal Angle
An eye-level or horizontal angle positions the camera approximately parallel to the ground.
This produces a natural and familiar perspective.
It is particularly useful for:
- Portraits
- Street photography
- Everyday snapshots
- Documentary photography
- Architecture
- Environmental scenes
Because the perspective feels natural, eye-level photography can make the viewer feel as though they are standing directly in the scene.
It is also useful when you want to emphasize strong horizontal or vertical lines, such as horizons, buildings, roads, or architectural structures.
Low Angle
A low-angle photograph is taken from below the subject, with the camera pointing upward.
This can make a subject appear larger, taller, or more powerful.
Low angles are especially effective for:
- Tall buildings
- Architecture
- Vehicles
- Portraits
- Flowers
- Insects
- Dramatic landscapes
For example, photographing a tall building from close to the ground can emphasize its height and create a stronger sense of scale.
A low angle can also make a person appear more imposing.
When photographing small subjects, lowering the camera to their level can reveal details and perspectives that would otherwise be missed.
What Is Camera Position?
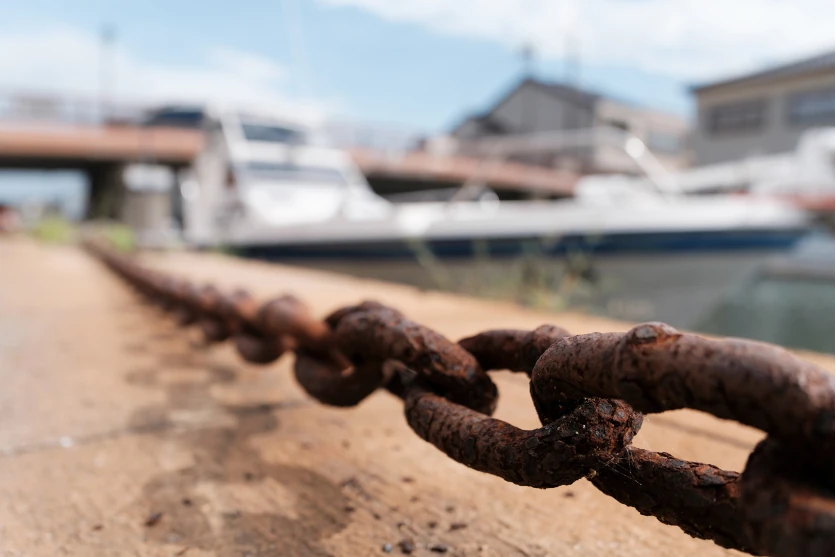
While camera angle describes the orientation of the camera, camera position in photography refers more broadly to where the camera is physically placed.
This includes its height and relationship to the subject.
Changing your position by only a small amount can produce a significant difference in the final image.
Three useful positions to experiment with are:
- High position
- Eye-level position
- Low position
High Position
A high camera position places the camera above your normal eye level.
You might achieve this by:
- Holding the camera above your head
- Standing on stairs
- Shooting from a balcony
- Using an elevated viewpoint
- Photographing from a hill or observation deck
This perspective can reveal the arrangement and relationship between subjects.
It can be especially effective in crowded environments because a higher viewpoint allows you to see patterns that aren’t visible from ground level.
Eye-Level Position
Eye-level positioning places the camera approximately at the same height as the subject’s eyes.
For portraits, this creates a natural and relatable perspective.
Instead of looking down at the person or up toward them, the camera shares their perspective.
This can create a stronger feeling of intimacy and realism.
Eye-level positioning can also work well for landscapes, particularly when you want the viewer to feel as though they are standing inside the scene.
Low Position
A low camera position places the camera close to the ground.
This is particularly useful when photographing:
- Children
- Pets
- Flowers
- Insects
- Cars
- Buildings
- Landscapes
Getting down to the subject’s level can reveal details that are easy to overlook when photographing from standing height.
In landscape photography, a low position can also make foreground objects appear larger and create a stronger sense of depth.
Camera Angle vs. Field of View
Camera angle and field of view are related to photography, but they describe different things.
The camera angle refers to the direction and orientation of the camera relative to the subject.
The field of view refers to how much of the scene the lens can capture.
The field of view is influenced by the lens’s focal length.
A wide-angle lens captures a broader view, while a telephoto lens captures a narrower portion of the scene.
This means you can change your composition in two different ways:
- Change where or how the camera is positioned.
- Change the lens or focal length.
Understanding this distinction is important because changing your position and changing your focal length do not always produce the same visual result.
Moving closer to a subject changes your perspective and the relationship between foreground and background.
Changing focal length while remaining in the same position primarily changes the framing.
Diagonal Composition
Diagonal composition places important elements along diagonal lines within the frame.
These lines can create a stronger sense of movement, depth, and energy.
Roads, staircases, buildings, bridges, and natural formations can all provide useful diagonal lines.
Combining diagonal composition with a low angle can make tall buildings or other structures feel even more dramatic.
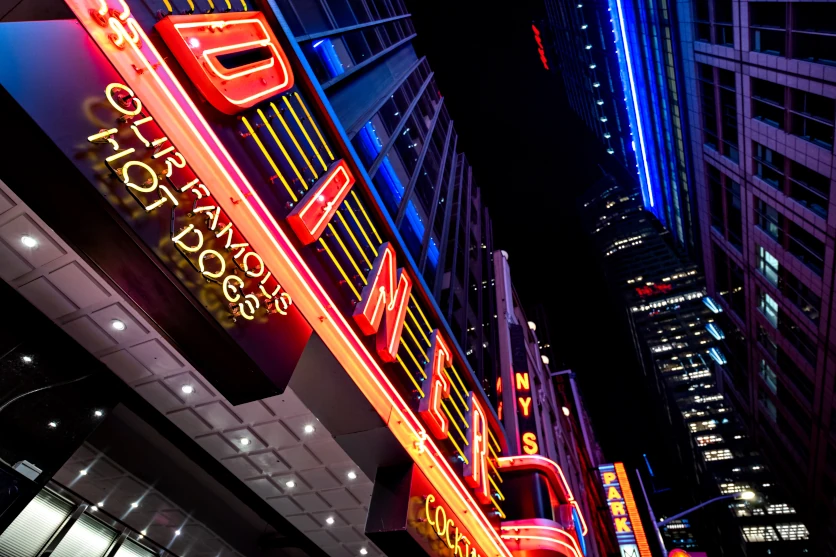
For example, instead of photographing a building straight on, move closer and lower the camera.
Allow the edges of the building to extend diagonally toward the top of the frame.
The resulting perspective can create a much stronger sense of height.
Rule of Thirds
The rule of thirds divides the frame into three horizontal and three vertical sections.
The resulting intersections can be used as natural placement points for the main subject.
This technique works with almost any camera angle.
For example, when photographing a landscape from a high position, you can use the rule of thirds to organize:
- Foreground
- Middle ground
- Background
This creates a balanced image while maintaining a clear sense of depth.
For portraits, placing the subject’s eyes near one of the upper intersections can create a natural composition while leaving space in the direction the subject is looking.
Central Composition
Central composition places the main subject directly in the middle of the frame.
Although placing a subject in the center is sometimes discouraged in beginner photography, it can be extremely effective when used intentionally.
It works particularly well with:
- Symmetrical architecture
- Monuments
- Buildings
- Reflections
- Geometric patterns
- The moon
- Strongly centered subjects
Symmetry can make a centered composition feel particularly balanced and powerful.
If the subject is naturally symmetrical, positioning it in the center can emphasize that characteristic rather than distracting from it.
Triangular Composition
Triangular composition arranges visual elements so that they form a triangle within the frame.
This creates a feeling of stability and visual harmony.
Natural scenes such as mountains and waterfalls can naturally contain triangular shapes.
Architecture can also provide triangular compositions through:
- Rooflines
- Staircases
- Building edges
- Bridges
- Structural elements
Combining a triangular composition with a low angle can make the subject appear more dramatic.
Radiating Composition
Radiating composition uses lines that appear to spread outward from a central or vanishing point.
This technique naturally draws the viewer’s eye through the image.
Useful subjects include:
- Roads
- Railway tracks
- Tree-lined streets
- Tunnels
- Buildings
- Spiral staircases
- Bridges
A low camera position can make these lines appear more dramatic by increasing the sense of perspective.
Camera Angles for Different Subjects
There is no single “best” camera angle.
The ideal perspective depends on your subject and what you want the photograph to communicate.
Let’s look at some common situations.
Photographing Children and Pets
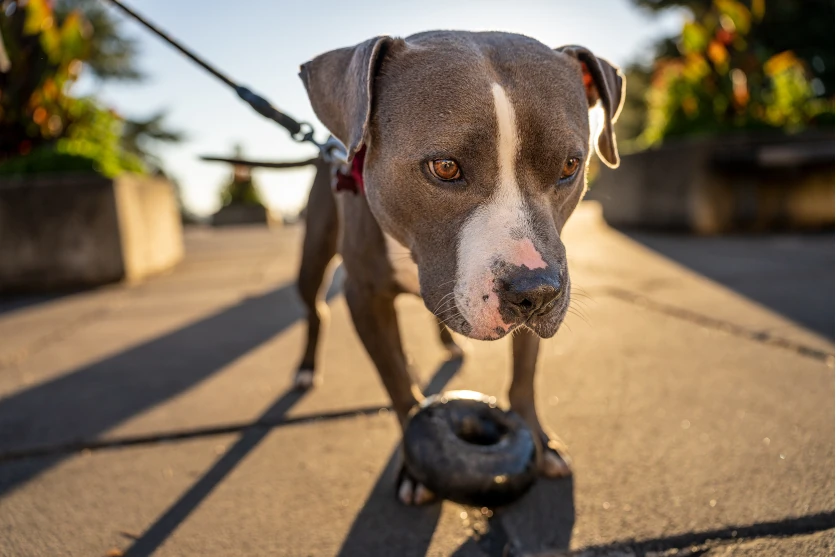
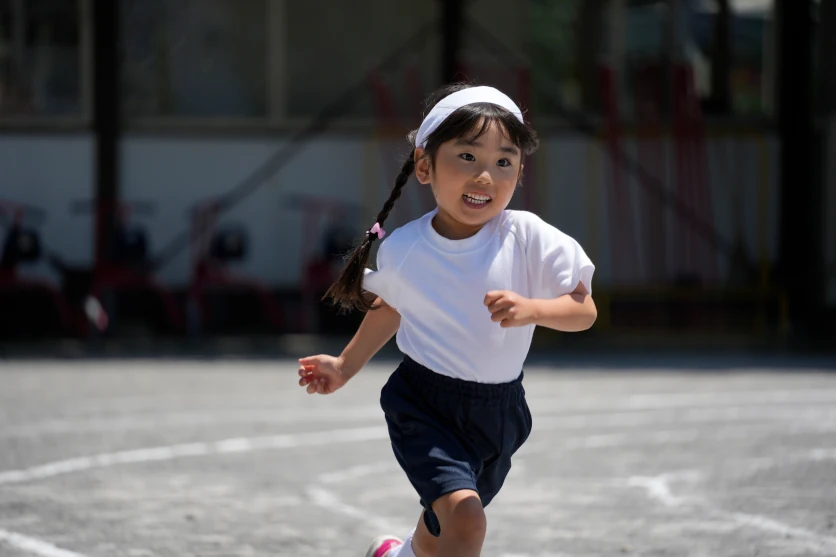
When photographing children or pets, try lowering your camera.
Instead of photographing from your normal standing height, get closer to the subject’s eye level.
This immediately changes the perspective.
You can see the world from the subject’s viewpoint, and the resulting image often feels more personal and engaging.
A telephoto lens can also be useful when you want to photograph a child or pet without getting too close.
Exposure Tip
Pay attention to the lighting on the subject’s face.
If the background is significantly brighter than the subject, the camera may underexpose the face.
Exposure compensation can help brighten the subject.
Alternatively, if your goal is to create a silhouette, intentionally reducing exposure can make the bright background more prominent.
Photographing Landscapes
Landscape photography provides endless opportunities to experiment with camera height and angle.
For expansive views, a higher viewpoint can help reveal the scale and arrangement of the landscape.
However, don’t always photograph landscapes from standing height.
Try lowering the camera and introducing a strong foreground element.
A rock, flower, tree, or section of the ground can provide depth while leading the viewer toward the background.
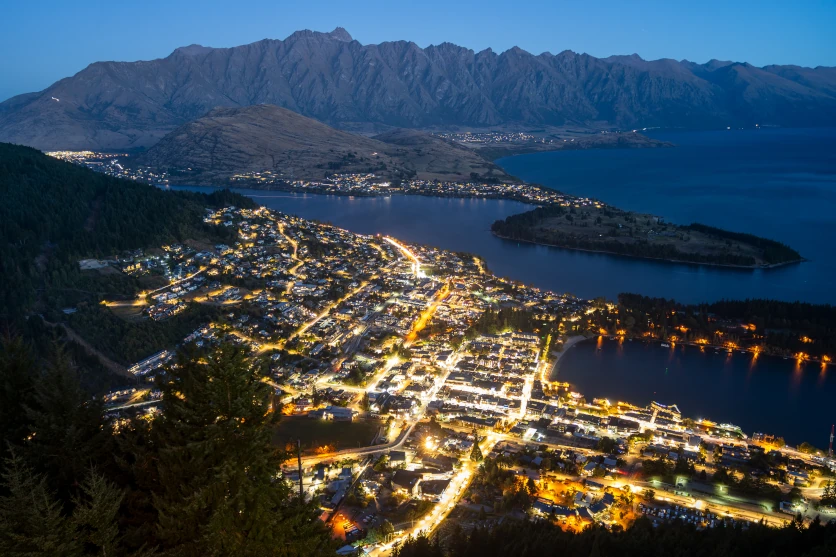
Try a Low Position
A low camera position can make foreground elements appear larger.
For example, when photographing a beach, placing the camera close to the sand can create a strong foreground while the sea and sky form the middle and background.
This creates a greater sense of depth than simply photographing the scene from eye level.
Suggested Lens
A versatile zoom can be particularly useful for landscapes because you can quickly adjust your framing without changing lenses.
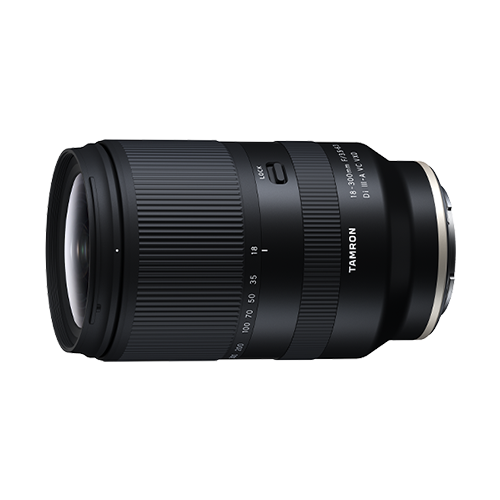
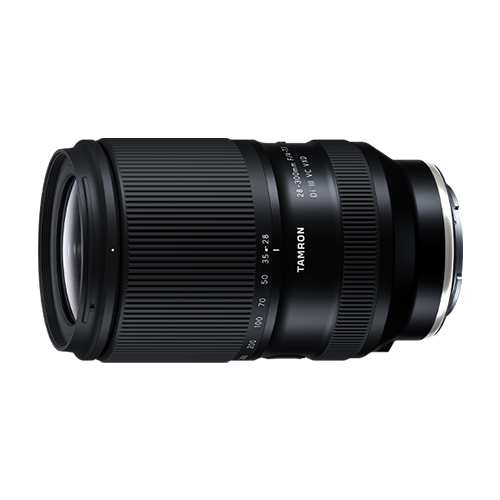
The TAMRON 28-300mm F/4-7.1 Di III VC VXD (Model A074), for example, provides a broad range of perspectives in a compact all-in-one design.
This allows you to move from wider environmental compositions to tighter details without carrying multiple lenses.
Photographing Food and Tabletop Subjects
Tabletop photography often benefits from experimenting with the camera height.
Two particularly useful perspectives are:
- Overhead
- Approximately 45 degrees
Overhead Photography
An overhead position looks directly down onto the subject.
This works well for:
- Food
- Table settings
- Products
- Flat-lay photography
- Patterns
An overhead angle allows you to emphasize the arrangement of objects within the frame.
It can make plates, ingredients, utensils, and other objects appear as graphic elements.
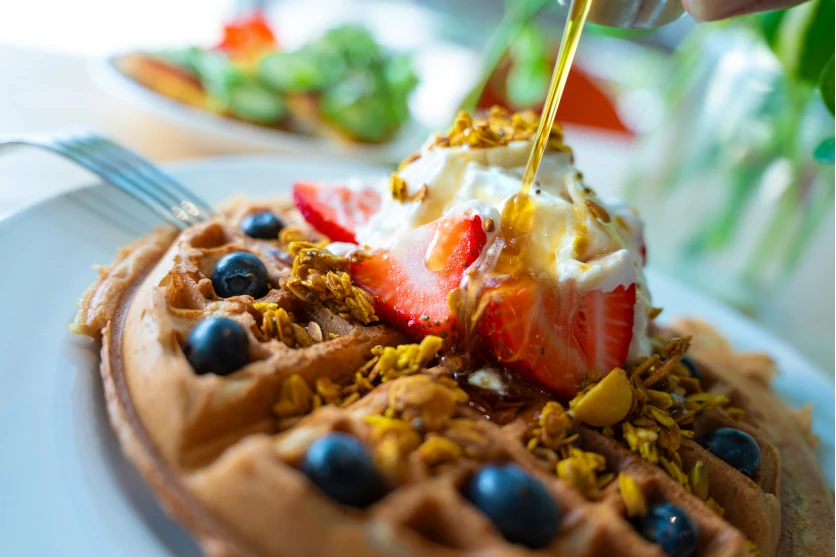
45-Degree Angle
A 45-degree perspective sits between an overhead and eye-level view.
This angle can preserve the arrangement of the scene while also showing the height and volume of the subject.
It is particularly useful for food because you can see both the surface and three-dimensional shape of the dish.
Lighting also becomes important.
Side lighting or backlighting can emphasize textures and make surfaces appear more dimensional.
Photographing Architecture
Architecture is an excellent subject for experimenting with camera angles in photography.
Tall buildings can be photographed from a low position to emphasize their height.
A wide-angle lens can further exaggerate perspective, making the building appear to rise dramatically from the foreground.
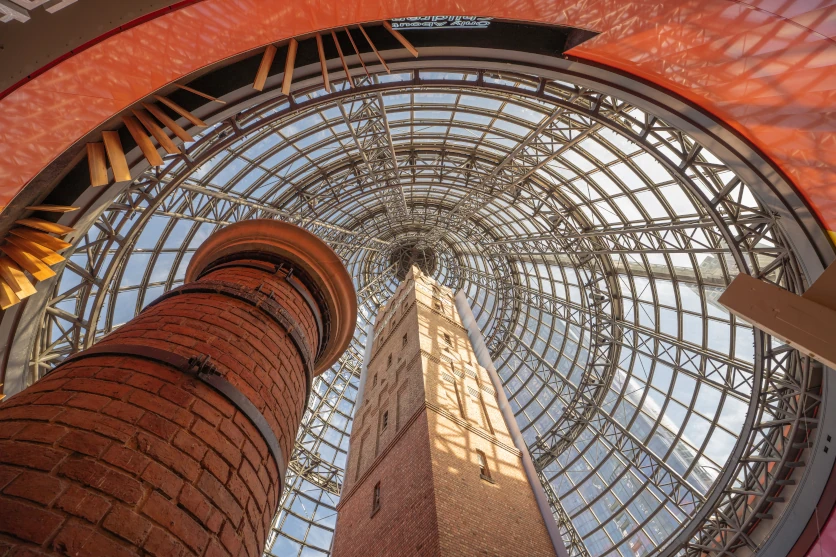
Low-Angle Architecture
Move closer to the building and lower the camera.
Pointing upward can create strong converging lines and emphasize the height of the structure.
This approach can be especially effective for skyscrapers, towers, and large monuments.
High-Angle Architecture
A high viewpoint provides a completely different perspective.
From a lookout or elevated platform, you can photograph the arrangement of buildings, streets, and rooftops.
Look for repeating shapes, geometric patterns, and lines.
These elements can turn a cityscape into an abstract composition.
Photographing Vehicles
Cars, motorcycles, trains, and other vehicles can benefit from carefully chosen camera positions.
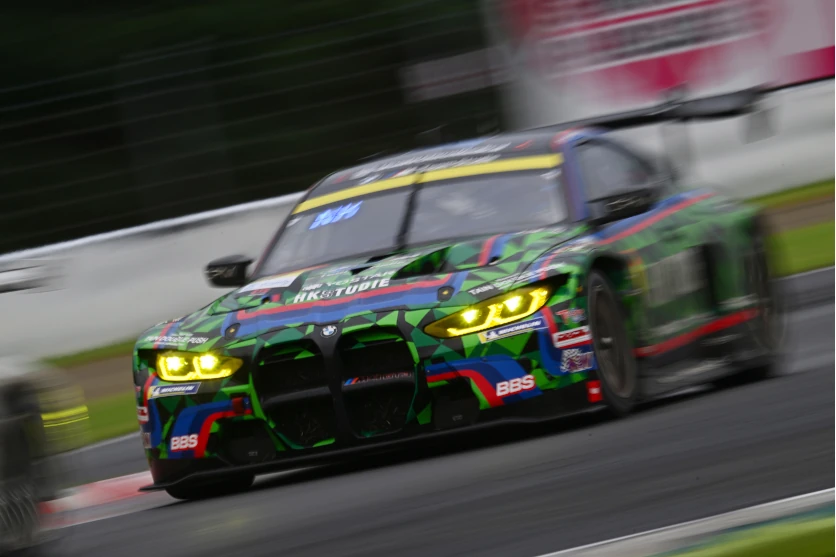
A low or horizontal angle can emphasize the vehicle’s presence and power.
A slight diagonal composition can also highlight the lines and shape of the vehicle.
When photographing a moving vehicle within a landscape, an eye-level or horizontal perspective can make it feel naturally integrated into its surroundings.
A high-angle view provides another creative option.
From above, you can emphasize the contrast between the vehicle and the surrounding environment.
How Lens Choice Affects Camera Angles
Your choice of lens can significantly influence what you can achieve with different camera positions.
However, the lens should support your creative intention rather than dictate it.
Wide-Angle Lenses
Wide-angle lenses provide a broad field of view.
They are useful for:
- Landscapes
- Architecture
- Travel
- Interiors
- Environmental portraits
When combined with a low camera position, a wide-angle lens can exaggerate perspective and make foreground objects appear larger.
This can create a dramatic sense of scale.
Standard Lenses
Standard lenses provide a natural-looking perspective.
They are useful for:
- Portraits
- Street photography
- Everyday photography
- Travel
- Documentary photography
Because they offer a familiar perspective, standard lenses can work well when you want the viewer to concentrate on the subject rather than an exaggerated perspective effect.
Telephoto Lenses
Telephoto lenses provide a narrower field of view.
They are useful for distant subjects and can help isolate a subject from its surroundings.
They can also create a compressed appearance between foreground and background elements.
This can be particularly effective when photographing:
- Wildlife
- Sports
- Vehicles
- Mountains
- Distant architecture
- Portraits
A telephoto lens can also give you more flexibility when photographing subjects that you cannot physically approach.
Minimum Focusing Distance
Minimum focusing distance is another useful consideration when choosing a lens.
A lens with a short minimum focusing distance allows you to move closer to a subject and still achieve focus.
This can be useful for photographing:
- Flowers
- Food
- Small objects
- Insects
- Textures
- Product details
A lens with strong close-focusing performance can therefore expand the number of perspectives available to you.
You can photograph a subject from farther away with a telephoto perspective or move close and explore its smaller details.
Lens Size and Weight
Camera position often requires physical movement.
You may need to crouch, kneel, hold the camera above your head, or move quickly around a subject.
A compact and lightweight lens can make these movements easier.
This becomes particularly important during travel, street photography, hiking, or events where you may be carrying your camera for several hours.
A lighter setup can also make it easier to experiment with unusual perspectives.
Wide Aperture
A wide maximum aperture, such as F2.8, allows more light to reach the camera sensor.
It can also produce stronger background blur.
This is useful when you want to isolate a subject from its surroundings.
For example, when photographing a flower from a low position, a wide aperture can separate the flower from a softly blurred background.
A wide aperture can also be useful in low-light situations.
However, remember that depth of field becomes shallower as the aperture gets wider.
Make sure the most important part of your subject is in focus.
Autofocus Performance
Autofocus becomes particularly important when your subject is moving.
Children, pets, vehicles, wildlife, and sports subjects can all require fast and accurate focusing.
When choosing a lens, consider how quickly and quietly its autofocus system operates.
Quiet autofocus can also be beneficial for video recording because it reduces the possibility of focus motor sounds being captured by the microphone.
Image Stabilization
Image stabilization can help reduce camera shake when shooting handheld.
This can be particularly useful when:
- Using telephoto lenses
- Shooting in low light
- Working from unusual camera positions
- Photographing without a tripod
- Traveling with lightweight equipment
Stabilization does not replace good technique, but it can provide additional flexibility when shutter speeds become slower.
When using a tripod, check the camera and lens manufacturer’s recommendations regarding stabilization.
Think About What You Want the Viewer to Feel
Technical knowledge is useful, but photography ultimately comes down to visual communication.
Ask yourself:
Do I want the subject to feel powerful?
Try a low angle.
Do I want to show the relationship between the subject and its surroundings?
Try a high angle.
Do I want the image to feel natural and relatable?
Try eye-level positioning.
Do I want to create depth?
Try a low camera position with a strong foreground element.
Do I want to isolate a distant subject?
Try a telephoto lens.
Do I want to emphasize scale?
Try a wide-angle lens combined with a strong foreground and low position.
These decisions turn camera angles and positions from technical settings into creative tools.
Experiment With Different Angles and Positions
There is no single correct camera angle.
The same subject can produce completely different images depending on where you place the camera.
Try shooting from above.
Then try eye level.
Then get down low.
Move closer.
Step backward.
Change the focal length.
Look for diagonal lines.
Try symmetry.
Use the rule of thirds.
Look for triangles and radiating lines.
The more you experiment, the easier it becomes to recognize which perspective best communicates your intended message.
Final Thoughts
Understanding camera angles in photography is one of the simplest ways to make your images more expressive.
Changing the angle, height, position, or focal length can alter the apparent scale, depth, perspective, and emotional impact of a photograph.
Start by mastering the basics:
- High-angle photography
- Eye-level photography
- Low-angle photography
- High camera positions
- Eye-level positions
- Low camera positions
- Wide-angle perspectives
- Telephoto perspectives
- Rule of thirds
- Diagonal composition
- Central composition
- Triangular composition
- Radiating composition
Then begin combining these techniques.
Most importantly, don’t feel limited to photographing subjects from the same comfortable position.
Move your camera. Change your perspective. Experiment with the composition.
Sometimes the difference between an ordinary photograph and a memorable one is simply where you chose to stand.
TAMRON products mentioned in this article