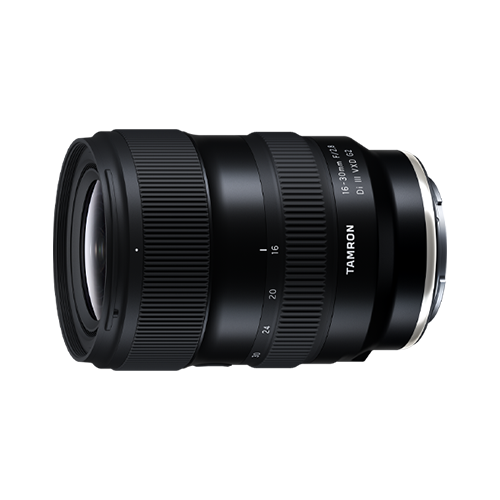
Starry Sky Photography: How to Photograph the Stars
Photographing a clear night sky can be one of the most rewarding experiences in photography.
Stars that appear small and faint to the naked eye can become much more prominent in a photograph. With the right location, camera settings, lens, and composition, you can capture a night sky filled with stars and combine it with mountains, trees, buildings, bodies of water, or other elements on the ground to create a dramatic starscape.
However, photographing the night sky is different from ordinary daytime photography.
There is very little available light, the Earth is constantly rotating, and even the smallest camera movement can cause an image to become blurred. Focusing can also be challenging because the camera may struggle to autofocus in extremely dark conditions.
The good news is that you don’t need a complicated setup to get started.
A camera with manual controls, a suitable wide-angle lens, a stable tripod, and an understanding of a few basic techniques can take you a long way.
In this guide, we’ll explain how to photograph stars, from choosing a location and preparing your equipment to setting the aperture, shutter speed, and ISO. We’ll also cover focusing, composition, photographing the Milky Way, creating star trails, and choosing a lens for night sky photography.
What Do You Need for Starry Sky Photography?
Before heading out for a night shoot, prepare your equipment.
The exact setup will depend on the type of photograph you want to create, but the following items are useful for most starscape photography.
Camera With Manual Controls
A camera that allows you to manually control the aperture, shutter speed, ISO, and focus gives you much more control in very low-light conditions.
Automatic exposure modes can struggle when most of the frame is extremely dark.
Manual shooting allows you to determine exactly how much light reaches the sensor and make adjustments based on the appearance of the stars and foreground.
A mirrorless or DSLR camera with good high-ISO performance can be particularly useful, but the technique is more important than simply having the latest camera.
Use a Wide-Angle or Ultra-Wide-Angle Lens
A wide-angle lens is one of the most useful tools for starry sky photography.
The wider field of view allows you to include more of the sky in a single photograph while also incorporating foreground elements.
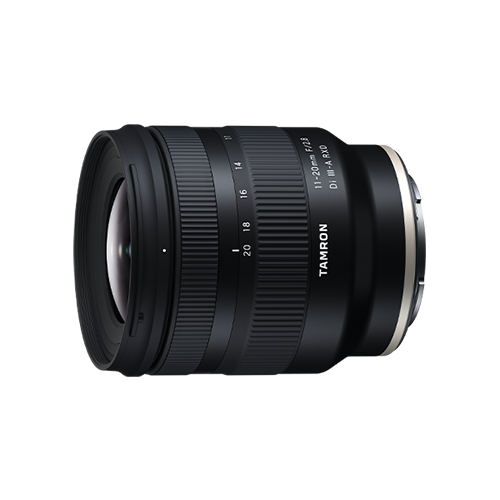
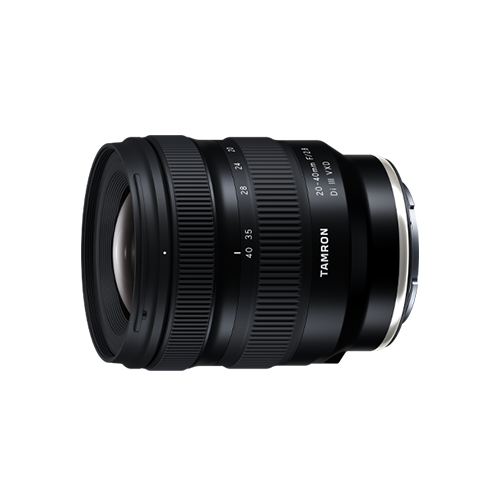
TAMRON recommends considering an ultra-wide-angle lens around 20mm or wider when possible. A wider focal length makes it easier to include a large portion of the sky together with the landscape.
A wide-angle lens can be useful for compositions such as:
- Milky Way over mountains
- Stars above a beach
- Night skies over forests
- Stars reflected in water
- Star trails around a landscape
- Buildings beneath a star-filled sky
A wider lens also allows a longer shutter speed before the movement of the stars becomes more noticeable as trails.
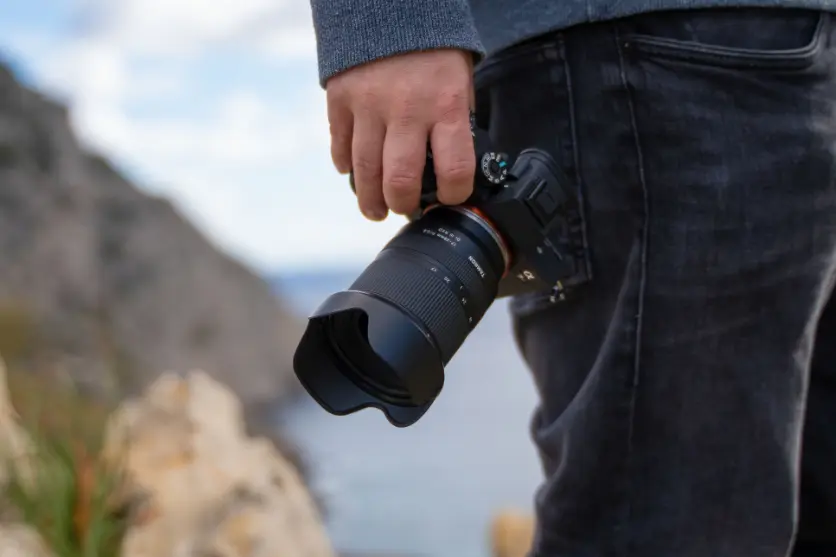
Use a Sturdy Tripod
A tripod is essential for most night sky photography.
Because there is so little available light, you will typically need a relatively slow shutter speed.
Holding the camera by hand during a several-second exposure would introduce significant camera shake.
Choose a tripod that is stable enough to support your camera and lens.
When shooting outdoors, pay attention to wind and uneven ground.
Even a sturdy tripod can move if it is placed on an unstable surface.
Once your composition is set, avoid touching the camera during the exposure.
Use a Remote Release or Self-Timer
Pressing the camera’s shutter button can introduce movement.
A remote shutter release allows you to trigger the camera without physically touching it.
If you don’t have one, the camera’s self-timer can be a useful alternative.
This becomes particularly important during long exposures because even a small movement at the beginning of the exposure can affect sharpness.
TAMRON recommends using a release or another method of triggering the camera remotely to reduce camera shake.
Bring a Headlamp
Starry sky photography often takes place in very dark environments.
A headlamp is useful because it keeps both hands free while you’re setting up your camera and tripod.
However, avoid shining bright light toward other photographers or into the scene while they are making long exposures.
If you’re shooting with other people, a low-light or red-light mode can be particularly helpful because it reduces the amount of bright light around you.
It’s also useful to have a separate light source for moving around and a dimmer setting for working around your camera.
Consider a Lens Heater
Condensation can become a problem during long nighttime shoots.
When temperatures drop or humidity is high, moisture can form on the front element of the lens.
This can make photographs appear soft or hazy.
A lens heater can help prevent condensation from forming on the lens surface.
This can be particularly useful when photographing near:
- Mountains
- Beaches
- Lakes
- Rivers
- Forests
- Other humid environments
TAMRON recommends considering a lens heater when shooting in conditions where temperature and humidity changes can cause condensation.
Do You Need an Equatorial Mount?
You don’t need an equatorial mount to get started with starscape photography.
A normal tripod is sufficient for many types of night sky photography.
However, an equatorial mount can be useful for more advanced astrophotography.
An equatorial mount tracks the apparent movement of celestial objects caused by Earth’s rotation.
This allows you to use longer exposures while keeping stars relatively sharp and point-like.
Without tracking, stars eventually appear as trails as the exposure becomes longer.
However, tracking introduces another consideration when photographing a landscape.
If the camera tracks the stars, the stars can remain sharp while the foreground moves relative to the camera.
This means that star-tracking techniques can require additional planning or compositing when you want both the stars and landscape to appear sharp.
For beginners, a stationary tripod is generally the simpler place to start.
The Best Camera Settings for Starry Sky Photography
Once your equipment is ready, the next step is setting up the camera.
There is no single setting that works for every night sky photograph.
Light pollution, moonlight, lens aperture, focal length, camera sensor, weather, and the brightness of the stars can all affect the exposure.
However, you can use a few general settings as a starting point.
Use Manual Exposure Mode
Start with Manual (M) mode.
Night scenes can be difficult for automatic exposure systems because most of the frame may be almost completely black.
Manual exposure allows you to control:
- Aperture
- Shutter speed
- ISO
After taking a test photograph, check the result and adjust the settings as necessary.
Digital cameras make this process relatively easy because you can immediately review the image.
Use a Wide Aperture
Stars are relatively faint light sources.
Opening the aperture allows more light to reach the camera sensor.
A lens with a maximum aperture around F2.8 is a useful starting point for starry sky photography. TAMRON recommends using an aperture as close to the lens’s maximum as practical to collect as much starlight as possible.
For example, you might begin with:
F2.8
Then adjust if necessary.
A brighter lens can be especially helpful when photographing the Milky Way or when working in locations with very little ambient light.
Start With a Shutter Speed of 20–30 Seconds
A shutter speed of around 20 to 30 seconds is a useful starting point for general starscape photography.
However, don’t treat this as a fixed rule.
The ideal shutter speed depends on the focal length and how much star movement you’re willing to accept.
If the stars begin appearing as noticeable lines when you want them to remain points, shorten the exposure.
You might try:
- 20 seconds
- 15 seconds
- 10 seconds
- 5 seconds
Then compare the results.
A wider lens generally allows a longer exposure before star movement becomes obvious.
Adjust ISO to Control Brightness
ISO is another important part of the exposure.
A starting range of approximately ISO 1600–6400 can be useful for starry sky photography, although the ideal value depends heavily on your camera, lens, location, and available light.
Rather than immediately choosing a very high ISO, start lower and increase it if the image is too dark.
For example:
F2.8 → 15 seconds → ISO 1600
Take a test shot.
If the sky is too dark, try increasing ISO.
The goal is to find a balance between capturing enough stars and keeping noise under control.
Turn Off Autofocus
Autofocus can struggle when the scene is extremely dark.
For starscape photography, manual focus is generally the better approach.
Switch the lens to MF and use the camera’s live-view magnification to focus on a bright star or distant light.
TAMRON recommends magnifying a bright star on the camera display and adjusting the focus ring until the star appears as small and sharp as possible.
How to Focus on Stars
Focusing correctly is one of the most important steps.
Here’s a simple method:
1. Switch to manual focus
Set the lens to MF.
2. Find a bright star
Look for the brightest star visible in the frame.
3. Magnify the live-view image
Use your camera’s magnification function.
4. Adjust the focus ring
Slowly rotate the focus ring until the star becomes as small and sharp as possible.
5. Take a test photograph
Review the image at high magnification.
If the stars look soft or bloated, make a small adjustment and try again.
Don’t assume that simply turning the focus ring all the way to infinity will always give you the sharpest result.
Check the actual image.
Choose a Dark Location
One of the biggest factors affecting night sky photography isn’t your camera.
It’s your location.
City lights, streetlights, buildings, vehicles, and other artificial light sources can make stars much harder to capture.
If possible, move away from heavily populated areas.
Good locations can include:
- Mountains
- Rural areas
- Beaches far from cities
- Highlands
- Open fields
- Remote viewpoints
The darker the environment, the more stars you can generally see and photograph.
TAMRON recommends selecting locations with minimal ambient light and notes that mountains and other areas away from city illumination can be particularly suitable.
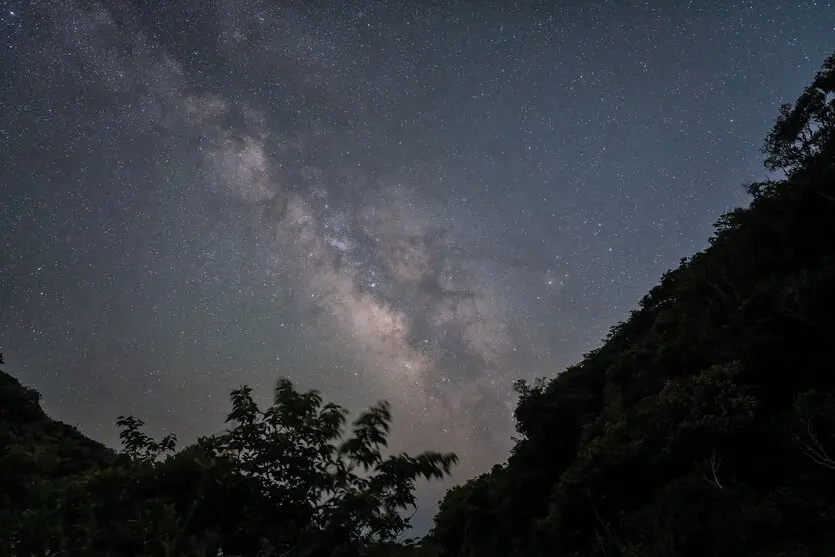
Check the Moon Phase
The Moon can dramatically affect the brightness of the night sky.
A full moon produces a significant amount of light, which can reduce the visibility of faint stars.
If your goal is to capture as many stars as possible or photograph the Milky Way against a dark sky, a night around the new moon can provide better conditions.
However, don’t assume that moonlight is always bad.
A partially illuminated landscape can actually add depth to a starscape.
Moonlight can illuminate mountains, trees, or buildings and create a completely different type of night photograph.
The important thing is to decide what kind of photograph you want before choosing your shooting time.
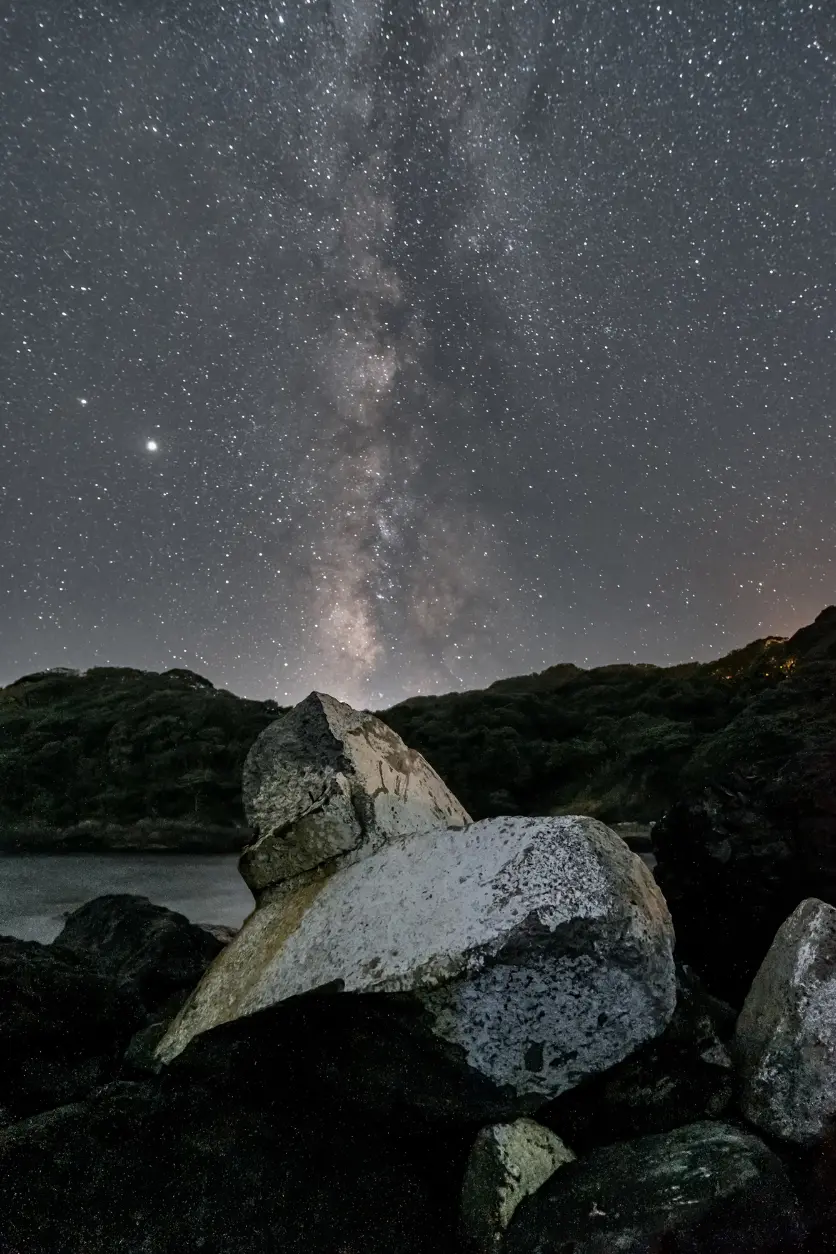
Check the Weather
Clear skies are obviously important when photographing stars.
Clouds can block the stars, while high humidity can create haze that reduces contrast.
Before heading to your location, check:
- Cloud cover
- Rain probability
- Humidity
- Visibility
- Wind
- Temperature
A clear, dry night is generally preferable.
A small amount of cloud can sometimes add atmosphere, but heavy cloud cover will make photographing the stars much more difficult.
How to Photograph the Pitcher
The pitcher’s motion is another excellent subject.
Watch the pitcher’s routine.
Many pitchers have a consistent sequence before delivering the ball.
This gives you an opportunity to prepare.
Depending on the pitcher’s handedness and your location, you may find that one side of the field gives you a clearer view of the throwing motion.
A position behind the backstop can also provide a direct view of the pitcher’s face and release.
Use AF-C and continuous shooting.
Start tracking before the pitcher begins the final part of the motion.
Then capture a short sequence around the release.
A shutter speed around 1/1000–1/1600 second can be a useful starting point for freezing the throwing motion in good light.
Compose More Than Just the Sky
A photograph containing only stars can be beautiful, but adding foreground elements can make the image much more visually interesting.
Try including:
- Mountains
- Trees
- Buildings
- Rock formations
- Beaches
- Boats
- Lakes
- Roads
This gives the viewer a sense of scale.
The stars become part of a larger landscape rather than simply filling the entire frame.
TAMRON’s examples demonstrate how incorporating mountains, trees, buildings, and water can create stronger starscape compositions.
Use the Rule of Thirds
A simple composition technique is to divide the frame into thirds.
For example:
Lower third: Landscape
Upper two-thirds: Night sky
This works particularly well when the sky is the main subject.
However, don’t feel restricted by the rule of thirds.
If the foreground is particularly interesting, you can give it more space.
If the sky contains an impressive Milky Way structure, you might give the sky most of the frame.
Look for Reflections
Bodies of water can create beautiful starscape photographs.
Look for:
- Lakes
- Rivers
- Beaches
- Calm bays
- Ponds
When the water is relatively still, the stars can appear as reflections.
This creates visual symmetry and can make the sky appear even larger.
A wide-angle lens is particularly useful for including both the sky and its reflection.
Try Different White Balance Settings
White balance can change the overall mood of a night photograph.
A cooler white balance can create a blue-toned night sky.
A warmer setting can give the scene a more orange or golden appearance.
If you’re unsure where to begin, Auto White Balance can be a practical starting point.
If you photograph in RAW, you can also adjust white balance during post-processing.
TAMRON recommends experimenting with white balance after becoming comfortable with the basic exposure settings to explore different visual expressions.
Shoot in RAW
If your camera supports RAW, consider using it for serious night sky photography.
RAW files preserve significantly more image information than JPEG files.
This gives you greater flexibility when adjusting:
- Exposure
- Shadows
- Highlights
- White balance
- Contrast
- Color
- Noise reduction
This can be particularly useful for starscape photography because the difference between the dark sky and bright stars can be substantial.
How to Photograph the Milky Way
The Milky Way is one of the most popular subjects in night sky photography.
However, it requires particularly dark conditions because the Milky Way is relatively faint.
Look for locations far away from urban light pollution.
Mountains, remote beaches, and other areas with minimal artificial light can be suitable.
TAMRON recommends using a bright ultra-wide-angle lens around F2–F2.8 when photographing the Milky Way, along with higher ISO settings such as ISO 3200–6400 depending on the conditions and equipment.
A possible starting point might be:
F2.8
15–25 seconds
ISO 3200–6400
Then adjust according to the actual conditions.
The exact settings will depend on the brightness of the Milky Way, moonlight, light pollution, focal length, and camera.
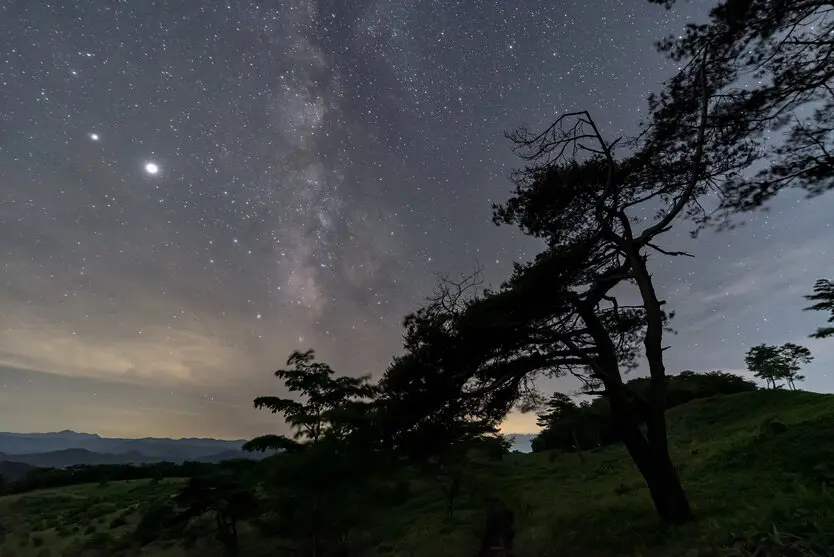
Find the Best Composition for the Milky Way
The Milky Way doesn’t always need to be placed directly in the center of the photograph.
Try positioning it diagonally across the frame.
You can also use natural features to guide the viewer’s eye toward the Milky Way.
For example:
- A mountain ridge leading upward
- A road leading toward the sky
- A tree framing one side
- A shoreline leading toward the horizon
This creates a stronger visual relationship between the landscape and the stars.
How to Photograph Star Trails
Stars appear to move across the sky because of Earth’s rotation.
With a sufficiently long exposure or a sequence of photographs, this movement can be recorded as trails.
There are two common approaches.
Method 1: Combine Multiple Photographs
Instead of taking one extremely long exposure, capture many photographs continuously and combine them using appropriate software.
This method provides greater control over the final image.
You can photograph for 30 minutes, an hour, or longer, depending on the effect you want.
The individual frames are then combined to create continuous-looking star trails.
One advantage is that you can identify and remove unwanted frames before combining the sequence.
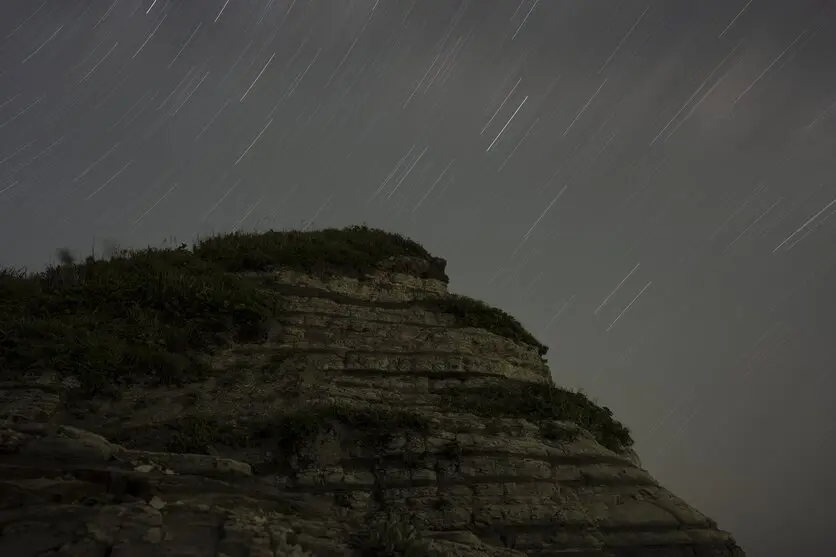
Method 2: Use a Long Exposure
Another approach is to create star trails through a very long exposure.
This can involve exposures lasting many minutes or even hours.
A low ISO and appropriate aperture can help control the exposure.
However, extremely long exposures can introduce additional challenges, including:
- Increased noise
- Battery consumption
- Heat
- Potential sensor stress
- Changes in ambient lighting
The exact approach should depend on your camera’s specifications.
For more advanced work, external power and appropriate camera settings may be necessary.
TAMRON notes that long exposures can place additional demands on the camera and battery and recommends considering the camera’s specifications when using this approach.
Photograph the North Star for Circular Star Trails
If you’re photographing from a location where Polaris is visible, positioning it within the frame can create circular star trails.
The Earth’s rotation causes the stars to appear to rotate around the celestial pole.
This can produce dramatic circular patterns.
Use the landscape to add context.
For example, a mountain, tree, or building can sit beneath the circular trails.
This creates a strong relationship between the stationary landscape and the movement of the stars.
Consider Using a Soft Filter
A soft filter can slightly diffuse bright points of light.
When used for starscape photography, it can make bright stars appear softer and more prominent.
This can create a different visual style and may be particularly useful when photographing constellations.
However, a soft filter isn’t essential.
Try photographing the same scene with and without the filter to determine which look you prefer.
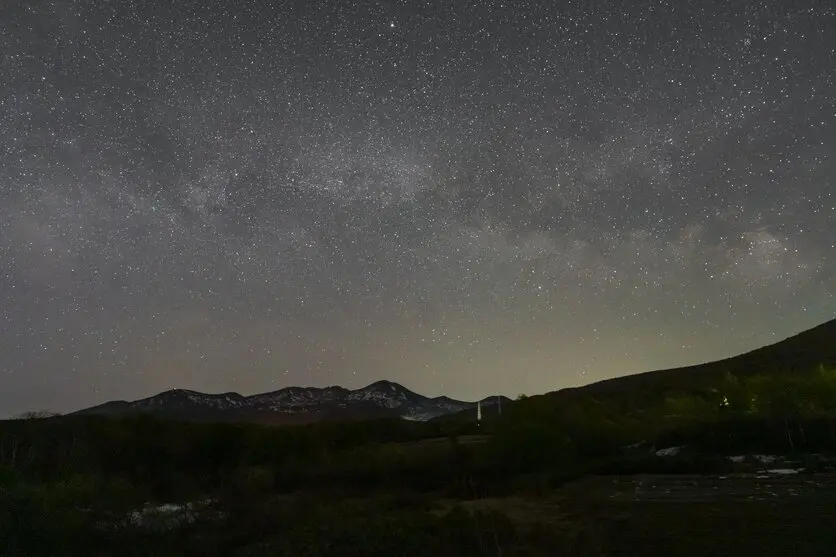
How to Choose a Lens for Starry Sky Photography
Lens selection can significantly affect your final image.
Here are the most important characteristics to consider.
1. Focal Length
Wide-angle lenses are particularly useful.
An ultra-wide-angle lens around 20mm or wider provides a broad field of view and makes it easier to include both the sky and foreground.
Wider lenses also allow longer shutter speeds before star movement becomes obvious.
However, don’t assume that wider is always better.
A slightly longer focal length can be useful when you want to emphasize a specific part of the Milky Way or create a tighter composition.
2. Maximum Aperture
The maximum aperture is especially important for starscape photography.
A brighter lens allows more light to reach the sensor.
As a general starting point, look for a lens with a maximum aperture around F2.8 or wider.
A wider aperture can help you:
- Capture more stars
- Use a lower ISO
- Use a shorter shutter speed
- Photograph the Milky Way more effectively
3. Manual Focus Operation
Since manual focus is commonly used for starscape photography, the focus ring should be easy to operate.
You may need to make very small adjustments while viewing a magnified star on the camera display.
A smooth, precise focus ring can make this easier.
Also consider whether you can operate the focus ring comfortably while wearing gloves or while a lens heater is attached.
4. Size and Weight
Night sky photography often involves traveling to remote locations.
You may need to carry:
- Camera
- Lens
- Tripod
- Extra batteries
- Memory cards
- Headlamp
- Lens heater
- Clothing
- Other accessories
A compact, lightweight lens can therefore be an advantage.
The best lens isn’t necessarily the largest or brightest one.
Consider the entire setup you’ll need to carry.
A Simple Starry Sky Photography Workflow
If you’re trying starscape photography for the first time, keep your process simple.
Before leaving
Check:
- Camera battery
- Spare batteries
- Memory card
- Lens
- Tripod
- Remote release
- Headlamp
- Lens heater if necessary
- Weather conditions
- Moon phase
- Shooting location
At the location
First, allow your eyes to adjust to the darkness.
Set up the tripod on stable ground.
Compose your scene.
Avoid placing the tripod somewhere that can easily vibrate from wind or footsteps.
Set the camera
Start with:
Mode: Manual
Aperture: Around F2.8
Shutter: 20–30 seconds
ISO: Around 1600–6400
Focus: Manual
These are starting points rather than fixed settings. Adjust them based on the actual scene.
Focus
Find a bright star.
Magnify it on the camera display.
Adjust manual focus until the star appears as small and sharp as possible.
Take a test photograph.
Check it at high magnification.
Compose
Look beyond the sky.
Find something interesting in the foreground.
A mountain, tree, building, road, or body of water can give the image a sense of scale.
Take several photographs
Don’t stop after one exposure.
Try different:
- Shutter speeds
- ISO settings
- Compositions
- Focal lengths
- White-balance settings
Compare the results.
This is one of the best ways to understand how your equipment behaves at night.
Common Starry Sky Photography Mistakes
Using Too Slow a Shutter Speed
If the shutter remains open too long, stars may become trails when you want them to appear as points.
Try shortening the exposure.
Using Too Low an ISO
A very low ISO may produce an image that is too dark.
Increase ISO when necessary.
Relying on Autofocus
Autofocus may struggle in extremely dark conditions.
Use manual focus and magnified live view.
Forgetting About Light Pollution
A technically correct exposure won’t compensate for a bright city sky.
Find a darker location whenever possible.
Ignoring Condensation
A clear lens can suddenly become covered with moisture.
Check the front element regularly during long nighttime shoots.
A lens heater can be useful in humid or temperature-changing environments.
Forgetting the Foreground
A sky filled with stars is impressive, but a strong foreground can give the photograph context and scale.
Look for something that connects the viewer to the location.
Starry Sky Photography Checklist
Before you press the shutter, check:
Location
- Is the area sufficiently dark?
- Is there excessive light pollution?
- Is the Moon too bright for the photograph you want?
Weather
- Are the skies clear?
- Is humidity high?
- Is condensation likely?
Equipment
- Camera
- Wide-angle lens
- Tripod
- Remote release
- Spare battery
- Headlamp
- Lens heater if needed
Settings
- Manual exposure
- Wide aperture
- Appropriate shutter speed
- ISO adjusted for brightness
- Manual focus
- RAW capture if desired
Composition
- Is the sky interesting?
- Is there a foreground subject?
- Can you include mountains, trees, buildings, or water?
- Is the Milky Way positioned effectively?
Final Tips for Beautiful Starry Sky Photography
Starry sky photography doesn’t have to be intimidating.
Start with a simple setup.
Find a dark location.
Use a wide or ultra-wide-angle lens.
Mount the camera on a stable tripod.
Switch to manual exposure and begin around F2.8, 20–30 seconds, and ISO 1600–6400. Then adjust these settings according to the actual conditions and your camera and lens.
Use manual focus and carefully focus on a bright star.
Take several test photographs and inspect them at high magnification.
If the stars are moving too much, shorten the shutter speed.
If the image is too dark, increase ISO or use a brighter aperture.
Don’t forget that the landscape is an important part of the photograph.
Mountains, trees, buildings, beaches, and reflections can transform a simple photograph of stars into a much stronger starscape.
Once you’re comfortable with basic night sky photography, experiment with the Milky Way, star trails, reflections, soft filters, and different compositions.
Most importantly, spend time observing the sky and understanding your location.
The best equipment can help, but a good photograph still begins with choosing the right place, finding an interesting composition, and being ready when the sky is at its best.
So pack your camera, tripod, and wide-angle lens, find a dark location, and look up.
The night sky is waiting.
TAMRON products mentioned in this article