Backlighting in Photography: How to Use Light Creatively
Light is one of the most important elements in photography, and the direction from which it reaches your subject can completely change the look and mood of an image.
One particularly effective technique is backlighting in photography, where the primary light source is positioned behind the subject and directed toward the camera.
Backlighting can create glowing edges, dramatic silhouettes, translucent details, soft highlights, and an atmospheric sense of depth. It can be used for portraits, landscapes, flowers, food, architecture, and many other subjects.
At the same time, backlighting can be challenging because the subject may become too dark while the background becomes extremely bright.
The key is understanding how to control the exposure and composition so that you can decide whether to preserve the details of the subject, create a silhouette, or intentionally allow the light to dominate the image.
In this guide, we’ll explain the basics of backlighting, explore different ways to use it creatively, and provide practical photography lighting techniques for getting better results.
What Is Backlighting in Photography?
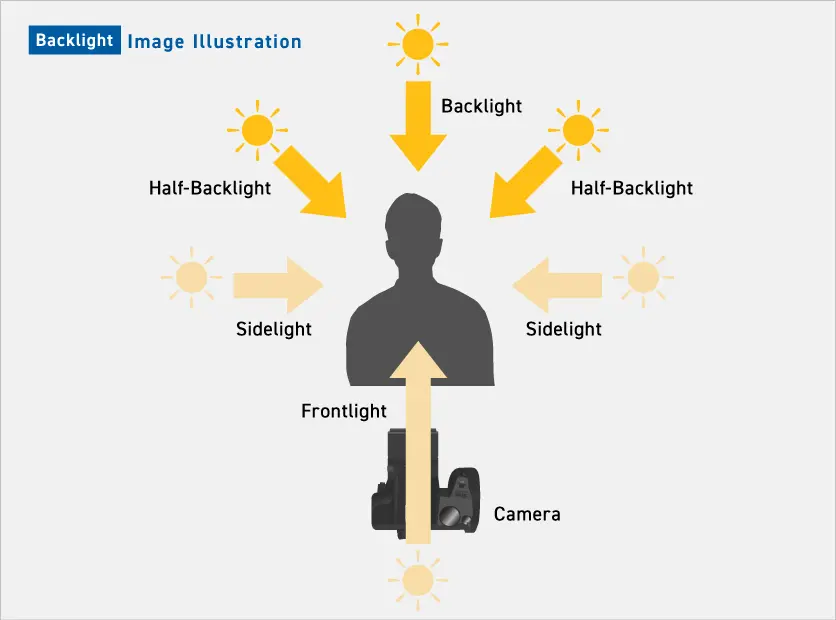
In photography, light direction is generally divided into three basic types:
- Front lighting — light comes from behind the camera toward the subject.
- Side lighting — light reaches the subject from the side.
- Backlighting — light comes from behind the subject toward the camera.
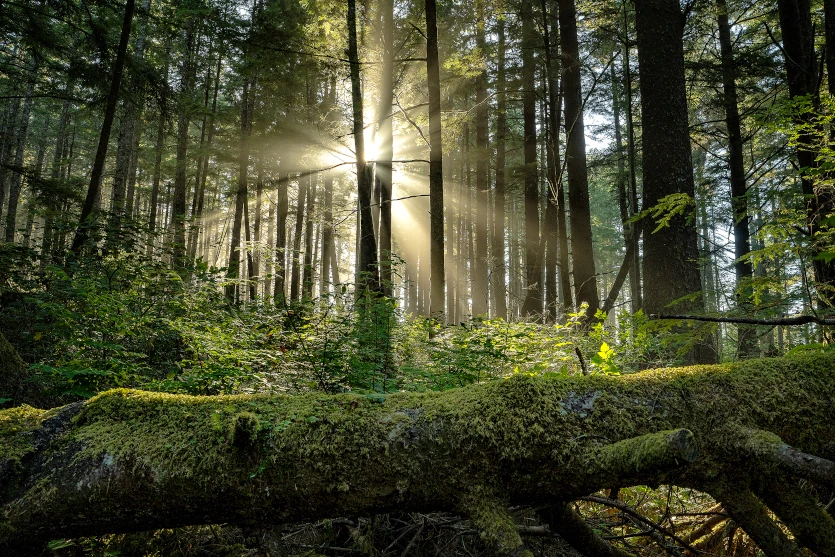
Backlighting is particularly interesting because the light interacts with the edges and translucent parts of the subject before reaching the camera.
When used effectively, it can create a glowing outline around a person’s hair, illuminate the edges of leaves, or turn a mountain or building into a dramatic silhouette.
The effect can become especially beautiful during sunrise and sunset, when sunlight is softer and warmer.
The existing TAMRON guide similarly emphasizes early morning and evening light as particularly effective situations for backlighting.
What Makes Backlighting Special?
The most recognizable characteristic of backlighting is the way it emphasizes the outline of a subject.
When light comes from behind, it can illuminate the edges of the subject and create what is often called a rim-light effect.
For example:
- Hair can appear to glow.
- Flower petals can become translucent.
- Leaves can reveal delicate veins.
- Clothing can develop a bright outline.
- Buildings can become striking silhouettes.
- Mountains can stand out against a bright sky.
At the same time, the front of the subject is often darker because it is facing away from the main light source.
This creates a high-contrast scene.
Rather than treating this as a problem, think of it as a creative opportunity.
You can either brighten the subject to preserve its details or deliberately keep it dark to create a silhouette.
Backlighting vs. Other Lighting Directions
Understanding the difference between lighting directions makes it easier to decide when to use backlighting.
Front Lighting
With front lighting, the light source is behind the camera.
The subject is directly illuminated, which generally makes details and colors easier to capture.
This can be useful for:
- Portraits
- Product photography
- Everyday photography
- Documentation
However, front lighting can sometimes produce a flatter-looking image because fewer shadows are created across the subject.
Side Lighting
Side lighting illuminates the subject from one side.
It can emphasize texture, shape, and depth.
This is particularly useful for:
- Portraits
- Architecture
- Food
- Landscapes
- Still life
Side lighting often creates a stronger sense of three-dimensionality than front lighting.
Backlighting
With backlighting, the primary light source is behind the subject.
This creates stronger contrast between the subject and background and can produce:
- Silhouettes
- Glowing edges
- Translucent subjects
- Atmospheric haze
- Dramatic highlights
- Warm, soft light
The same subject can therefore look completely different simply by changing the direction of the light.
Two Main Ways to Use Backlighting
There are two particularly useful approaches when working with backlight.
You can either emphasize the silhouette or brighten the subject to create a soft, glowing effect.
1. Create a Strong Silhouette
To create a silhouette, expose primarily for the bright background rather than the darker subject.
The subject then becomes significantly darker, sometimes appearing almost completely black.
This works especially well when your subject has a recognizable shape.
Good subjects include:
- People
- Trees
- Buildings
- Mountains
- Animals
- Vehicles
- Architecture
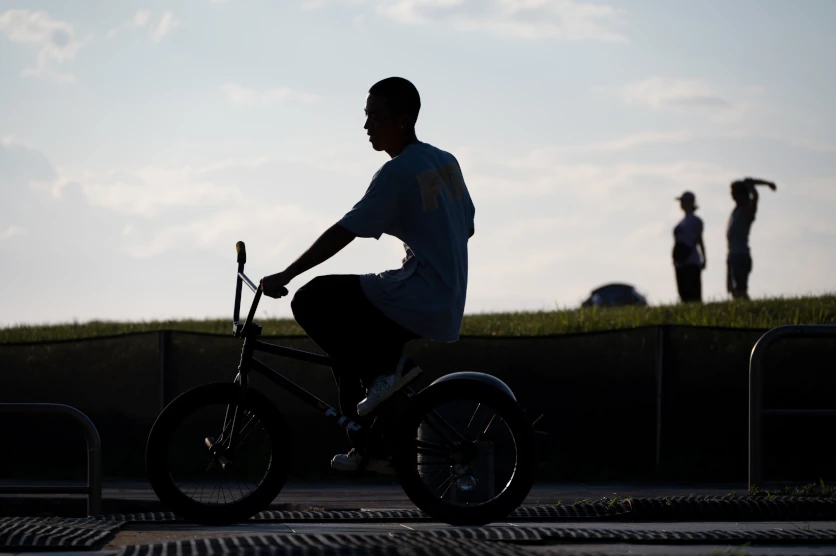
For example, a person standing in front of a sunset can become a simple dark shape against a bright orange or yellow sky.
Suggested shooting approach
Try reducing exposure compensation or adjusting your exposure until the subject becomes sufficiently dark.
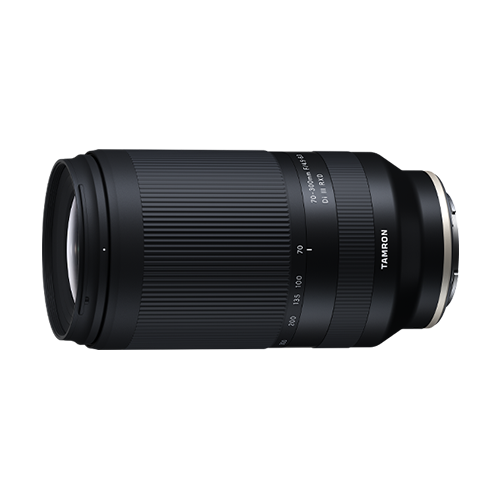
The existing TAMRON example uses the 70-300mm F4.5-6.3 Di III RXD (A047) at 173mm, F6.3, 1/1000 sec, ISO 100 to create a silhouette.
The exact settings will vary depending on the brightness of the scene, so use them as a starting point rather than a fixed formula.
The important thing is the relationship between the bright background and the darker subject.
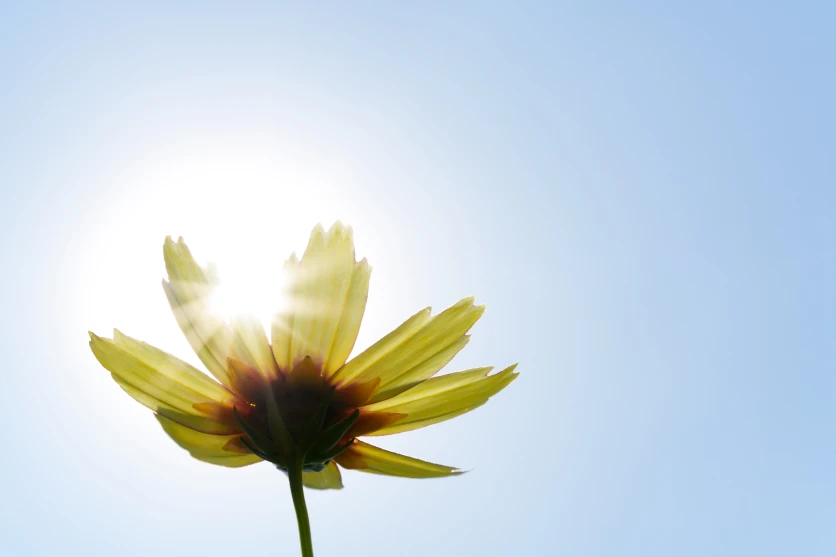
2. Create Soft, Warm Backlighting
Backlighting doesn’t always have to produce a silhouette.
You can increase exposure to reveal more detail in the subject while retaining the glow from the light source behind it.
This can create a soft and atmospheric appearance.
The technique works particularly well with subjects that interact with light, such as:
- Hair
- Flower petals
- Leaves
- Thin fabrics
- Glass
- Water
- Food ingredients
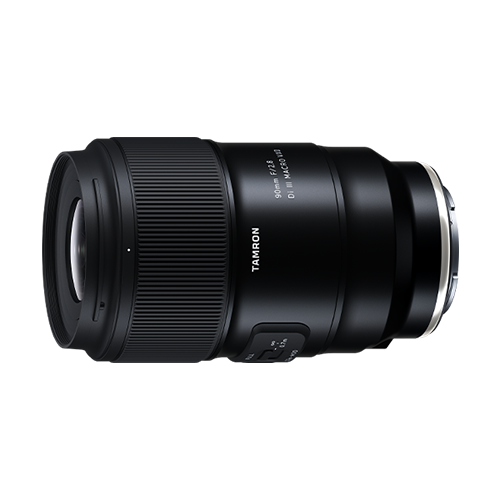
The existing article demonstrates this approach using the TAMRON 90mm F2.8 MACRO (F072), with exposure adjusted to produce a brighter, softer effect.
Decide What You Want Before You Shoot
One of the most important backlighting photography techniques is to decide what you want the final image to look like before adjusting your settings.
Ask yourself:
Do I want a silhouette?
Expose for the bright background and allow the subject to become dark.
Do I want to show the subject’s face or details?
Increase exposure or add fill light to bring back shadow detail.
Do I want a soft, dreamy image?
Look for warm light around sunrise or sunset and use a wider aperture.
Do I want a dramatic landscape?
Use the strong contrast between the illuminated sky and darker foreground elements.
Having a clear visual goal makes it much easier to decide how to expose the scene.
Time of Day Matters
The quality of backlight changes dramatically throughout the day.
Early Morning
Morning light is generally softer than the harsh light of midday.
It can produce gentle highlights and a cooler or warmer atmosphere depending on the conditions.
This makes early morning useful for:
- Landscapes
- Flowers
- Portraits
- Misty scenes
- Outdoor subjects
Golden Hour
The period around sunrise and sunset is particularly popular for backlighting.
The sun sits lower in the sky, producing warmer light and longer shadows.
Hair, leaves, grass, and other translucent subjects can glow beautifully when illuminated from behind.
Sunset
Sunset can produce dramatic colors and strong silhouettes.
A person, tree, building, or mountain can become a recognizable shape against the colorful sky.
Because the sun is extremely bright, carefully monitor your exposure to avoid losing too much highlight detail.
Understanding Exposure for Backlighting
Exposure is one of the biggest challenges when photographing against a bright light source.
A backlit scene can contain both very bright highlights and very dark shadows.
Your camera has to make a decision about how to balance those areas.
Understanding aperture, shutter speed, ISO, and exposure compensation gives you more control.
Aperture
Aperture affects both exposure and depth of field.
A wider aperture, such as F2.8 or F4, allows more light into the camera and can produce a shallower depth of field.
This can be useful for portraits, flowers, and other subjects where you want the background to become soft.
A narrower aperture, such as F8 or F11, can provide greater depth of field and may be useful when you want more of a landscape to remain sharp.
A narrower aperture can also affect the appearance of the sun and bright light sources.
The existing article suggests F8-F11 as an example range for emphasizing silhouettes and F2.8-F4 for softer effects, but these should be treated as starting points rather than universal settings.
Shutter Speed
Shutter speed controls how long light reaches the sensor.
A faster shutter speed can help freeze movement and prevent overexposure in bright conditions.
A slower shutter speed allows more light into the camera but increases the possibility of motion blur.
When shooting handheld, make sure your shutter speed is fast enough for the subject and focal length you’re using.
If the subject is moving, prioritize a shutter speed that keeps the important details sharp.
ISO
A low ISO generally produces cleaner images with less visible noise.
In bright backlit conditions, ISO 100-400 may be sufficient.
However, if you need to preserve shadow detail or work in lower light, increasing ISO can provide additional exposure.
Don’t automatically choose the lowest possible ISO.
Choose the ISO that allows you to achieve the shutter speed and aperture you actually need.
Exposure Compensation
Exposure compensation is particularly useful for backlit subjects.
If the subject is too dark, try increasing exposure compensation.
If the bright background is becoming overexposed, reducing exposure compensation may help preserve highlight detail.
For silhouettes, negative exposure compensation can intentionally make the subject darker.
The correct setting depends entirely on the visual result you’re trying to achieve.
Use the Histogram and Highlight Warnings
The LCD screen can sometimes make exposure difficult to judge, particularly in bright outdoor conditions.
The histogram can provide a more reliable indication of how tones are distributed throughout the image.
Also check highlight warnings if your camera provides them.
If large areas of the important background are clipped, you may need to adjust your exposure.
However, don’t assume that every clipped highlight is a mistake.
A bright sun or small light source may naturally be beyond the camera sensor’s dynamic range.
The goal is to preserve the details that matter most to your photograph.
Use White Balance Creatively
White balance affects the overall color temperature of your image.
Auto white balance is convenient, but you can also adjust it intentionally to influence the mood.
A warmer white balance can emphasize the golden tones of sunrise or sunset.
For example, settings such as Cloudy or Shade can produce warmer-looking images.
This can work particularly well for:
- Portraits
- Flowers
- Sunset landscapes
- Food
- Outdoor scenes
If you shoot RAW, you also have greater flexibility to adjust white balance during post-processing.
Composition Is Still Important
Beautiful light alone does not guarantee a strong photograph.
The subject still needs to be arranged effectively within the frame.
Try combining backlighting with basic photography composition techniques.
Rule of Thirds
Place the subject near one of the intersections created by the rule of thirds.
This can leave space for the light source, sky, or surrounding environment.
For example, you might position a person on one side of the frame and leave the glowing sunset visible beside them.
Diagonal Composition
Diagonal lines can add movement and energy.
Roads, mountains, buildings, branches, and architectural elements can all create diagonal lines.
Backlighting can make these lines particularly dramatic because the contrast between light and shadow becomes stronger.
Use the Sun Carefully
When the sun is directly behind the subject, you can either keep it outside the frame or deliberately include it.
For beginners, keeping the sun just outside the frame can make exposure easier.
Once you’re more comfortable, try partially including the sun behind the subject.
This can create a glowing effect around the edges.
However, strong light entering the lens can also produce flare and ghosting.
How to Reduce Flare and Ghosting
Backlighting naturally increases the possibility of lens flare and ghosting.
These optical effects occur when strong light interacts with the optical elements inside a lens.
They aren’t always undesirable.
A small amount of flare can add atmosphere or a cinematic quality.
However, excessive flare can reduce contrast and obscure important details.
Use a Lens Hood
A lens hood helps block stray light from entering the lens from outside the frame.
It is especially useful when shooting outdoors toward a bright light source.
Change Your Position
Even a small movement can significantly change the way light enters the lens.
Try moving:
- Left
- Right
- Forward
- Backward
- Higher
- Lower
You may find a position where the subject remains beautifully backlit while unwanted flare is reduced.
Keep the Lens Clean
Dust, fingerprints, and smudges on the front element can make flare more noticeable.
Before shooting, check the lens surface and clean it using appropriate lens-cleaning equipment when necessary.
Consider Lens Coatings
Modern lens designs use advanced optical coatings to help reduce unwanted reflections.
TAMRON lenses, for example, use technologies such as BBAR and BBAR-G2 coatings in applicable models to help control reflections and improve light transmission. The existing article specifically highlights these technologies for challenging backlit scenes.
Backlighting for Portrait Photography
Portraits are one of the most effective applications of backlighting.
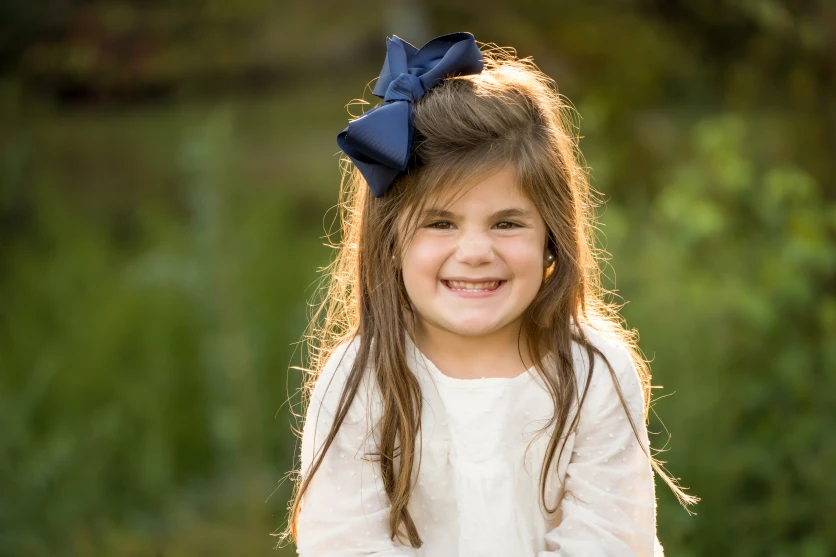
Position the light source behind the subject and allow the light to trace the edges of their hair and clothing.
This can create a glowing outline and separate the subject from the background.
However, the face will often fall into shadow.
If you want to preserve facial detail, increase exposure or use fill light.
If you want a dramatic silhouette, allow the face to remain dark.
Look for Hair and Clothing That Catch the Light
Backlighting works particularly well with:
- Long hair
- Flowing hair
- Semi-transparent clothing
- Hats
- Veils
- Fabric
As the subject moves, the light can create constantly changing highlights.
This gives you opportunities to capture more dynamic portraits.
Suggested Lens
A telephoto lens can be useful for outdoor portraits because it allows you to create separation between the subject and background.
The TAMRON 70-300mm F4.5-6.3 Di III RXD (A047), for example, can provide a long working distance and a compressed perspective at longer focal lengths. The original article uses this lens for its portrait backlighting example.
Backlighting for Landscape Photography
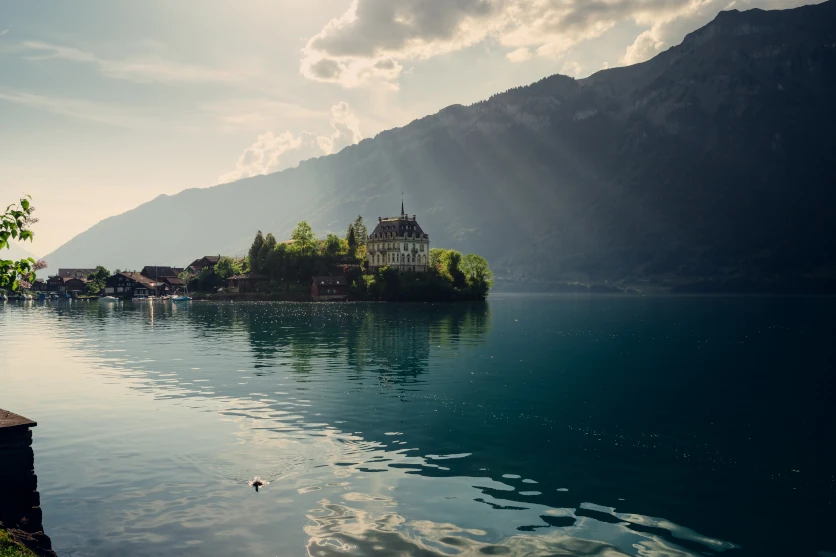
Backlighting can give landscapes a dramatic sense of depth.
Mountains, trees, grass, clouds, and atmospheric haze can all interact beautifully with light coming from behind.
Try shooting during sunrise or sunset when the light is lower and warmer.
Look for:
- Mountain silhouettes
- Sun rays
- Mist
- Reflections
- Backlit trees
- Clouds
- Water
- Atmospheric haze
A wide-angle lens can help include both the landscape and sky.
Suggested Lens
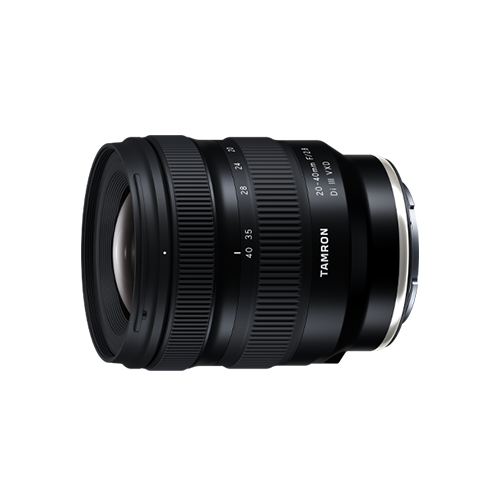
The TAMRON 20-40mm F2.8 Di III VXD (A062) is well suited to scenes where you want to move between wide environmental compositions and a more standard perspective.
The existing article uses the A062 at 32mm, F11, 1/320 sec, ISO 100 for a backlit landscape example.
Backlighting for Architecture
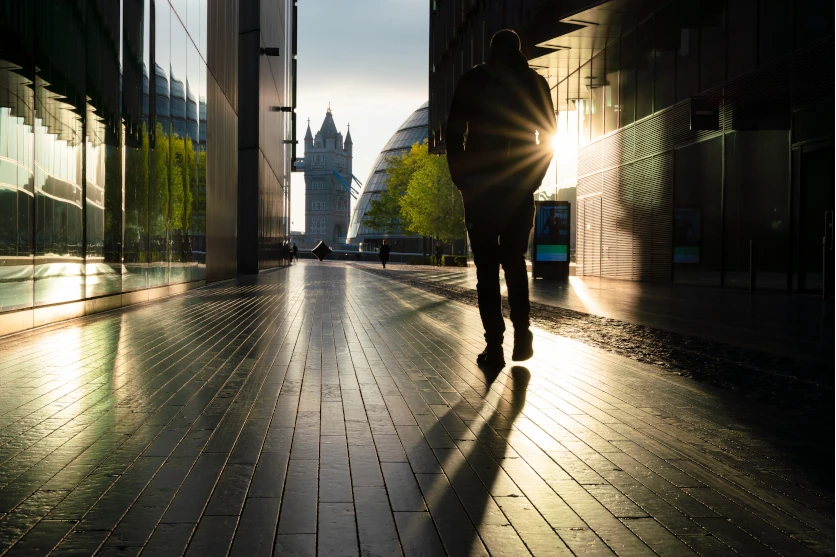
Buildings can become dramatic silhouettes when photographed against a bright sky.
Look for strong architectural shapes and geometric forms.
Useful compositions include:
- Triangles
- Diagonal lines
- Symmetry
- Repeating patterns
- Strong vertical lines
A low camera position can emphasize the height of a building while the bright sky creates separation around its edges.
A wide-angle lens can help exaggerate perspective when you’re close to a large structure.
The original TAMRON article demonstrates backlit architectural photography with the B060 at 20mm, using a wide perspective to emphasize building shapes.
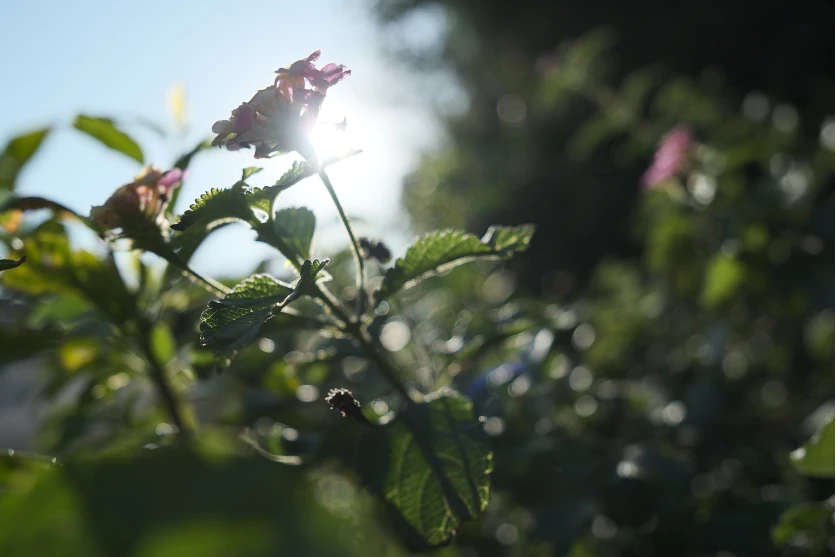
Backlighting for Flowers and Plants
Plants and flowers can become particularly interesting when illuminated from behind.
Light passing through leaves and petals can reveal details that are difficult to see under front lighting.
Veins, textures, edges, and translucent areas can become much more visible.
Try placing the sun behind the plant and looking for areas where the light passes through the subject.
Try a Close-Up Perspective
Moving closer can make small details the main subject.
A macro lens or lens with strong close-focusing capability can be especially useful.
A wider aperture can also help separate the illuminated subject from a soft background.
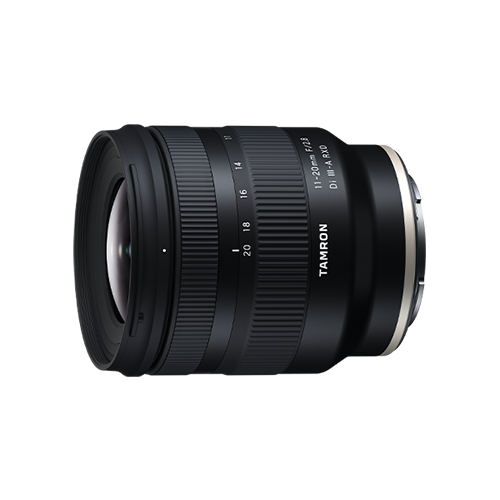
The existing article demonstrates this technique with the TAMRON 11-20mm F2.8 Di III-A RXD (B060), emphasizing how backlighting can reveal details in leaves and petals.
Choosing a Lens for Backlighting
You don’t need a specialized lens to experiment with backlighting.
Almost any lens can be used.
However, different lenses provide different creative possibilities.
Wide-Angle Lenses
Wide-angle lenses are useful when you want to include a large environment.
They work particularly well for:
- Landscapes
- Architecture
- Environmental portraits
- Travel
- Large outdoor scenes
A wide perspective can place the subject within a larger story.
Standard Zoom Lenses
Standard zoom lenses provide flexibility.
You can quickly change your composition without moving your position or changing lenses.
This is useful when the light is changing quickly, such as during sunrise or sunset.
Telephoto Lenses
Telephoto lenses can isolate subjects against bright backgrounds.
They are particularly useful for:
- Portraits
- Wildlife
- Mountains
- Distant architecture
- Details within a landscape
A longer focal length can also compress layers within a scene.
Macro Lenses
Macro lenses are particularly useful for translucent subjects.
Flowers, leaves, insects, and other small subjects can reveal fascinating details when illuminated from behind.
The ability to focus closely allows you to fill more of the frame with the subject.
Common Backlighting Mistakes
Backlighting becomes easier with practice, but there are a few common mistakes worth watching for.
The Subject Is Too Dark
If you want to preserve detail in the subject but the entire subject is nearly black, increase exposure compensation or adjust your exposure.
You can also use fill light or a reflector.
The Background Is Completely Blown Out
If the bright background contains important details, reduce exposure and check your histogram.
Remember that the sun itself may naturally be clipped.
Concentrate on preserving detail in the parts of the scene that matter.
Too Much Flare
Try changing your position or slightly adjusting the angle of the lens.
A lens hood can also help.
If flare is still excessive, partially blocking the light source behind the subject can provide a cleaner result.
The Subject Has No Clear Shape
Silhouettes work best when the outline of the subject is recognizable.
Avoid placing multiple subjects directly on top of each other if you want each shape to remain distinguishable.
For example, a person’s arms should ideally be separated from their body if you’re creating a recognizable silhouette.
A Simple Backlighting Workflow
If you’re new to backlight photography, try this simple process.
Step 1: Find Your Light Source
Look for the sun or another strong light source.
Sunrise and sunset are excellent starting points.
Step 2: Place It Behind the Subject
Position yourself so the primary light comes from behind the subject.
Step 3: Take a Normal Exposure
Start with your camera’s normal exposure.
Look at the result.
Step 4: Decide What You Want
Do you want:
- A silhouette?
- A bright subject?
- A soft glow?
- Strong rim light?
Step 5: Adjust Exposure
Use exposure compensation or manual settings to move toward your desired result.
Step 6: Change Your Position
Move slightly left, right, higher, or lower.
Watch how the light changes around the subject.
Step 7: Experiment
Try different apertures, focal lengths, and compositions.
Don’t stop after one photograph.
The best backlit image may come from a small change in position.
Backlighting Is About Controlling Contrast
The biggest challenge—and opportunity—of backlighting is contrast.
You’re often working with a very bright background and a relatively dark subject.
Instead of trying to eliminate this contrast, decide how you want to use it.
For a silhouette, increase the contrast.
For a portrait, reduce it by bringing more light into the subject.
For flowers and leaves, use the contrast to reveal translucent details.
For landscapes, use it to emphasize layers and shapes.
For architecture, use it to create bold geometric silhouettes.
Once you understand this, backlighting becomes much less intimidating.
Final Thoughts
Backlighting in photography can initially seem difficult because the camera is pointed toward a strong light source.
However, once you understand how light direction, exposure, composition, and lens choice interact, it becomes one of the most versatile lighting techniques available to photographers.
Start with simple subjects and soft light.
Try sunrise or sunset.
Experiment with silhouettes.
Then try brightening the subject to create a soft, glowing effect.
Move around and observe how small changes in position affect the light.
Most importantly, don’t think of backlighting as something you always need to correct.
Sometimes the dark subject, glowing edges, flare, or strong contrast is exactly what makes the photograph interesting.
Learn to control the light, and backlighting can turn an ordinary scene into a much more expressive photograph.
TAMRON products mentioned in this article