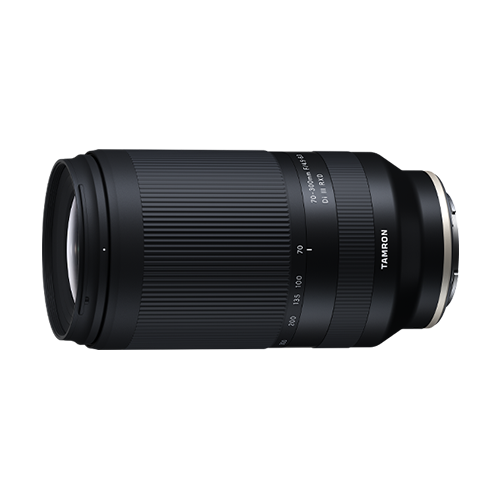
Baseball Photography Tips: How to Photograph Baseball and Choose the Right Lens
Baseball is an exciting sport to photograph because every inning can produce a completely different moment.
A pitcher’s windup, a batter’s swing, a runner stealing a base, a spectacular defensive play, or even a player’s expression while waiting in the dugout can all make compelling photographs.
However, capturing these moments isn’t always easy.
Baseball players can move quickly, and many important moments happen at a considerable distance from the photographer. A standard lens may not provide enough reach to capture the player’s expression or the details of an important play.
This is where a telephoto or ultra-telephoto lens becomes particularly useful.
With the right lens, camera settings, and shooting position, you can capture detailed photographs of the players while also creating images that communicate the energy and atmosphere of the game.
In this guide, we’ll explore baseball photography tips covering camera settings, shutter speed, autofocus, continuous shooting, composition, shooting positions, and how to photograph specific moments such as batting, pitching, defense, and base running.
We’ll also explain what to look for when choosing a lens for baseball photography, including focal length, maximum aperture, autofocus performance, image stabilization, size, weight, and minimum focusing distance.
Why Is Baseball Photography Challenging?
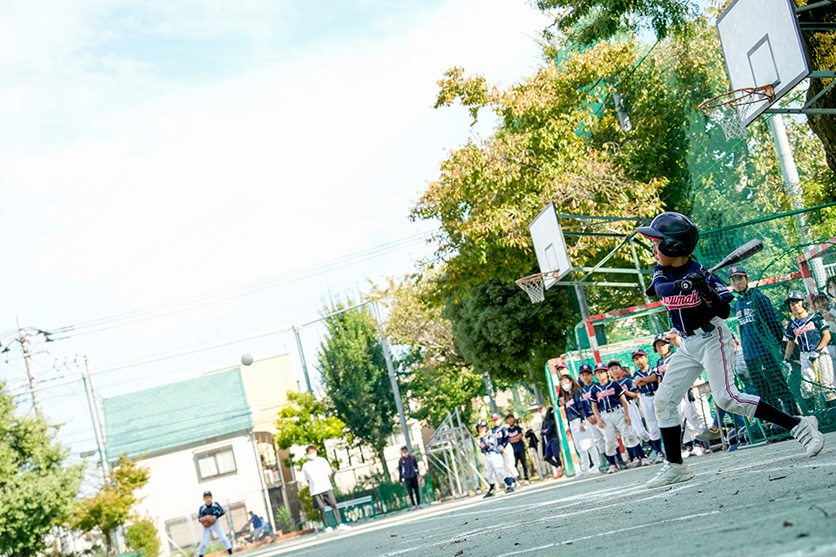
One of the biggest challenges of baseball photography is distance.
The field is large, and important players can be positioned far away from the photographer.
A batter may be standing on the opposite side of the field, while an outfielder can be even farther away.
Even if you can clearly see the action with your eyes, a standard lens may make the players appear very small in the photograph.
Baseball is also a fast-moving sport.
A pitch can happen in an instant.
A batter’s swing lasts only a fraction of a second.
A runner can suddenly take off toward the next base.
A fielder can make a quick throw.
This means your camera settings and shooting technique need to be prepared before the action happens.
The goal isn’t simply to react after something happens.
Instead, learn to anticipate the play.
Watch the players.
Pay attention to the situation on the field.
Think about what is likely to happen next.
Then position yourself and prepare your camera before the decisive moment arrives.
Use a Telephoto Lens for Baseball Photography
A telephoto lens is one of the most useful tools for photographing baseball.
The distance between the photographer and players means that longer focal lengths are often necessary.
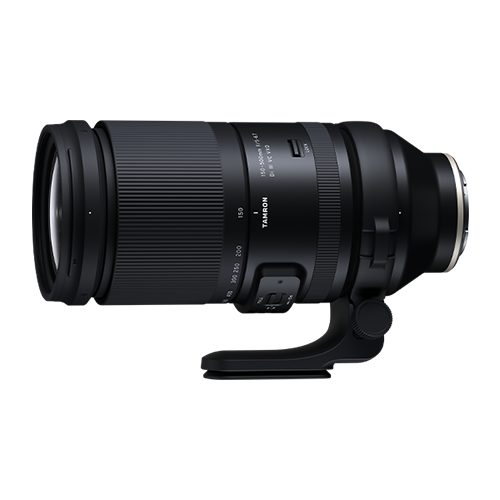
TAMRON recommends an ultra-telephoto lens of approximately 300mm or longer for situations where players are far away. A long focal length allows you to fill more of the frame with the player while remaining at a suitable distance.
For example, a long telephoto lens can help you capture:
- A pitcher’s throwing motion
- A batter’s swing
- A fielder catching a ball
- A runner approaching a base
- A player’s facial expression
- A coach giving instructions
- Players interacting in the dugout
The longer focal length also allows you to isolate the player from the surrounding stadium.
Why a Telephoto Zoom Lens Can Be Especially Useful
A fixed telephoto lens can provide excellent reach, but a telephoto zoom can offer greater flexibility.
Baseball photographers don’t always know exactly how far away the next important moment will occur.
A player might suddenly move closer.
A play might develop in another part of the field.
A wider focal length can also be useful when you want to include the surrounding environment.
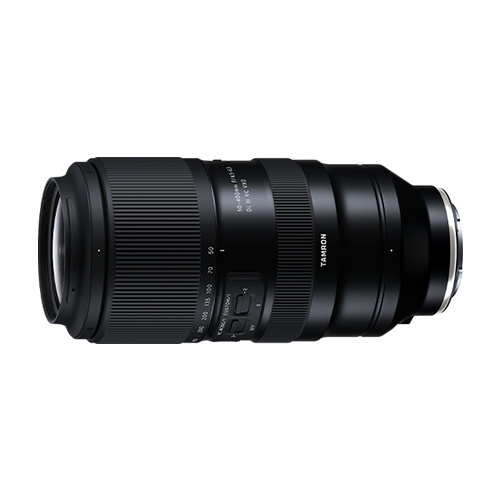
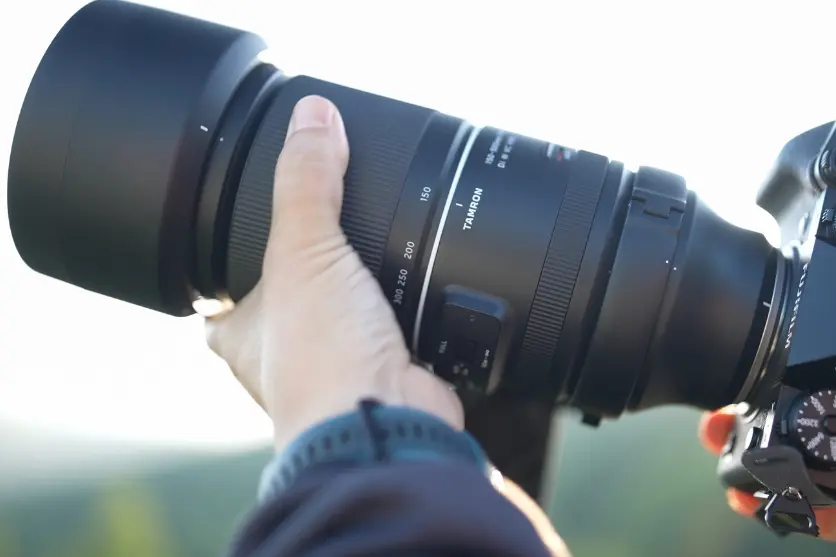
A lens such as the TAMRON 50-400mm F4.5-6.3 Di III VC VXD (Model A067) covers a particularly broad range, allowing you to move between wider environmental compositions and tight telephoto images without changing lenses. The original TAMRON article uses the A067 throughout its baseball examples, including batting, pitching, defensive plays, and team scenes.
This type of flexibility can be useful when you’re moving between different types of photographs throughout a game.
Recommended Camera Settings for Baseball Photography
There isn’t one perfect set of camera settings for every baseball game.
Outdoor daytime games, cloudy afternoons, indoor games, and night games can require different settings.
However, shutter speed should generally be one of your main priorities.
You need enough shutter speed to freeze the movement of the players.
Use Shutter Priority Mode
Shutter Priority mode can be a useful starting point for baseball photography.
In this mode, you select the shutter speed while the camera automatically adjusts the aperture to achieve an appropriate exposure.
This lets you concentrate on controlling motion.
For outdoor baseball, start with a shutter speed around 1/800 to 1/1600 second and adjust according to the action, lighting, and desired effect. TAMRON recommends this range as a practical starting point for reducing blur during swings, pitching, and base running.
If the players are moving particularly quickly, you may need an even faster shutter speed.
Use a Fast Shutter Speed to Freeze Action
A fast shutter speed is essential when you want to capture a decisive moment sharply.
Consider using approximately:
- 1/800 sec for general movement
- 1/1000–1/1600 sec for swings and pitching
- 1/2000 sec or faster for particularly fast action
These aren’t strict rules.
The appropriate shutter speed depends on the movement you’re photographing and whether you want to completely freeze it or retain a slight sense of motion.
For example, a very fast shutter speed can freeze a baseball in midair.
A slightly slower shutter speed may allow some motion blur in the bat or legs, creating a greater sense of movement.
Use a Wide Aperture When You Need More Light
Baseball photography often requires fast shutter speeds.
The faster the shutter speed, the less light reaches the sensor.
Opening the aperture can help compensate.
A wider aperture also creates a shallower depth of field, which can separate the player from the background.
This can be particularly effective when photographing a batter, pitcher, or player standing in the field.
For example, a telephoto lens at a wide aperture can blur the stadium seats, fencing, and other distractions behind the player.
When to Stop Down the Aperture
A wide aperture isn’t always the best choice.
If you’re photographing several players at different distances, a slightly smaller aperture can provide more depth of field.
This can also be useful when you want to include more of the stadium environment.
Stopping down the aperture can keep more of the scene recognizable while still providing some background separation.
Think about what you want the photograph to communicate.
If the goal is a dramatic portrait of one player, background blur can help.
If the goal is to show the atmosphere of the game, a deeper depth of field may be more appropriate.
Adjust ISO According to the Lighting
During a bright outdoor game, ISO 100–800 may be a useful starting range.
However, don’t be afraid to increase ISO when necessary.
Cloudy weather, shaded fields, late-afternoon games, and night games can require higher ISO settings.
Remember that getting a sharp photograph of a fast-moving player is generally more important than keeping ISO as low as possible.
If you lower ISO too much and the resulting shutter speed becomes too slow, you may introduce motion blur.
Instead, find a balance between shutter speed, aperture, and ISO.
Use Continuous Autofocus
Baseball players are constantly moving.
Continuous autofocus, commonly called AF-C, can help maintain focus as a player moves toward or away from the camera.
This is especially useful for:
- Base running
- Pitching
- Fielding
- Players running toward home plate
- Defensive plays
Instead of focusing once and waiting for the action, AF-C continuously adjusts focus as the subject changes position.
If your camera offers subject detection or tracking features, experiment with them and determine which settings work reliably with your camera system.
Use Continuous Shooting
Even with perfect timing, it can be difficult to capture the exact moment you want with a single frame.
Continuous shooting allows you to capture a short sequence of images.
This can be especially useful for:
- The batter’s swing
- The pitcher’s release
- A player catching a ball
- A runner sliding
- A player crossing home plate
- A fielder throwing the ball
Instead of trying to press the shutter at exactly one instant, begin shooting shortly before the anticipated moment.
You can then select the frame with the most interesting expression, body position, ball placement, and overall composition.
Anticipate the Action
Good baseball photography isn’t just about fast equipment.
It’s also about understanding the game.
Watch the situation on the field.
Where are the runners?
How many outs are there?
What is the count?
Which players are positioned defensively?
Where is the next play likely to occur?
For example, if a runner is on first base, you can anticipate several possible events:
- A stolen base
- A throw to second
- A double play
- A bunt
- A pickoff attempt
Preparing for these possibilities allows you to point your camera toward the right area before the action begins.
This can make it much easier to capture decisive moments.
Choose Your Shooting Position Carefully
Your position can dramatically change the appearance of a baseball photograph.
If permitted, try photographing from different areas around the field.
You might shoot from:
- First-base side
- Third-base side
- Behind the backstop
- The outfield
- The stands
- Other designated spectator areas
Each position gives you a different background, perspective, and angle.
However, always follow the venue’s rules and avoid interfering with players, officials, spectators, or other photographers.
Never enter restricted areas simply to get a better photograph.
Photograph From a Lower Position
A lower camera position can make athletes appear more powerful.
Instead of photographing from standing eye level, try lowering the camera when the location and safety rules allow it.
This can be particularly effective for:
- Pitchers
- Batters
- Base runners
- Little league players
A low angle can make the player appear larger within the frame and emphasize their movement.
When photographing children, be especially mindful of your position and surroundings. The original TAMRON guidance recommends using a lower perspective to create dynamic images while keeping the camera position appropriate for the situation.
How to Photograph Through a Protective Net
Many baseball fields have protective netting.
This can make photography more difficult because the camera may accidentally focus on the net instead of the player.
Fortunately, there are several ways to reduce its effect.
Move Closer to the Net
If permitted, move closer to the net.
When the net is extremely close to the front of the lens, it can become significantly blurred and less noticeable.
Do not press the lens against the net unless the venue specifically permits it.
Use a Longer Focal Length
Zooming toward the telephoto end can also reduce the visual impact of the net.
The narrower field of view allows you to concentrate on the player rather than the surrounding fencing.
Use a Wide Aperture
A wider aperture reduces depth of field.
This can help throw the nearby net out of focus while keeping the player sharp.
However, make sure the camera is actually focusing on the player.
Use a Focus Limiter When Available
Some lenses include a focus limiter.
This allows you to restrict the range in which the lens searches for focus.
When photographing through a net, this can help prevent the lens from focusing on objects that are much closer than the player.
Use Background Blur to Emphasize the Player
Baseball stadiums can contain a lot of visual distractions.
Seats, advertisements, fencing, buildings, trees, dugouts, and spectators can all compete with the player for attention.
A telephoto lens combined with a wide aperture can help simplify the background.
The longer focal length compresses the scene and can make background elements appear larger and softer.
This can produce a strong separation between the athlete and the surroundings.
However, don’t eliminate the background in every photograph.
Sometimes the stadium itself is an important part of the story.
Include the Stadium and Game Atmosphere
Not every baseball photograph needs to be a tight player portrait.
Use the wider end of a telephoto zoom to capture:
- The entire field
- The stands
- The dugouts
- The scoreboard
- The surrounding landscape
- Players warming up
- The team together
These images help establish where the action is happening.
A combination of close-up action photographs and wider environmental images can tell a more complete story of the game.
How to Photograph a Batter’s Swing
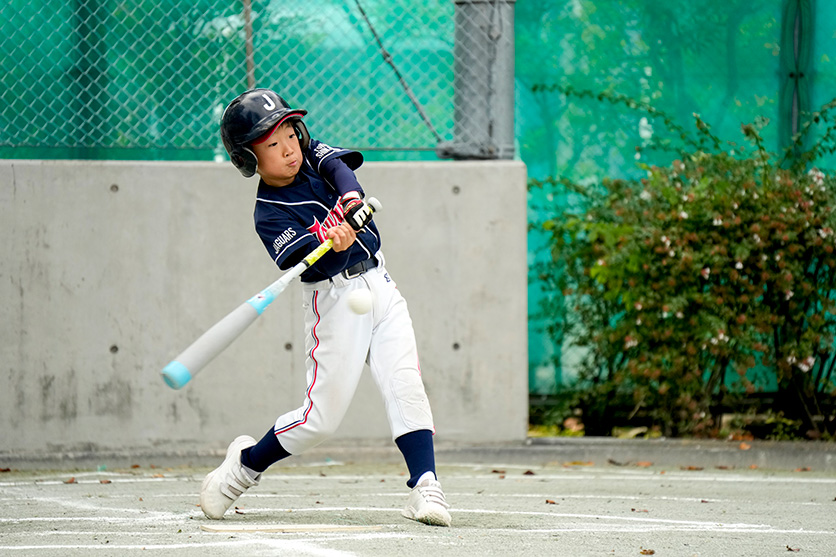
The batter’s swing is one of the classic moments to capture.
Your shooting position can make a major difference.
For a right-handed batter, shooting from the first-base side can provide one perspective of the swing.
For a left-handed batter, the third-base side may provide a better view.
The exact position will depend on the player’s stance, the stadium layout, and where you’re permitted to stand.
Watch the batter before the pitch.
Observe the timing of their swing.
Pre-focus or begin tracking the player before the action starts.
Then use continuous shooting as the swing develops.
Don’t worry if you don’t capture the exact moment the bat contacts the ball every time.
The moment immediately before or after contact can also produce compelling images.
Look for:
- The player’s expression
- The rotation of the body
- The position of the bat
- The ball
- The follow-through
- The movement of the uniform
Together, these details communicate the power of the swing.
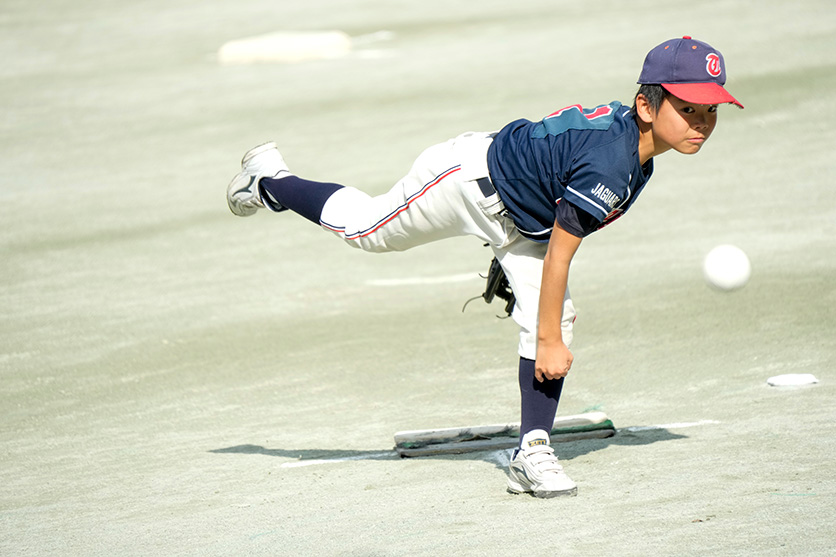
How to Photograph the Pitcher
The pitcher’s motion is another excellent subject.
Watch the pitcher’s routine.
Many pitchers have a consistent sequence before delivering the ball.
This gives you an opportunity to prepare.
Depending on the pitcher’s handedness and your location, you may find that one side of the field gives you a clearer view of the throwing motion.
A position behind the backstop can also provide a direct view of the pitcher’s face and release.
Use AF-C and continuous shooting.
Start tracking before the pitcher begins the final part of the motion.
Then capture a short sequence around the release.
A shutter speed around 1/1000–1/1600 second can be a useful starting point for freezing the throwing motion in good light.
Photograph Defensive Plays
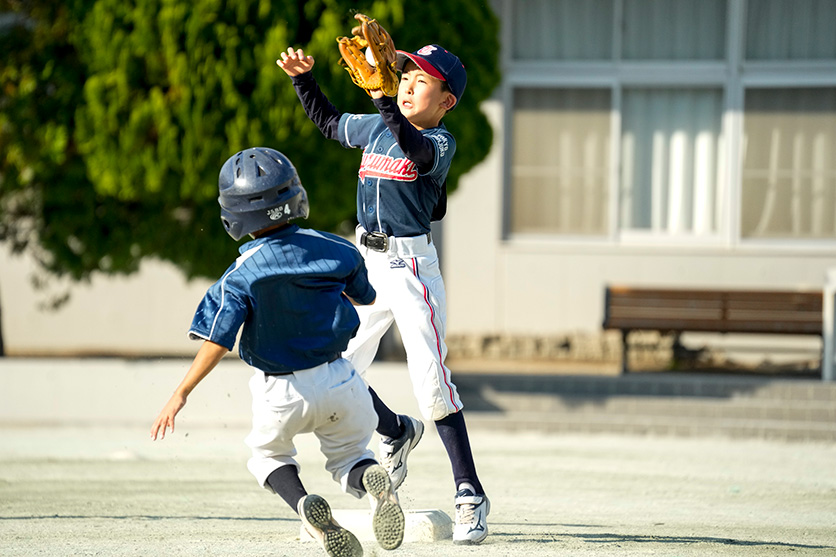
Defensive photography requires anticipation.
Instead of constantly following the ball, think about where the next play is likely to happen.
Watch:
- Shortstops
- Second basemen
- Catchers
- First basemen
- Outfielders
The situation on the bases can give you clues about what might happen next.
For example, with a runner on first base, watch for a potential throw to second.
If there are runners in scoring position, anticipate where the defense may need to make a play.
The player waiting in a defensive stance can also be an interesting subject.
You don’t always need to photograph the final action.
The concentration in a player’s face and body position can tell its own story.
Photograph Base Running
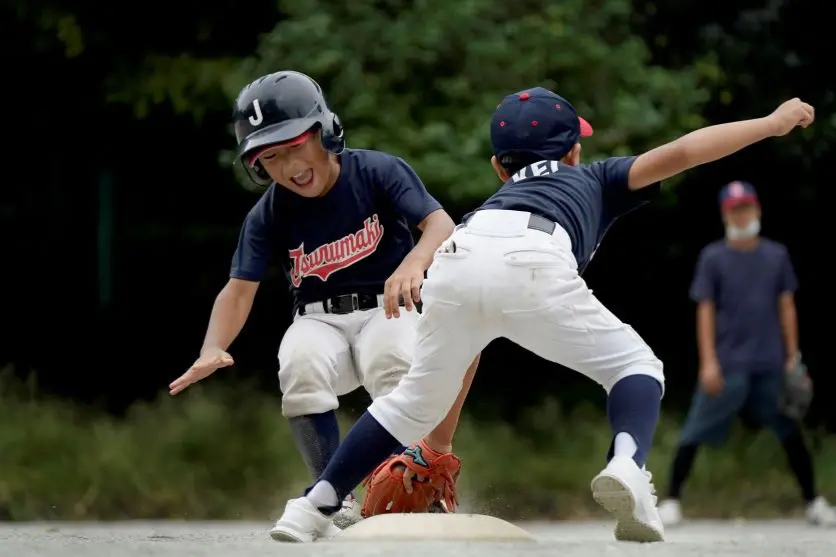
Base running can create dynamic photographs.
Use a fast shutter speed to freeze the player’s movement.
Track the runner with AF-C and continuous shooting.
Try to anticipate when the player will:
- Leave the base
- Approach the next base
- Slide
- Turn toward the next base
- Cross home plate
Leave some space in front of the runner when possible.
This gives the image a stronger sense of direction.
A slightly lower shooting position can also emphasize movement.
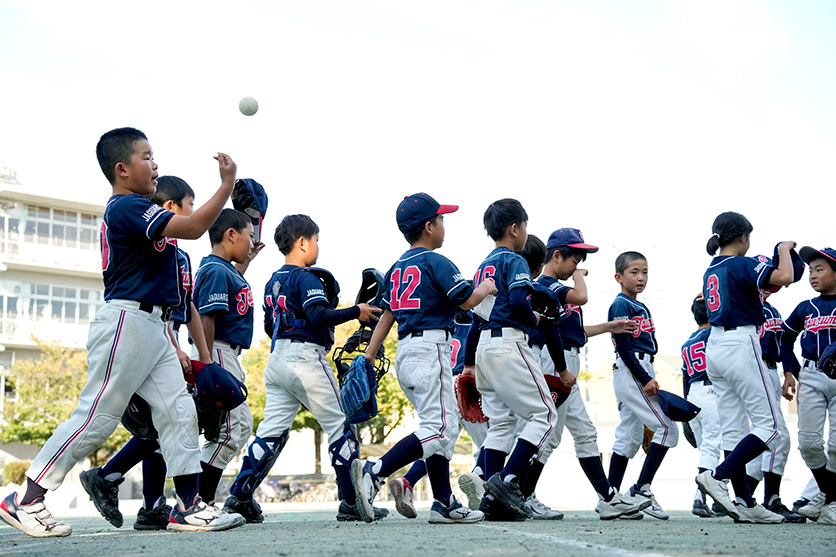
Photograph Little League Baseball
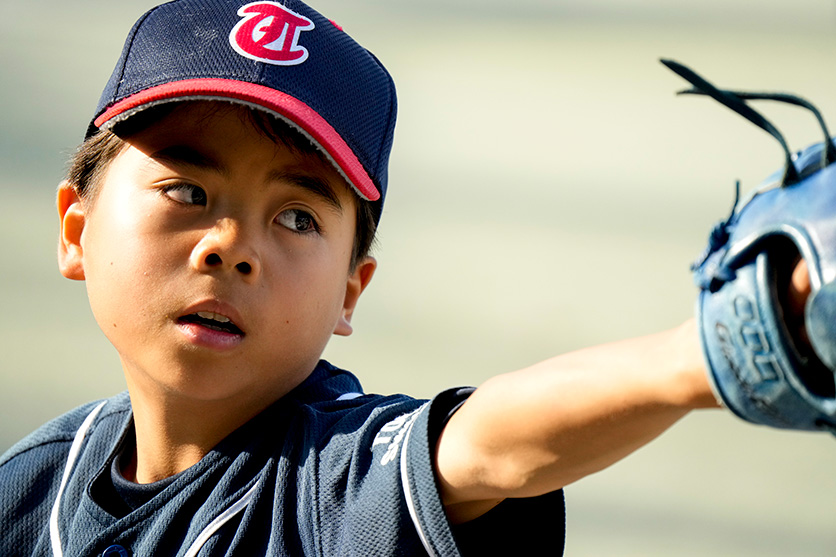
Little league baseball offers many opportunities for expressive photographs.
Children’s games can provide a different atmosphere from professional baseball.
The players’ concentration, excitement, teamwork, and reactions can all become part of the story.
A slightly lower camera position can make the players appear more powerful and can place the viewer closer to their perspective.
Focus carefully on the player’s eyes and expressions.
Don’t photograph only the action.
Also look for moments when players are:
- Waiting for their turn
- Preparing to bat
- Talking with teammates
- Sitting on the bench
- Celebrating
- Encouraging each other
- Walking onto the field
These quieter moments can complement the action photographs.
Always follow the venue’s rules and respect the privacy and safety of young athletes.
Capture the Team on the Bench
The dugout and bench can reveal a different side of the game.
Players may be:
- Cheering
- Talking
- Preparing equipment
- Watching the action
- Celebrating a play
- Encouraging teammates
Use a zoom lens to move between wider team photographs and tighter portraits.
Look for moments where players interact naturally.
If possible, include team colors, uniforms, or logos in the background to reinforce the identity of the team.
Photograph the Details
Don’t overlook the equipment.
Baseball provides many interesting opportunities for close-up photography.
Photograph details such as:
- Bats
- Baseballs
- Gloves
- Cleats
- Helmets
- Dirt-covered equipment
- Baseball bags
- Uniform details
These photographs can communicate the preparation and effort behind the game.
A lens with good close-focusing capability can be useful here.
Instead of only photographing the players during the game, look for visual details that tell the story before and after the action.
Photograph Player Expressions
Facial expressions can be just as powerful as action.
Look for moments when players are:
- Concentrating
- Celebrating
- Encouraging teammates
- Waiting for a pitch
- Reacting to a play
- Resting between innings
A telephoto lens allows you to capture these expressions from a distance without interrupting the player’s concentration.
Focus carefully on the eyes.
A sharp eye can make a portrait much more engaging.
Capture the End of the Game
The game doesn’t end when the final play is over.
Players may shake hands, celebrate with teammates, hug, talk with coaches, or gather together.
These moments can communicate sportsmanship and friendship.
A zoom lens can be particularly useful because you may want to move between a group photograph and a tighter image of individual interactions.
Watch the players after the final play.
Sometimes the most memorable photograph happens after the action has finished.
How to Photograph Baseball at Night
Night games present a different challenge.
There is less available light, but the players are still moving quickly.
This means you may need to increase ISO while maintaining a fast shutter speed.
Start with a fast shutter speed and then adjust ISO to achieve the exposure you need.
You can also use a lens with a wider maximum aperture to allow more light into the camera.
Pay attention to the stadium lighting.
Artificial lights can affect the color of the photograph, so check your white-balance settings.
Also watch for uneven lighting across the field.
Some areas may be much brighter than others.
Don’t Be Afraid to Raise the ISO
Photographers sometimes try too hard to keep ISO low.
For sports photography, that can be counterproductive.
If you use a low ISO but your shutter speed becomes too slow, the photograph may suffer from motion blur.
A higher ISO with a fast shutter speed can produce a sharper photograph.
Modern cameras are increasingly capable at higher ISO settings, and noise can often be managed during post-processing.
Prioritize the characteristics that matter most for the photograph you’re trying to create.
For fast action, that usually means getting the movement under control first.
Choosing the Right Lens for Baseball Photography
The right lens depends on where you photograph, how far you are from the field, and what type of images you want to create.
Here are the main characteristics to consider.
1. Focal Length
Focal length is one of the most important considerations.
A lens reaching around 300mm or longer can be useful for photographing players from a distance.
Longer focal lengths provide more reach and allow you to create tighter compositions.
However, longer lenses can also become larger and heavier.
Consider how you plan to use the lens.
If you frequently move around the stadium, a versatile zoom may be more convenient.
If you photograph from a fixed position, a longer telephoto lens may be more practical.
2. Maximum Aperture
A wide maximum aperture can be useful for baseball photography.
It allows more light to reach the sensor, which is particularly helpful when using fast shutter speeds.
A wide aperture also creates background blur that can help isolate the player.
This becomes particularly valuable during:
- Cloudy games
- Late-afternoon games
- Night games
- Indoor baseball
- Heavily shaded fields
However, a lens with a smaller maximum aperture can still be useful in bright conditions.
3. Autofocus Performance
Baseball is fast.
Your lens needs to respond quickly as players move through the frame.
Look for a lens with responsive autofocus and good subject tracking.
Smooth autofocus can be particularly useful when following:
- Pitchers
- Batters
- Base runners
- Fielders
A fast camera body is helpful, but the lens also plays an important role in the overall autofocus system.
4. Image Stabilization
Long focal lengths magnify camera movement.
Image stabilization can help reduce the effect of camera shake when shooting handheld.
This can be particularly useful with telephoto lenses.
However, remember that image stabilization primarily helps with camera movement.
It doesn’t freeze a moving player.
You still need a sufficiently fast shutter speed for the action.
TAMRON specifically highlights image stabilization as a useful feature for handheld baseball photography, particularly because tripods and monopods may be restricted in some venues.
5. Weight and Size
A baseball game can last several hours.
If you’re carrying a large lens throughout the entire game, weight can become important.
A compact telephoto zoom can be easier to handle and reposition.
This is particularly useful when you want to photograph from different locations.
Consider not only the specifications but also how the camera and lens feel when you’re actually holding them.
6. Minimum Focusing Distance
Don’t overlook close-focusing capability.
You may be photographing players from a distance most of the time, but there will also be opportunities to photograph equipment and details.
A shorter minimum focusing distance can allow you to photograph:
- Baseballs
- Gloves
- Bats
- Helmets
- Uniform details
- Other equipment
This makes the lens more versatile beyond the main action.
A Simple Baseball Photography Workflow
If you’re photographing a baseball game for the first time, try this workflow.
Before the game
Check:
- Camera battery
- Memory card
- Lens
- Autofocus mode
- Continuous shooting
- Shutter speed
- ISO
- White balance
- Image stabilization
- Camera strap
Take a few test photographs before the game begins.
During warm-ups
Use warm-ups to understand the players’ movements.
Watch the pitcher.
Observe the batters.
Look at where the players are positioned.
This is a good opportunity to test your autofocus and exposure settings before the game becomes faster.
During the game
Don’t keep your camera pointed at the same player for the entire game.
Look for different types of photographs.
Capture:
- Action
- Expressions
- Team interactions
- Environmental scenes
- Equipment
- Fans
- Coaches
- Bench moments
This gives you a more complete visual story.
Anticipate instead of reacting
Before every pitch, ask yourself:
What might happen next?
If a runner is on first, watch second base.
If the batter is preparing to swing, prepare for the action.
If the pitcher is beginning the windup, start tracking.
Anticipation can make the difference between seeing a moment and actually photographing it.
Final Tips for Baseball Photography
Baseball photography combines fast action, long distances, and unpredictable moments.
A good setup starts with the right lens.
A telephoto lens reaching around 300mm or longer can provide useful reach, while a telephoto zoom can give you greater flexibility when the distance and type of action change throughout the game.
Set a sufficiently fast shutter speed to control motion.
For outdoor games, approximately 1/800 to 1/1600 second can be a useful starting range, but adjust according to the action and lighting.
Use AF-C when tracking moving players and continuous shooting when you anticipate an important moment.
Don’t simply photograph the biggest action.
Capture the quieter moments too.
Photograph players preparing for a pitch, teammates talking on the bench, a glove covered in dirt, the concentration on a pitcher’s face, or the celebration after a successful play.
Change your shooting position when possible and appropriate.
A photograph from behind the backstop can look very different from one taken from the first- or third-base side.
Use lower angles when appropriate to add a sense of power and movement.
If there’s protective netting, try moving closer to it, using a longer focal length, and opening the aperture to reduce its visual presence.
Most importantly, learn to anticipate the game.
The more you understand what is happening on the field, the easier it becomes to predict where the next important moment will occur.
With the right baseball photography lens, camera settings, shooting position, and timing, you can capture more than just individual plays—you can create photographs that communicate the energy, concentration, teamwork, and atmosphere of the entire game.
TAMRON products mentioned in this article