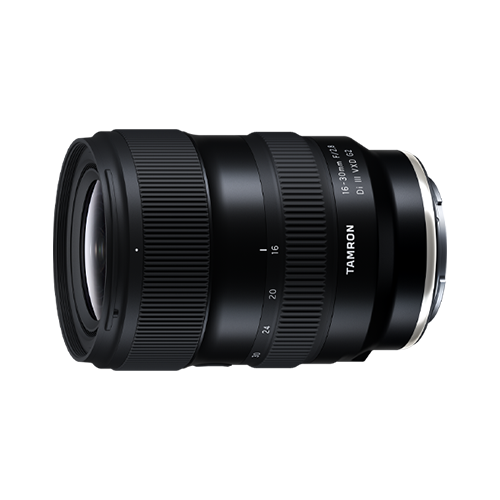
Illumination Photography: Tips for Beautiful Photos
Illuminations can transform an ordinary location into a completely different scene. Decorative lights, illuminated trees, buildings, streets, bridges, and seasonal displays can create colorful and atmospheric photographs, especially after sunset.
However, photographing illuminations can be challenging. Bright lights may be surrounded by very dark areas, making exposure difficult. Handheld shooting can also introduce camera shake, while choosing the right aperture and focus can significantly change the appearance of the lights.
With the right camera settings, composition, and lens, you can capture illumination photography with greater detail and atmosphere.
In this guide, we’ll explain how to photograph illuminations, from basic exposure settings to creative techniques such as bokeh, reflections, long exposures, filters, and multiple exposures. We’ll also cover what to look for when choosing a lens for photographing illuminated scenes.
Best Scenes for Illumination Photography
Before adjusting your camera settings, consider what kind of scene you want to create. The same illumination display can look completely different depending on your viewpoint, composition, and relationship with the surrounding environment.
Here are several approaches you can try.
Photograph a Wide View of Illuminations
One of the simplest ways to photograph illuminations is to make the lights themselves the main subject.
A wide composition can show the scale and density of an illumination display, particularly when photographing large installations or decorated streets.
However, simply pointing the camera toward the lights can sometimes result in a flat or repetitive composition.
Try photographing the same display from different:
- Angles
- Heights
- Distances
- Directions
- Viewpoints
Moving closer can emphasize individual lights and patterns, while stepping farther away can reveal how the illumination interacts with the surrounding environment.
You can also look for foreground elements that frame the lights and create a greater sense of depth.
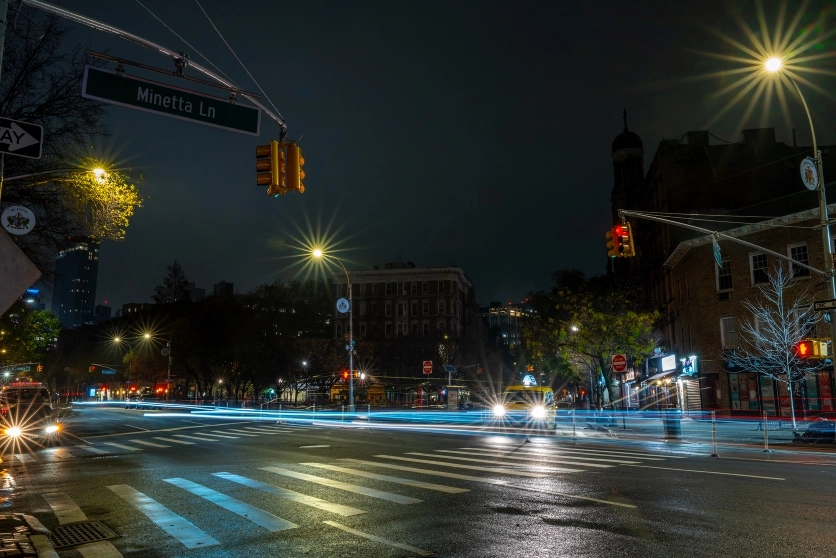
Combine Illuminations With a Nightscape
Combining illumination with the surrounding nightscape can create a more dimensional photograph.
Instead of photographing only the lights, include buildings, streets, trees, bridges, or other environmental elements in the composition.
For this type of scene, a relatively small aperture such as F8 to F11 can help keep the illumination and surrounding scenery sharp.
The original TAMRON guide recommends starting around ISO 100 to ISO 400 and adjusting exposure according to the difference in brightness between the illumination and surrounding night scene.
If the camera is mounted securely on a tripod, try a long exposure of around 15 to 30 seconds. This can capture more ambient light and create additional movement in the scene.
Photograph Illuminations in a Landscape
Illuminations don’t have to be limited to urban environments.
Combining lights with natural scenery such as trees, rivers, canals, or seasonal landscapes can produce particularly atmospheric photographs.
A wide-angle lens can help include both the illumination and the surrounding environment.
For a landscape-oriented illumination photograph, start around F8 to F11 and a relatively low ISO such as ISO 100 to ISO 400, then adjust according to the available light.
You can also experiment with different shutter speeds.
A faster shutter speed can preserve the appearance of moving subjects, while a slower shutter speed can introduce motion blur or smooth movement in water.
Seasonal elements can also add visual interest. Illuminations combined with autumn foliage, snow, trees, or reflections can create a stronger sense of place.
Photograph People With Illuminations
Illuminations can make excellent backgrounds for portraits.
Rather than treating the lights as the primary subject, use them to create atmosphere around the person.
A wide aperture can create background blur and turn individual lights into soft circles of bokeh.
For handheld portraits, a shutter speed around 1/50 to 1/200 second can be a useful starting range, depending on subject movement and focal length. ISO may need to be increased in darker environments.
The original TAMRON article suggests approximately ISO 400 to ISO 1600 for this type of portrait and notes that positive exposure compensation may help when strong backlighting causes the subject’s face to become too dark.
When using backlighting, pay particular attention to the subject’s face. The bright background can cause the camera to underexpose the person.
Recommended Camera Settings for Illumination Photography
There is no single set of settings that works for every illumination scene. The ideal settings depend on whether you’re photographing a landscape, portrait, handheld snapshot, or long exposure.
However, the following settings provide useful starting points.
Shooting Mode
Aperture Priority mode is a practical starting point for illumination photography.
It allows you to control the aperture while the camera automatically determines the shutter speed for the selected exposure.
This is especially useful when you want to control the amount of background blur.
For example, using a wide aperture can create soft illumination bokeh, while stopping down can keep more of the scene sharp.
As you become more comfortable with exposure, switch to Manual mode when you want precise control over aperture, shutter speed, and ISO.
Manual mode is particularly useful for long exposures or situations where you want multiple photographs to have consistent exposure.
Aperture
Aperture has a major effect on how illumination appears.
For soft backgrounds and attractive bokeh, try a wide aperture such as F2 to F4.
A wide aperture allows more light into the camera and creates a shallower depth of field. This can make the illumination appear as large, soft points of light behind your subject.
If you want the lights and surrounding landscape to appear sharper, stop the lens down.
An aperture around F8 to F11 can be a useful starting point for nightscapes and wide illumination scenes.
The right aperture ultimately depends on your creative goal.
Wide Aperture
Use a wide aperture when you want:
- Background bokeh
- Soft illumination
- Portraits
- Low-light handheld photography
- Strong subject separation
Smaller Aperture
Use a smaller aperture when you want:
- More of the scene in focus
- Sharp illumination details
- Nightscapes
- Starburst effects
- Greater depth of field
Shutter Speed
Shutter speed determines how long the camera records light.
When shooting handheld, a faster shutter speed can help reduce camera shake. Depending on the subject and lens, approximately 1/50 to 1/200 second can be a useful starting range.
For creative long exposures, mount the camera on a tripod and experiment with shutter speeds from several seconds to around 30 seconds.
Long exposures can create attractive effects such as:
- Light trails from cars
- Motion blur from people
- Reflections
- Smooth water
- More visible ambient light
The original article recommends approximately 5 to 30 seconds for expressing movement in illumination scenes, with a tripod for stability.
ISO Sensitivity
Start with a relatively low ISO when conditions allow.
ISO 100 or ISO 400 can work well when using a tripod and a slower shutter speed.
If you’re photographing handheld in a darker environment, you may need to raise the ISO.
ISO 1600 or ISO 3200 can sometimes be appropriate, depending on your camera and the amount of available light.
Higher ISO settings can introduce more visible noise, particularly in dark areas and shadows. Instead of automatically choosing the highest ISO available, balance ISO with aperture and shutter speed.
Exposure Compensation
Illuminations contain bright light sources that can make exposure challenging.
If the lights look too dark, try increasing exposure compensation.
A setting around +1 EV can be a useful starting point in situations where the illumination appears weaker than expected, although the correct adjustment depends on the scene.
Always check the resulting image and highlights rather than relying on a fixed value.
If the brightest lights become completely overexposed, reduce the exposure.
White Balance
White balance can significantly change the mood of illumination photography.
Different artificial light sources can produce warm, neutral, or cool colors.
For example, a warmer white balance can emphasize the cozy atmosphere of decorative lights, while a cooler setting can create a more dramatic nighttime appearance.
Try different white balance settings to see which best matches your creative intention.
If you’re photographing in RAW format, you can also fine-tune white balance during post-processing.
Composition Tips for Beautiful Illumination Photos
Once exposure is under control, composition becomes one of the most important factors.
Try a Low-Angle Perspective
Shooting from a lower position can make illumination displays appear larger and more dramatic.
A low angle can emphasize the height of illuminated trees, structures, and installations while making the lights appear to extend farther into the frame.
Don’t limit yourself to eye level.
Move the camera higher or lower and compare how the perspective changes.
Move Closer or Farther Away
If your photograph looks flat, changing your distance from the subject can make a major difference.
Moving closer can emphasize patterns, individual lights, and details.
Moving farther away can reveal the relationship between the illumination and its surroundings.
Rather than zooming immediately, physically changing your position can also change perspective and depth.
Use Foreground and Background Blur
Adding out-of-focus illumination in the foreground or background can create a greater sense of depth.
For example, you can position a nearby light source just outside the main point of focus while keeping your subject sharp.
This creates layers within the photograph and can make the scene feel more three-dimensional.
A wide aperture is particularly useful for this technique.
Look for Reflections
Reflections can transform a familiar illumination scene into a more creative composition.
After rain, look for puddles that reflect decorative lights.
You can also use:
- Rivers
- Canals
- Lakes
- Glass windows
- Polished surfaces
- Wet streets
Try photographing the reflection directly or using it as a secondary element within a larger composition.
A reflection can provide symmetry, additional color, and visual depth.
Use the Rule of Thirds
The rule of thirds can help create a balanced composition.
Imagine dividing the frame into nine sections using two horizontal and two vertical lines.
Position important subjects near these lines or their intersections rather than always placing the main subject in the center.
For example, you might place an illuminated building on one side of the frame while allowing the lights and surrounding night sky to occupy the remaining space.
This is only a guideline, so experiment with centered and unconventional compositions as well.
Creative Illumination Photography Techniques
Once you’ve become comfortable with basic exposure and composition, try using the lights in more creative ways.
Create Beautiful Bokeh
One of the most popular ways to photograph illuminations is to turn the lights into soft, circular bokeh.
To create this effect, use a wide aperture and make sure there is sufficient distance between your subject and the illuminated background.
Focus on the foreground subject.
The background lights will then fall outside the depth of field and become soft, blurred shapes.
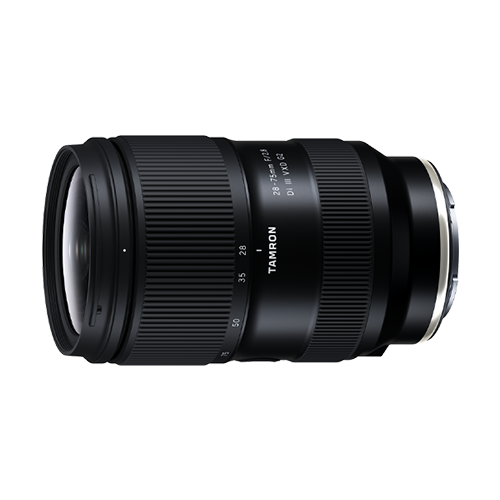
The TAMRON 28-75mm F2.8 G2 (Model A063), for example, was used in the original article at 28mm, F2.8, 1/125 second, and ISO 400 for a bokeh illumination photograph.
If the bokeh becomes too bright, adjust your exposure accordingly.
Use Filters to Change the Appearance of Light
Lens filters can produce different visual effects with illumination.
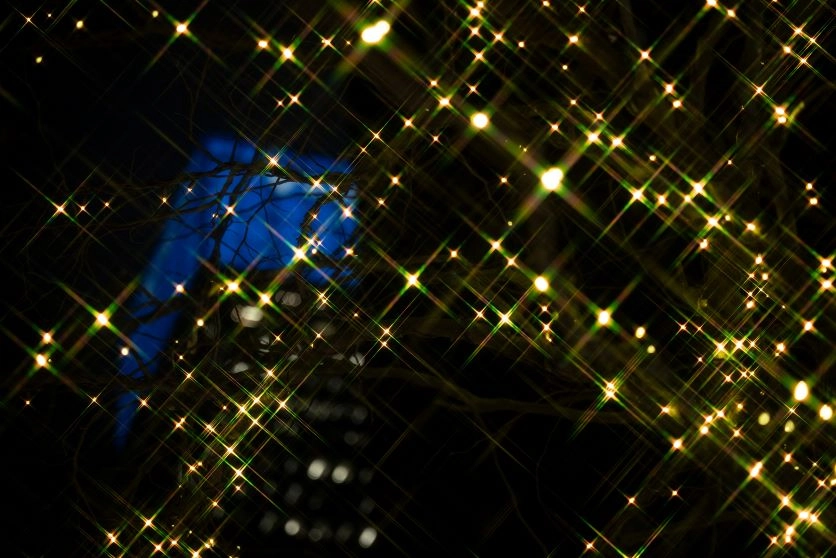
A cross filter can transform bright point light sources into star-like patterns, creating a sparkling effect.
A soft filter can reduce the apparent sharpness of light sources and create a softer, dreamlike atmosphere.
Color filters can also change the overall tone of the photograph.
These effects are particularly useful when you want to create an image that looks different from a straightforward documentary photograph of the illumination display.
Use filters selectively, however. The effect should support the subject rather than overwhelm it.
Use Long Exposure to Create Light Trails
Long exposure is an effective way to add movement to illumination photography.
Place the camera on a tripod and use a slower shutter speed.
Moving cars can become continuous lines of light, while people walking through the scene can become blurred figures.
This creates contrast between the stationary illumination and moving elements.
A shutter speed of approximately 15 to 30 seconds can be a useful starting point for this type of creative photography. The original TAMRON article also recommends ISO 100 to ISO 400 for long-exposure illumination scenes.
A remote shutter release can further reduce camera movement.
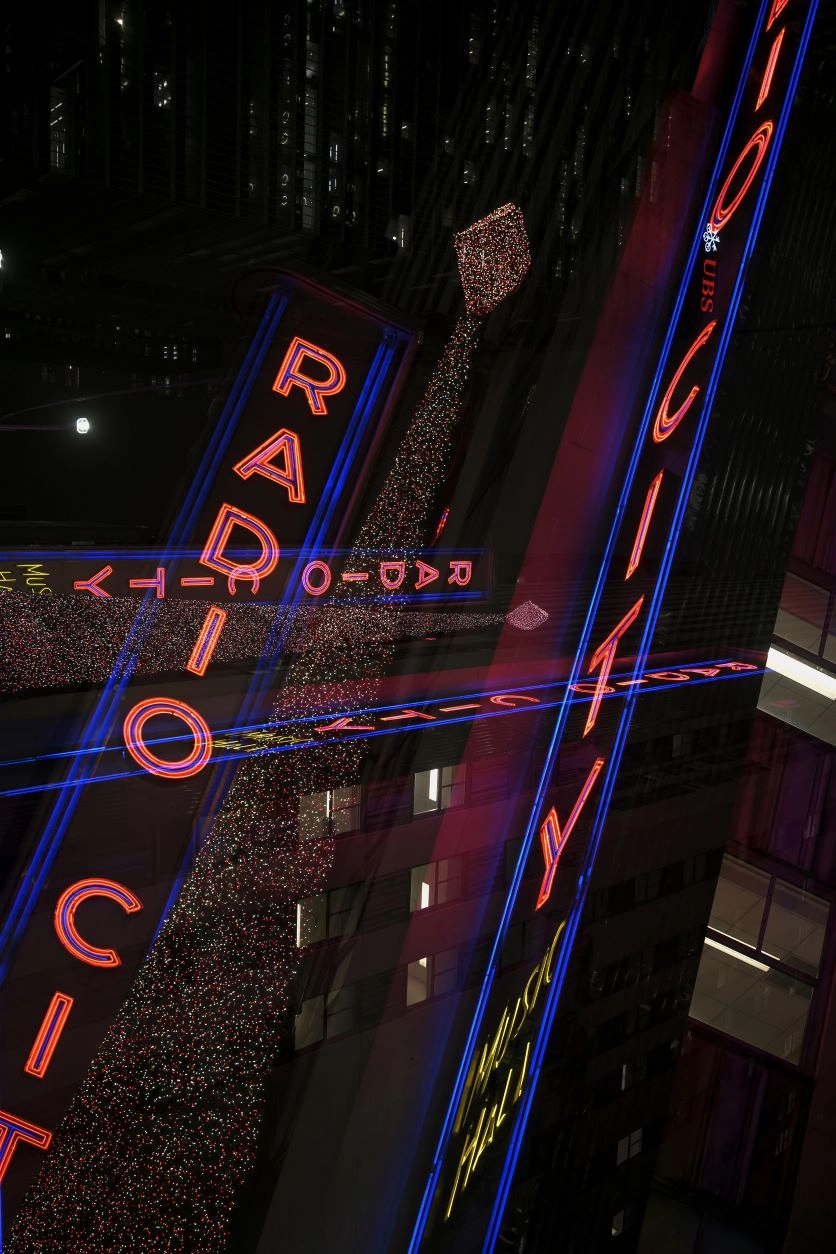
Try Multiple Exposure Photography
Some interchangeable-lens cameras offer a multiple-exposure function that allows several photographs to be combined into a single image.
This can be used creatively with illuminations.
For example, you could photograph the lights sharply in one exposure and then photograph the same scene slightly out of focus in another.
Combining the two can produce overlapping light shapes and a more abstract appearance.
This technique requires experimentation, so try different focus distances and exposure combinations.
The original TAMRON article specifically demonstrates this approach using the 28-75mm F2.8 G2 (Model A063).
How to Choose a Lens for Illumination Photography
The lens you choose can affect both the composition and the appearance of the lights.
There are several factors worth considering.
Maximum Aperture
A lens with a wide maximum aperture can be particularly useful for illumination photography.
Lenses with maximum apertures such as F1.4, F2, F2.8, or F4 can allow more light into the camera and provide greater control over background blur.
A wide aperture is especially useful when photographing portraits surrounded by illumination or when you want large, soft bokeh.
It can also help when shooting handheld in darker environments.
Focal Length
Wide-angle lenses are useful when you want to capture a large illumination display together with its surroundings.
They can help emphasize the scale of a scene and are particularly useful when shooting in locations where you cannot move very far away.
A standard lens can provide a more natural perspective and is useful for portraits, street scenes, and snapshots.
Rather than choosing a lens based only on focal length, consider the type of photograph you want to create.
Wide-Angle Lenses
Useful for:
- Large illumination displays
- Cityscapes
- Architecture
- Landscapes
- Environmental portraits
- Tight shooting locations
Standard Zoom Lenses
Useful for:
- Portraits
- Street photography
- Details
- General nighttime shooting
- Multiple compositions without changing lenses
Lightweight and Compact Design
Illumination photography often involves walking through large areas or visiting multiple locations.
A lightweight lens can therefore be more comfortable to carry for several hours.
Compact equipment can also make it easier to move through crowded areas and quickly change your composition.
When choosing a lens, consider how the size and weight of the complete camera setup will affect your shooting experience.
Autofocus Performance
Autofocus performance becomes particularly important in low-light environments.
When choosing a lens for illumination photography, consider how quickly and accurately it can focus in darker conditions.
Autofocus tracking can also be useful when photographing moving subjects such as people or vehicles.
However, some scenes may benefit from manual focus, particularly when photographing static subjects with very low contrast.
A smooth and easy-to-use focus ring can therefore be valuable as well.
Image Stabilization
Image stabilization can help reduce camera shake when photographing handheld.
This can be useful when you’re walking through an illumination display and don’t want to carry a tripod.
However, image stabilization does not freeze moving subjects. If a person, vehicle, or other subject is moving, you may still need a sufficiently fast shutter speed.
For long exposures, a tripod remains the more appropriate solution.
Final Tips for Photographing Illuminations
Illumination photography gives you many opportunities to experiment.
Start with the basics:
- Choose a suitable lens for the scene.
- Decide whether you want the lights sharp or blurred.
- Use a wide aperture for bokeh and low-light portraits.
- Use a smaller aperture such as F8 to F11 for detailed nightscapes.
- Keep ISO as low as practical for the scene.
- Use a tripod for long exposures.
- Watch bright highlights when adjusting exposure.
- Experiment with white balance to change the mood.
- Look for reflections in water, glass, and wet surfaces.
- Try different angles and shooting distances.
- Experiment with filters for creative light effects.
- Try long exposures to capture light trails.
- Explore multiple exposure if your camera supports it.
Most importantly, don’t photograph every illumination display from eye level with the same settings.
Move around. Change your perspective. Photograph the lights from close up and from a distance. Look for reflections, foreground elements, silhouettes, and moving subjects.
Illuminations are already visually striking, but thoughtful composition and controlled exposure can turn them into much more compelling photographs.
Whether you’re photographing a large seasonal display, a city nightscape, a portrait surrounded by lights, or a small detail that catches your attention, the combination of the right lens, camera settings, stability, and creative perspective will give you greater control over the final image.
TAMRON products mentioned in this article