Shutter Speed in Photography: Settings, Tips & Guide
Shutter speed is one of the most important camera settings to understand when learning photography. It affects how much light reaches the camera sensor, but it also determines how movement appears in an image.
By choosing a fast shutter speed, you can freeze a rapidly moving subject such as an athlete, bird, or splash of water. By choosing a slow shutter speed, you can intentionally record movement as blur or create long-exposure effects such as flowing waterfalls, light trails, and starry skies.
Understanding shutter speed gives you greater control over both exposure and creative expression.
In this guide, we’ll explain what shutter speed is, how it relates to aperture and ISO, when to use fast or slow shutter speeds, and recommended starting points for different photography situations.
What Is Shutter Speed?
Shutter speed is the length of time the camera shutter remains open while the image is being captured.
During this period, light reaches the camera’s image sensor and the image is recorded. Shutter speed is commonly displayed as a fraction or number, such as:
- 30 seconds
- 1 second
- 1/60 second
- 1/125 second
- 1/500 second
- 1/1000 second
- 1/4000 second
The larger the denominator in a fraction, the faster the shutter speed.
For example, 1/1000 second is faster than 1/60 second because the shutter is open for a much shorter amount of time.
This difference may seem small, but it can have a significant effect on the final photograph.
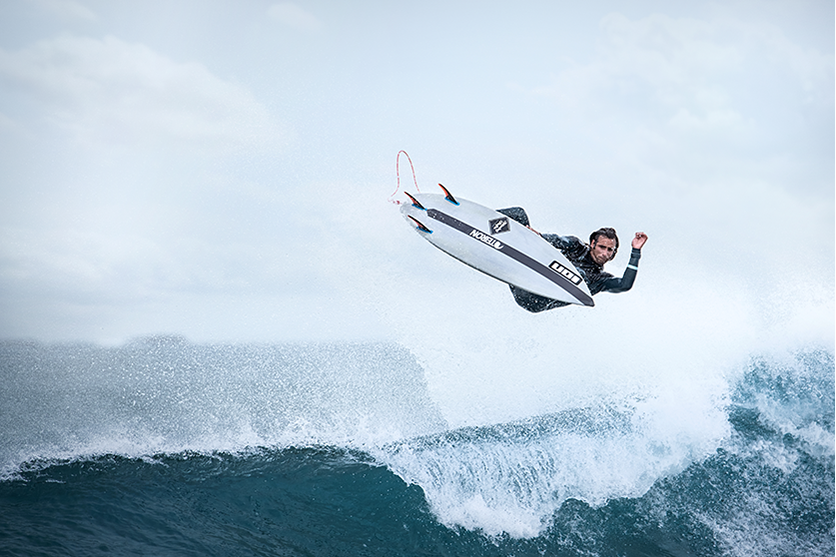
A fast shutter speed can freeze movement, while a slow shutter speed can record movement as blur.
How Shutter Speed Affects Exposure
Shutter speed is one of the three primary factors that determine exposure, together with:
- Aperture (F-number)
- Shutter speed
- ISO sensitivity
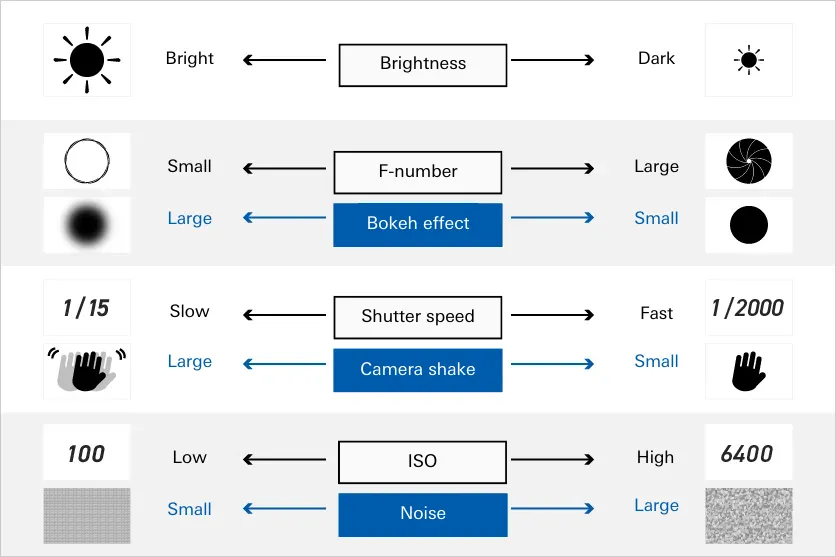
These three settings work together to determine how much light reaches the sensor and how the resulting image looks.
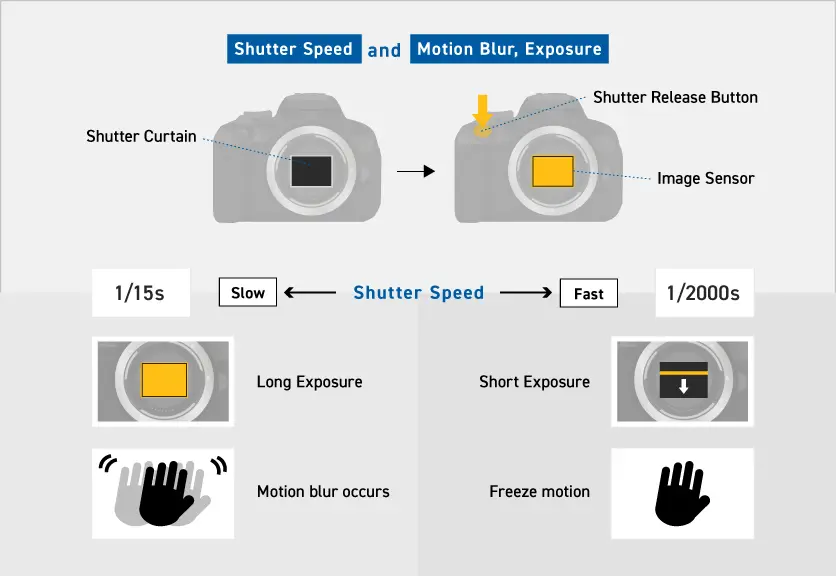
Fast Shutter Speed
A fast shutter speed allows less light to reach the sensor because the shutter remains open for a shorter amount of time.
For example, changing from 1/125 second to 1/1000 second significantly reduces the exposure time.
This is useful when you want to freeze movement, but you may need to compensate by:
- Opening the aperture
- Increasing ISO
- Adding more light
Slow Shutter Speed
A slow shutter speed keeps the shutter open longer, allowing more light to reach the sensor.
This can be useful in low-light situations, but it also makes movement more visible.
Camera shake can become noticeable, and moving subjects may appear blurred.
That is why slow shutter speeds are often paired with a tripod when the intention is to keep stationary parts of the scene sharp.
Fast vs. Slow Shutter Speed
The simplest way to understand shutter speed is to think about how you want movement to appear.
Fast Shutter Speed: Freeze Movement
Fast shutter speeds such as 1/500, 1/1000, or 1/2000 second are useful for capturing fast action.
They can help freeze:
- Sports
- Birds in flight
- Running children
- Splashing water
- Moving vehicles
- Dancing
- Action scenes
The faster the movement, the faster your shutter speed may need to be.
For particularly quick movement, shutter speeds of 1/1000 second or faster can help capture moments that would otherwise appear blurred.
Slow Shutter Speed: Show Movement
Slow shutter speeds such as 1/2 second, 1 second, 10 seconds, or longer can intentionally introduce motion blur.
This can be used creatively for:
- Waterfalls
- Light trails
- Moving traffic
- Fireworks
- Star trails
- Night landscapes
Rather than trying to eliminate movement, you are using it as part of the image.
What Is Shutter Speed Priority Mode?
Many interchangeable-lens cameras include a shutter speed priority mode.
Depending on the camera manufacturer, this mode may be represented by a setting such as S or Tv.
In this mode, you select the shutter speed while the camera automatically adjusts other exposure parameters according to the camera’s settings and exposure system.
This can be particularly useful when shutter speed is the most important consideration.
For example, when photographing sports or flying birds, you can select a fast shutter speed first and allow the camera to help maintain an appropriate exposure.
It is a useful way to learn how different shutter speeds affect motion while maintaining relatively straightforward exposure control.
Shutter Speed and Camera Shake
Shutter speed doesn’t only affect subject movement. It also affects how much camera shake is recorded.
When shooting handheld, a slow shutter speed increases the possibility that small movements by the photographer will make the image appear blurred.
A commonly used rule of thumb is the 1/focal-length guideline.
For example:
- 50mm → approximately 1/50 second
- 100mm → approximately 1/100 second
- 200mm → approximately 1/200 second
The idea is to use a shutter speed roughly equal to the reciprocal of the focal length when shooting handheld.
However, this should only be treated as a starting point.
The appropriate shutter speed depends on factors such as:
- Camera and lens
- Image stabilization
- Focal length
- How steadily you hold the camera
- Subject movement
- Lighting
- Shooting technique
When in doubt, take a test shot and check the image at high magnification.
How Image Stabilization Helps
Some lenses feature optical image stabilization that can help compensate for camera movement during handheld shooting.
TAMRON calls its stabilization technology Vibration Compensation (VC) on applicable lenses.
Image stabilization can be particularly helpful when shooting at longer focal lengths or in low-light situations.
However, it is important to understand the distinction between camera shake and subject movement.
If your subject is moving quickly, stabilization alone cannot freeze that subject. You may still need a fast shutter speed.
For example, a stabilized lens may help you photograph a stationary subject at a slower shutter speed, but a running athlete can still appear blurred if the shutter speed is too slow.
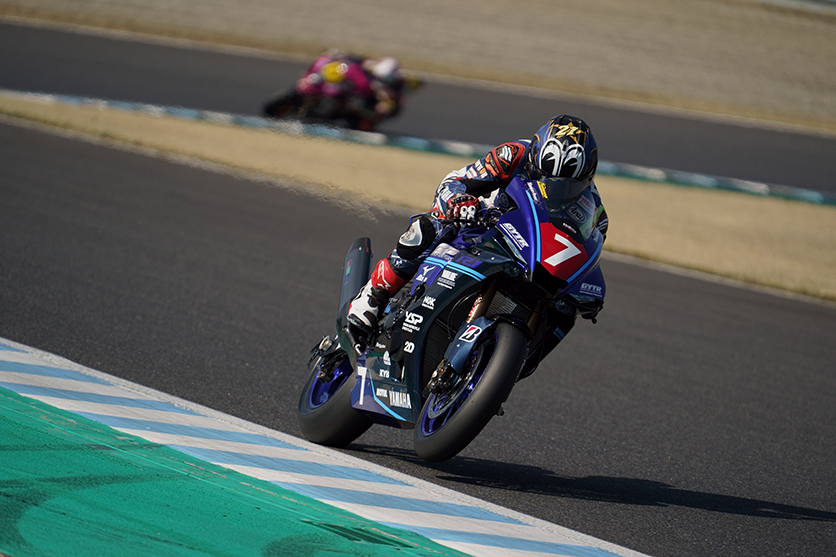
Recommended Shutter Speed Settings by Subject
There is no single shutter speed that works for every situation.
The best setting depends on the subject, lighting, focal length, and the type of movement you want to capture.
The following values are useful starting points rather than fixed rules.
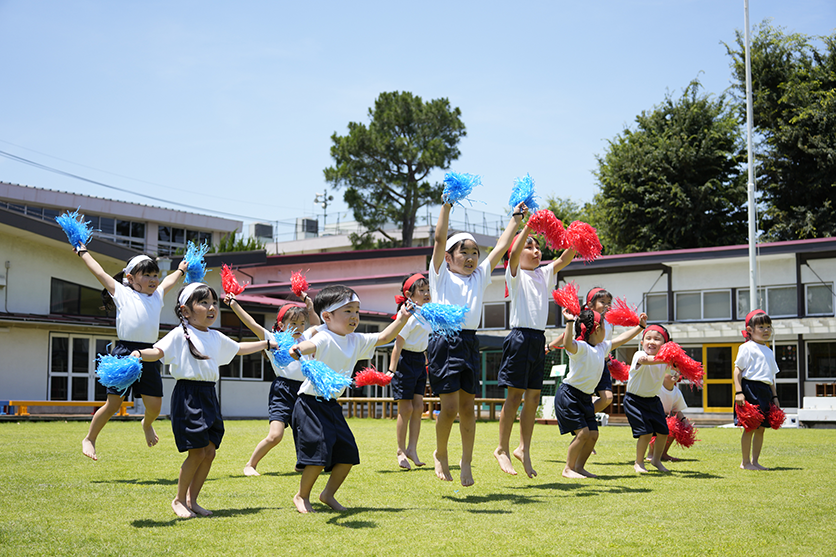
Sports Day and Children in Motion
When photographing children running, jumping, or participating in sports activities, movement can happen very quickly.
A shutter speed around 1/500 to 1/1000 second can be a useful starting point for freezing action.
If you want to create a sense of movement instead, try a slower shutter speed and experiment with panning.
For panning, approximately 1/60 to 1/125 second can be a starting range depending on the subject’s speed.
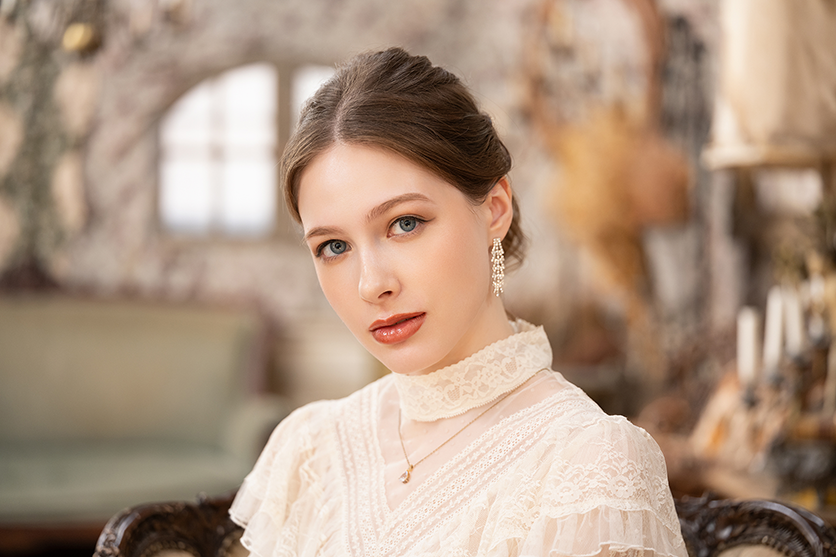
Portrait Photography
For relatively still portraits, approximately 1/60 to 1/125 second can be a useful starting point.
This can help keep facial expressions and natural gestures sharp.
If the subject is moving, or if you are photographing outdoors where hair or clothing is moving in the wind, a faster shutter speed such as around 1/250 second may be more appropriate.
In low light, you may need to balance shutter speed with aperture and ISO to maintain both adequate exposure and sharpness.
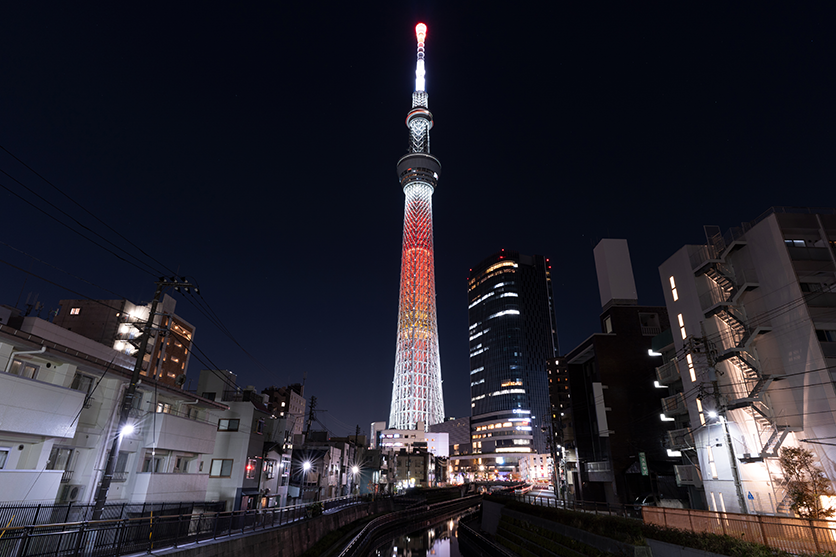
Night Photography
Night photography often benefits from slower shutter speeds because there is less available light.
When using a tripod, exposures ranging from a few seconds to around 30 seconds can be useful for capturing city lights and nighttime landscapes.
A tripod helps keep stationary elements sharp during these longer exposures.
When a tripod isn’t practical, such as at a crowded tourist location, you may need to shoot handheld.
In that situation, a starting point around 1/15 to 1/60 second may be appropriate depending on your focal length, stabilization, subject movement, and available light.
You may also need to increase ISO to maintain adequate exposure.
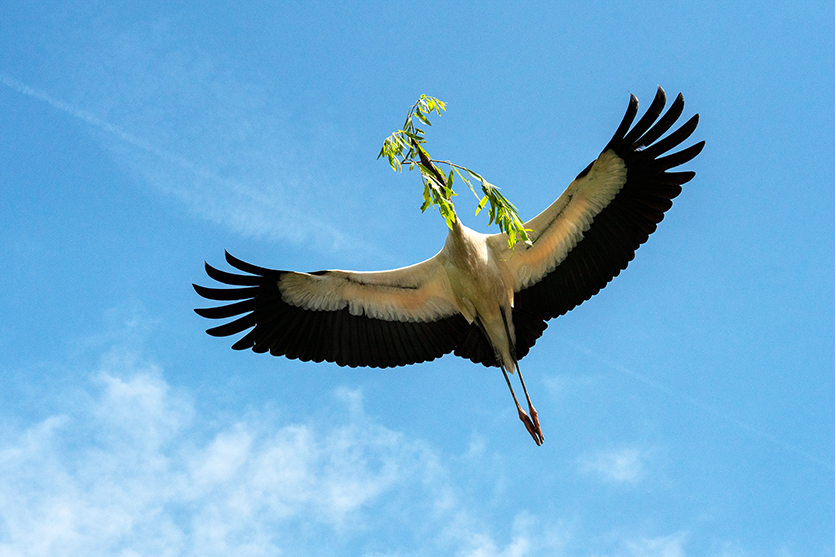
Wildlife and Birds
Wildlife photography often requires a fast shutter speed because animals can move unpredictably.
For a bird sitting on a branch, approximately 1/250 to 1/500 second can be a starting point.
For birds in flight, you may need approximately 1/1000 to 1/2000 second or faster, depending on the bird’s movement and the type of image you want.
Early morning and late afternoon can provide beautiful light, but these periods can also have lower brightness.
In those conditions, increasing ISO may allow you to maintain a sufficiently fast shutter speed.
Sports Photography
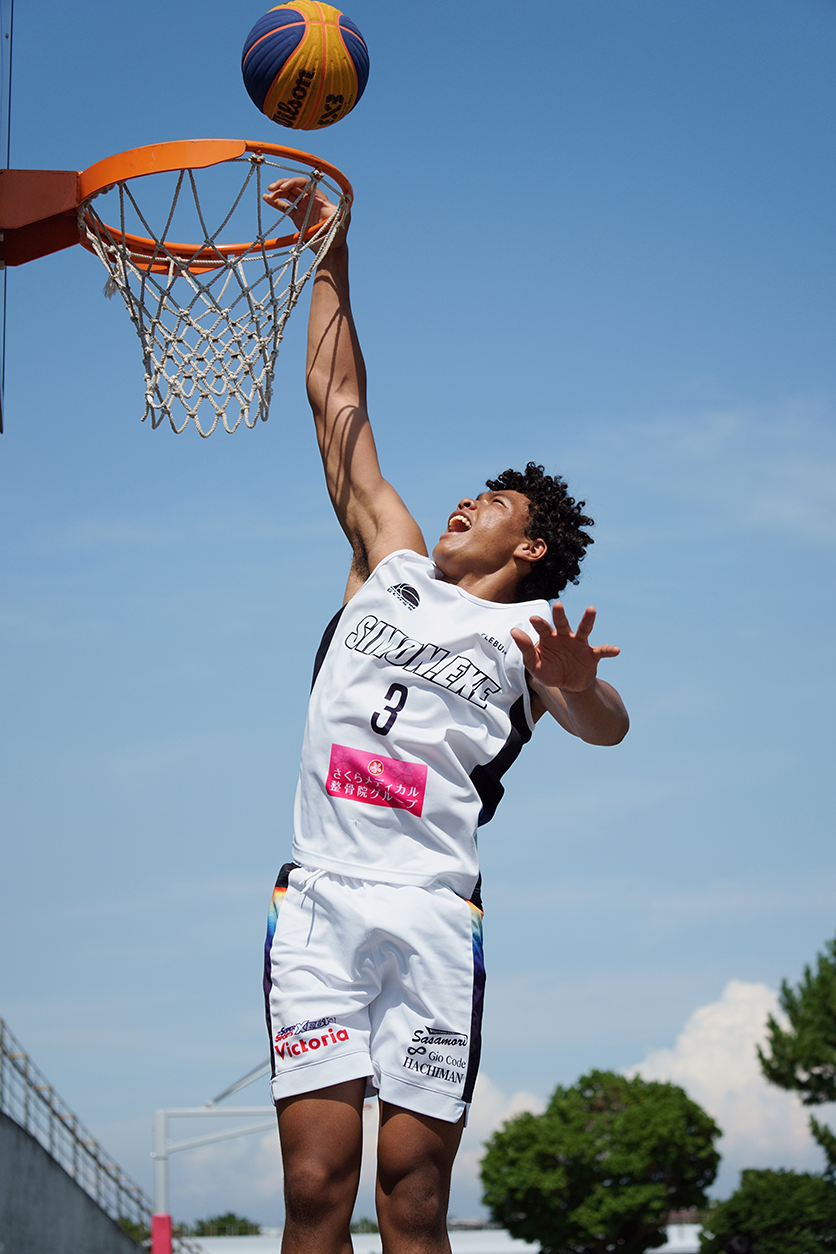
Fast sports such as basketball, baseball, and tennis require quick shutter speeds when your goal is to freeze action.
A shutter speed of around 1/1000 second or faster can be a useful starting point.
For particularly fast action, such as capturing a ball or a specific facial expression, you may want to try around 1/2000 second or faster.
On the other hand, panning can create a stronger sense of speed.
A shutter speed around 1/125 to 1/250 second can be used as a starting point, depending on the sport and subject movement.
Starry Sky Photography
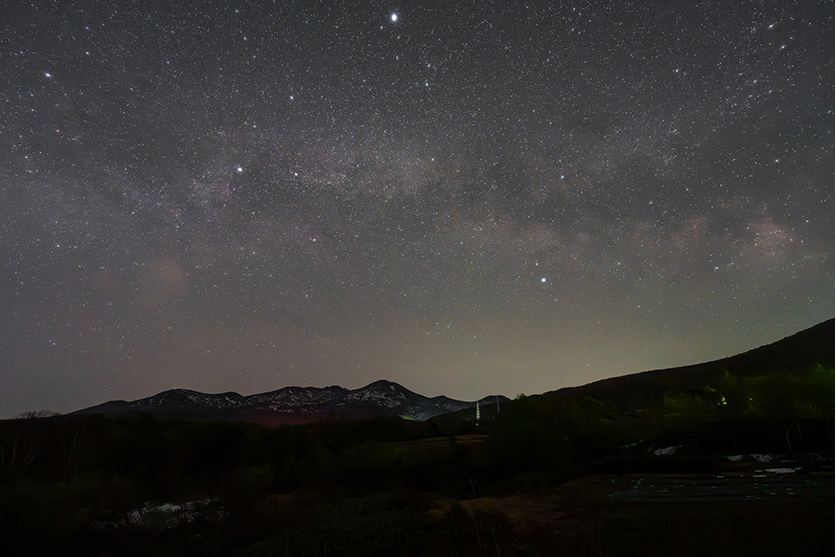
When photographing stars as points of light, a tripod is essential.
A starting exposure of approximately 10 to 30 seconds can be useful depending on the lens, focal length, aperture, ISO, and desired result.
However, the longer the shutter remains open, the greater the chance that the apparent movement of the stars caused by Earth’s rotation will become visible.
If you want to deliberately photograph star trails, much longer exposures or multiple exposures combined during post-processing can be used.
For brighter celestial subjects such as the moon, a much faster shutter speed may be appropriate because the moon reflects a significant amount of sunlight.
Waterfall Photography
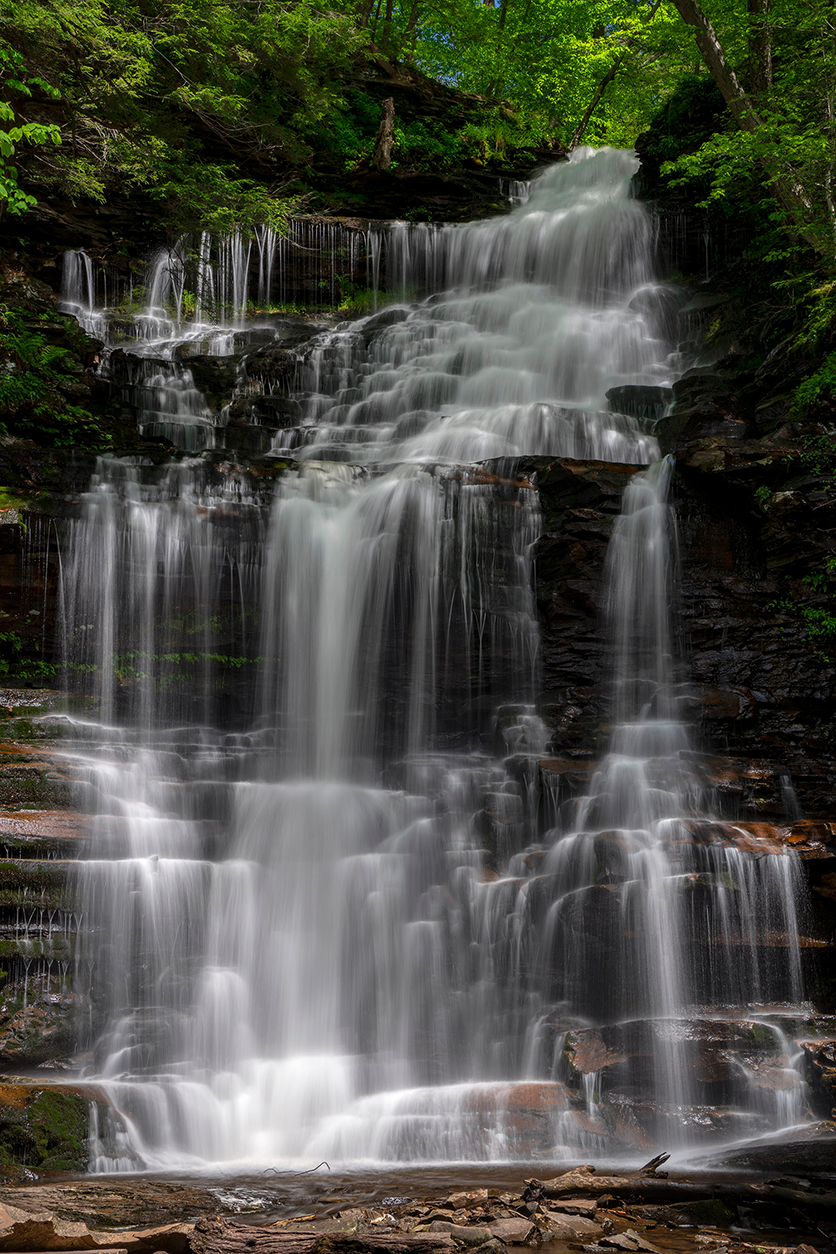
Waterfalls offer an excellent opportunity to experiment with both fast and slow shutter speeds.
If you want to freeze individual droplets and preserve the texture of the water, try a fast shutter speed such as 1/500 second or faster.
If you want a smooth, flowing appearance, try approximately 1/2 second or slower.
On a bright day, a slow shutter speed can allow too much light into the camera.
An ND filter, or neutral-density filter, can reduce the amount of light entering the lens and make longer exposures possible.
Panning Photography
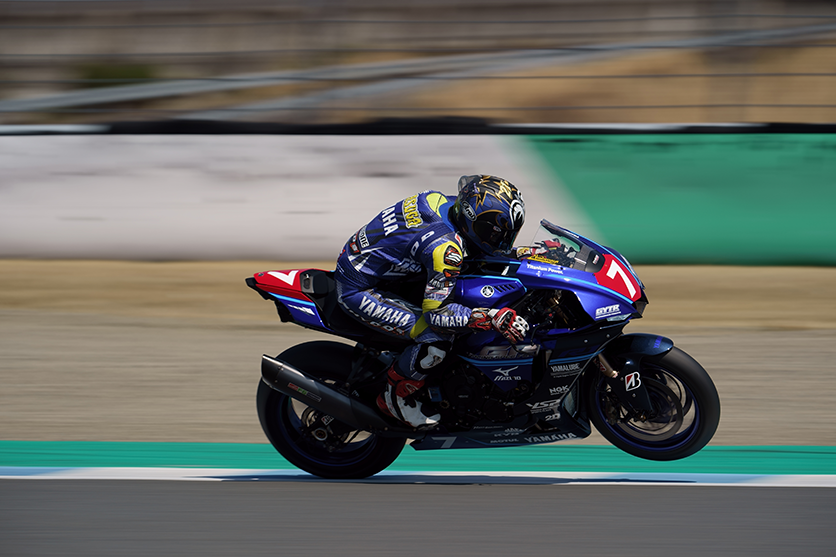
Panning is a technique where you move the camera along with a moving subject while taking the photograph.
When done successfully, the subject can remain relatively sharp while the background becomes blurred, creating a strong impression of movement.
Starting shutter speeds can vary depending on the subject:
- Pedestrians: around 1/30 second
- Runners and bicycles: around 1/60 second
- Cars and trains: around 1/125 to 1/250 second
These are only starting points. Faster subjects and different shooting distances may require different settings.
Panning requires practice, so start with a slower-moving subject before attempting faster action.
Light Trails
Long exposures can transform moving lights into colorful trails.
For example, when photographing traffic at night, an exposure of approximately 10 to 30 seconds can produce continuous light trails from passing vehicles.
Around 15 seconds can be a useful starting point, but the ideal exposure depends on traffic density and vehicle speed.
A tripod is essential for keeping the stationary parts of the scene sharp.
You can also experiment with rear-curtain sync when using flash to combine a sharply recorded moving subject with a trailing light effect.
Fireworks Photography
Fireworks also benefit from longer exposures because you want to capture the movement of the fireworks from launch through their burst.
An exposure of approximately 4 to 8 seconds can be a useful starting point.
A tripod is essential, and using a self-timer or remote shutter release can help reduce camera movement when pressing the shutter button.
Experiment with different exposure times depending on how frequently fireworks are launched and how many bursts you want to include in a single frame.
Shutter Speed for Video
Shutter speed is also important when recording video.
For common frame rates such as 24fps or 30fps, a shutter speed around 1/50 to 1/60 second is often used as a starting point for natural-looking motion.
Artificial lighting can introduce flicker depending on the electrical frequency of the environment.
For this reason, you may need to choose shutter speeds that work appropriately with the local power frequency and the type of lighting being used.
How to Choose the Right Shutter Speed
Rather than memorizing a single setting for every subject, ask yourself three questions:
1. Is the subject moving?
If yes, consider how quickly it is moving.
A bird in flight requires a very different shutter speed from a person sitting still.
2. Do I want to freeze or show movement?
If you want a sharp, frozen moment, increase the shutter speed.
If you want to emphasize movement, experiment with a slower shutter speed.
3. Am I shooting handheld?
If you’re shooting handheld, consider both camera shake and subject movement.
A longer focal length generally makes camera movement more noticeable, while image stabilization can provide additional assistance.
Balance Shutter Speed With Aperture and ISO
Changing shutter speed affects exposure, so you often need to adjust other settings to compensate.
For example, if you increase shutter speed from 1/250 to 1/1000 second, the sensor receives light for a much shorter period.
To maintain brightness, you may need to:
- Open the aperture
- Increase ISO
- Add light
Conversely, when you slow the shutter speed, you may need to reduce the amount of light entering the camera by narrowing the aperture or lowering ISO.
This interaction is why understanding the relationship between shutter speed, aperture, and ISO is essential for taking consistent photographs.
Use Shutter Speed as a Creative Tool
Shutter speed isn’t simply a technical setting used to obtain the correct exposure.
It is also a creative tool.
A fast shutter can reveal a moment that is difficult to see with the naked eye, such as a bird’s wings at the peak of flight or a drop of water suspended in the air.
A slow shutter can transform movement into lines and shapes, turning flowing water, traffic, fireworks, or moving subjects into an artistic element.
Once you understand the basic settings, try deliberately moving away from the “correct” shutter speed and see how the image changes.
Practice Different Shutter Speeds
The best way to understand shutter speed is to experiment.
Choose a moving subject and photograph it using several different settings:
- 1/30 second
- 1/60 second
- 1/125 second
- 1/250 second
- 1/500 second
- 1/1000 second
- 1/2000 second
Compare the results.
You’ll begin to see how movement changes as the shutter becomes faster or slower.
Then try the same exercise with a waterfall, moving vehicle, person walking, or nighttime scene.
The goal isn’t to memorize a fixed shutter speed for every situation. Instead, develop an understanding of how shutter speed changes the appearance of movement and how it interacts with aperture and ISO.
Final Thoughts
Shutter speed is one of the most powerful settings available to photographers.
A fast shutter speed can freeze action and reveal fleeting moments, while a slow shutter speed can transform movement into creative blur and light trails.
Start with the recommended values as guidelines, but don’t treat them as strict rules. The ideal shutter speed depends on your subject, lighting, focal length, camera movement, and the visual effect you want to create.
Once you become comfortable controlling shutter speed, you’ll have greater freedom to photograph everything from sports and wildlife to portraits, waterfalls, night scenes, fireworks, and starry skies.
The more you experiment, the easier it becomes to choose the right shutter speed instinctively—and to deliberately use it as part of your creative style.
2. Keep the Composition Simple
Close-up photographs can quickly become visually cluttered.
Look carefully at everything around your subject before pressing the shutter. Distracting leaves, bright objects, strong lines, or unrelated colors can compete with the main subject.
A simple background can make small subjects stand out more clearly.
You can also experiment with shooting from a low or diagonal angle. Changing your viewpoint can add depth and create a stronger relationship between the subject and background.
3. Use the Background as Part of the Image
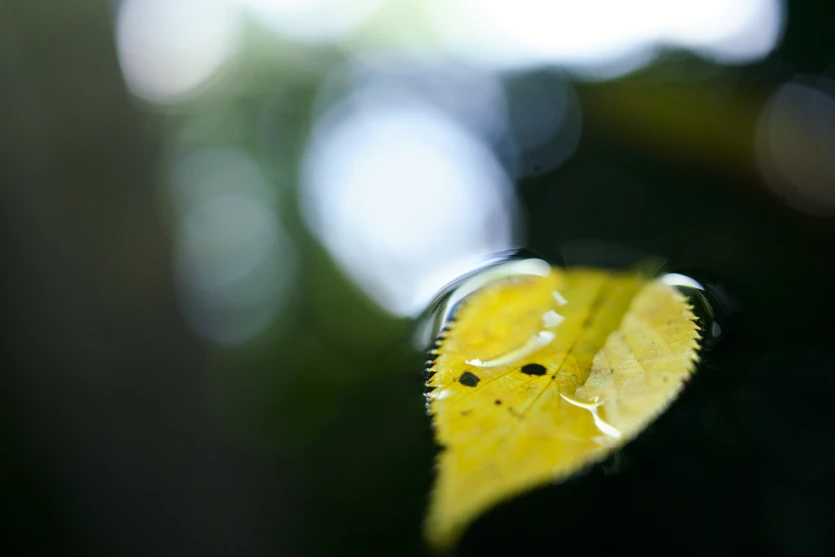
A blurred background doesn’t have to be empty.
Instead, use it to add color, atmosphere, or context.
When photographing flowers, for example, nearby flowers with similar colors can create a more cohesive background. When photographing insects, branches, leaves, or flowers can help communicate the insect’s natural environment.
This is one of the key strengths of half macro photography: you can capture detail without completely eliminating the surroundings.

4. Minimize Camera Shake
Small movements can become especially noticeable in close-up photography.
For handheld shooting, using a sufficiently fast shutter speed can help reduce the effects of camera shake. The original TAMRON guide suggests starting around 1/125 to 1/200 second or faster, depending on the shooting conditions and subject. A tripod can provide additional stability, particularly in low-light situations or when you are working with extremely fine details.
5. Pay Attention to Light
Lighting can dramatically change the appearance of a close-up subject.
Side lighting can emphasize contours and texture, creating a stronger sense of depth. Backlighting can highlight edges and translucent subjects such as flower petals.
Front lighting can produce more even illumination and preserve colors and textures, although it may create a flatter appearance.
Try changing your shooting position rather than relying only on camera settings. Moving around the subject can change both the direction of light and the relationship between the subject and background.
You Can Use a Half Macro Lens Beyond Macro Photography
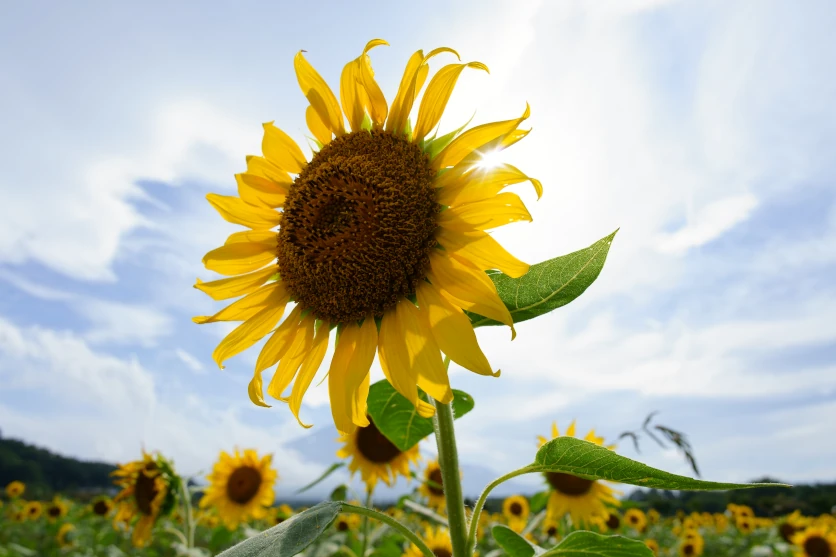
One of the benefits of some half macro lenses is that they can also function effectively as everyday prime lenses.
For example, a 35mm half macro lens can be used for portraits, snapshots, landscapes, and other everyday subjects in addition to close-up photography.
The TAMRON 35mm F/2.8 Di III OSD M1:2 (Model F053) combines a 35mm focal length, F/2.8 maximum aperture, and 1:2 close-up capability. Its specifications make it useful not only for close-up subjects but also for everyday photography where a natural perspective and shallow depth of field are desirable.
This versatility can be useful if you don’t want a lens that is limited to one specific type of photography.
What to Look for When Choosing a Half Macro Lens
If you’re considering a half macro lens, maximum magnification is only one specification to examine.
Maximum Magnification
First, consider how much magnification you actually need.
A 1:1 macro lens is better suited to situations where maximum detail and magnification are the priority. A 1:2 lens can be a better fit when you want to combine close-up detail with more of the surrounding scene.
Minimum Object Distance
Check the lens’s minimum object distance to understand how close you can get to your subject while maintaining focus.
A shorter minimum object distance can provide greater flexibility when composing close-up photographs.
Focal Length
Focal length affects both your field of view and the way your subject relates to the background.
Wider focal lengths can include more of the environment, while longer focal lengths can provide tighter framing and stronger background separation.
Choose a focal length based on the type of subjects and compositions you expect to photograph.
Maximum Aperture
A wider maximum aperture, such as F/2.8, can be useful in lower-light situations and can also help create stronger background blur.
However, remember that depth of field can become very shallow when shooting close to your subject. Depending on the scene, stopping down the aperture can help keep more of the subject in focus.
Size and Weight
If you plan to carry the lens during travel, street photography, or everyday shooting, size and weight can be important considerations.
A compact lens can make spontaneous close-up photography easier because you’re more likely to have it with you when an interesting subject appears.
Autofocus Performance
Autofocus performance can be important when photographing moving subjects such as insects.
Look for a lens that can focus smoothly and accurately for the type of subjects you regularly photograph. Quiet autofocus can also be useful when photographing subjects that may be easily disturbed.
Image Stabilization
Image stabilization can be helpful when shooting handheld, particularly in situations where you need to use slower shutter speeds.
However, stabilization does not replace good technique. Pay attention to your shutter speed, shooting position, and subject movement to achieve consistently sharp images.
Half Macro vs. 1:1 Macro: Which Should You Choose?
The choice ultimately comes down to the type of photographs you want to create.
Choose a 1:1 macro lens when you want to emphasize extremely fine details and photograph small subjects at high magnification.
Consider a 1:2 half macro lens when you want to capture close-up details while retaining more of the surrounding environment. This can be especially effective for flowers, insects, tabletop subjects, street details, and everyday objects.
Half macro photography is not simply about getting closer to a subject. It is about finding a balance between detail and context.
By carefully controlling focus, composition, background, lighting, and camera stability, you can create close-up photographs that show not only what your subject looks like, but also something about the environment around it.
Explore More with Half Macro Photography
Half macro lenses open up a different way of seeing everyday subjects. Flowers, insects, food, objects, and even ordinary street details can become compelling photographic subjects when viewed from a closer perspective.
Whether you’re just beginning to explore macro photography or looking for a versatile lens that can handle both close-ups and everyday shooting, understanding the difference between 1:1 and 1:2 magnification can help you choose the right approach.
Start by looking closely at the subjects around you. You may find that there’s an entire world of detail waiting to be photographed.
TAMRON products mentioned in this article