Why Are My Photos Blurry? Common Focus Problems and How to Fix Them
Getting a sharp photograph is one of the fundamentals of photography. Whether you’re photographing people, landscapes, wildlife, sports, or everyday subjects, accurate focus can make the difference between a clear, detailed image and one that looks soft or blurry.
However, getting sharp photos isn’t always as simple as pressing the shutter button.
Your camera may focus on the wrong part of the scene, your shutter speed may be too slow, the subject may be moving, or you may be too close for the lens to focus properly. In some situations, autofocus may also struggle because of the lighting or the characteristics of the subject.
Understanding why photos become blurry or out of focus makes it much easier to correct the problem.
In this guide, we’ll look at the most common photography focus problems and explain how to adjust your camera settings and shooting technique to capture sharper images.

What Does “In Focus” Mean?
A photograph is considered in focus when the intended subject appears sharp and its important details are clearly defined.
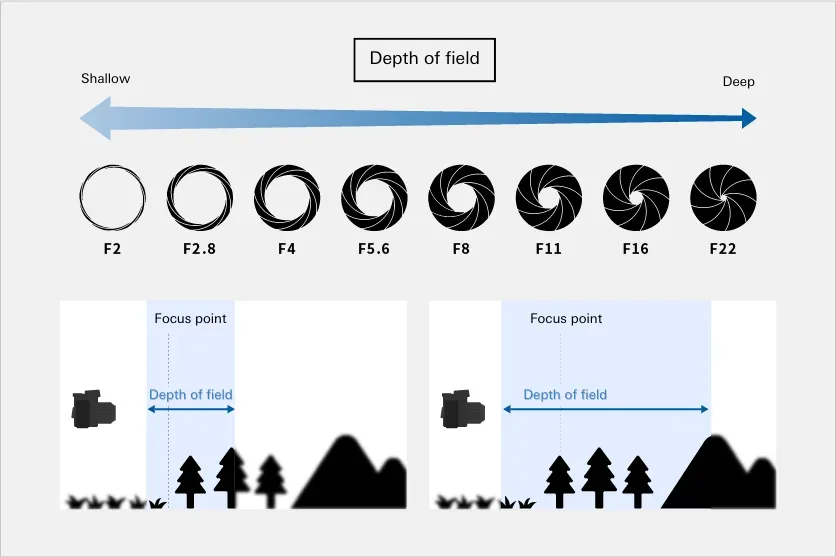
Technically, the camera focuses on a particular plane. However, an area in front of and behind that plane can also appear acceptably sharp. This area is known as the depth of field.
Depth of field is affected by several factors, including:
- Aperture
- Focal length
- Shooting distance
- Sensor format
- Distance between the subject and background
A wider aperture, such as F2.8, generally produces a shallower depth of field, while stopping the lens down to a smaller aperture such as F8 can increase the area that appears sharp.
Depth of field can become particularly shallow when you’re shooting close to your subject or using a telephoto lens.
This can be useful when you want strong background blur, but it also means that accurate focusing becomes more important.
It’s also worth remembering that not every blurred area in a photograph is a focusing mistake.
Photographers often intentionally use background blur, shallow depth of field, or motion blur as creative techniques.
The goal isn’t to make everything sharp. The goal is to make sure the part of the image you want the viewer to notice is sharp.
Why Are My Photos Blurry or Out of Focus?
There are several possible reasons why your photographs may not look sharp.
Before changing your camera settings, try to identify what type of blur you’re seeing.
1. The Camera Focused on the Wrong Subject
One of the most common focus problems occurs when the camera focuses on something other than your intended subject.
This can happen when there are multiple objects in the frame or when you’re using an automatic AF area that allows the camera to decide what to focus on.
For example, imagine photographing a person standing behind a fence.
The camera may focus on the fence instead of the person’s face.
The result is a technically focused photograph, but the important subject appears blurry.
How to fix it
Try using a smaller or more specific AF area when precision is important.
For portraits, use Face Detection or Eye AF when available.
For still subjects, a single-point or similarly precise AF area can give you more control over exactly where the camera focuses.
2. Your Depth of Field Is Too Shallow
A shallow depth of field can create beautiful background blur, but it also leaves less room for focusing errors.
This is especially noticeable when photographing:
- Portraits
- Flowers
- Macro subjects
- Small objects
- Close-up details
- Wildlife with long telephoto lenses
For example, when photographing a person at F2.8, the eyes may be sharp while the ears or nose are already becoming softer.
How to fix it
If you’re having difficulty keeping enough of your subject sharp, try stopping down the aperture.
For example, instead of F2.8, try:
F4 → F5.6 → F8
The appropriate aperture depends on the subject and desired appearance, but stopping down can provide a larger depth of field.
Keep in mind that a smaller aperture also reduces the amount of light reaching the sensor, so you may need to compensate with shutter speed or ISO.
3. Camera Shake Is Making the Image Blurry
Sometimes the focus is actually correct, but the entire photograph looks soft because the camera moved while the shutter was open.
This is called camera shake.
Camera shake becomes particularly noticeable when using:
- Slow shutter speeds
- Telephoto lenses
- Low-light conditions
- Heavy lenses
- Handheld shooting
A useful starting point is the traditional 1/focal-length guideline.
For example, when shooting with a 200mm lens, you might start around 1/200 second or faster when shooting handheld.
However, this is only a guideline. Your actual needs depend on your camera, lens, stabilization system, shooting technique, and subject.
How to reduce camera shake
Try the following:
- Increase your shutter speed.
- Hold the camera firmly with both hands.
- Keep your elbows close to your body.
- Maintain a stable stance.
- Use a tripod for stationary subjects.
- Use image stabilization or vibration compensation when appropriate.
- Increase ISO if you need a faster shutter speed.
If you’re still seeing blur, try a faster shutter speed and compare the results.
4. Your Subject Is Moving
Camera shake isn’t the only source of motion blur.
If your subject moves while the shutter is open, the subject itself can become blurred.
This is particularly common when photographing:
- Sports
- Wildlife
- Children
- Pets
- Vehicles
- Birds
- Performances
In these situations, simply changing the AF mode may not be enough. You also need an appropriate shutter speed.
How to fix motion blur
Use a faster shutter speed to freeze movement.
For example:
- 1/125 sec: slower movement
- 1/250 sec: moderate movement
- 1/500 sec: faster action
- 1/1000 sec or faster: very fast movement
These aren’t fixed rules, but they provide useful starting points.
For moving subjects, combine an appropriate shutter speed with Continuous AF so that the camera can continue adjusting focus as the subject moves.
5. Autofocus Is Turned Off
This sounds obvious, but it’s surprisingly easy to overlook.
If either your camera or lens is set to manual focus, autofocus won’t operate as expected.
Depending on your camera and lens combination, check that:
- The camera is set to AF.
- The lens is set to AF.
- The lens is properly attached.
- The camera has sufficient battery power.
- There are no settings preventing autofocus operation.
If the lens has an AF/MF switch, make sure it is in the correct position for the way you want to shoot.
6. You’re Too Close to the Subject
Every lens has a minimum focusing distance.
If you move closer than the lens allows, the camera won’t be able to achieve focus even if the subject is directly in front of the lens.
This can be especially confusing when photographing small objects.
You may keep pressing the shutter button, but the camera simply refuses to focus.
How to fix it
Move slightly farther away from the subject.
If you regularly photograph small objects or details, consider using a lens with a shorter minimum focusing distance or a dedicated macro lens.
A macro lens is specifically designed for close-up photography and can make it much easier to capture small subjects and fine details.
7. The Subject Is Difficult for Autofocus to Detect
Autofocus systems work best when they have enough visual information to identify an area to focus on.
Subjects with strong contrast are generally easier to focus on than subjects with very little contrast.
AF can struggle with things such as:
- Plain white walls
- Clear blue skies
- Very dark subjects
- Low-contrast surfaces
- Fine repetitive patterns
- Extremely dark scenes
- Heavy backlighting
For example, if you point your camera at a completely blank wall, there may not be enough contrast for the AF system to confidently determine where to focus.
How to fix it
Try focusing on an area with stronger contrast.
You can also:
- Change your shooting angle.
- Add light if appropriate.
- Move the AF point to a more detailed area.
- Use focus lock.
- Switch to manual focus.
Choosing the Right Autofocus Mode
Modern cameras provide several autofocus modes, and choosing the appropriate one can make a significant difference.
Single AF
Single AF is useful for subjects that aren’t moving.
It works well for:
- Landscapes
- Architecture
- Still life
- Products
- Flowers
- Food
- Many types of macro photography
The camera focuses once and maintains that focus until you refocus.
This gives you greater control when your subject isn’t moving.
Continuous AF
Continuous AF is designed for moving subjects.
The camera continually adjusts focus as the subject moves.
It is particularly useful for:
- Sports
- Wildlife
- Birds
- Children
- Pets
- Vehicles
For action photography, combine Continuous AF with an appropriate shutter speed and, when useful, burst shooting.
Automatic AF
Automatic AF allows the camera to determine what it thinks should be the main subject.
This can be convenient when you need to photograph quickly.
However, the camera’s choice may not always match your intention.
If there are multiple subjects or distracting foreground elements, consider switching to a more controlled AF area.
Choosing the Right AF Area
The AF mode determines how the camera behaves when focusing, while the AF area determines where the camera looks for the subject.
Different cameras use different terminology, but common options include:
- Single-point AF
- Wide-area AF
- Zone AF
- Tracking AF
- Face Detection
- Eye AF
Single-Point AF
Single-point AF gives you precise control over where the camera focuses.
It’s useful when photographing a stationary subject where you know exactly which part should be sharp.
For example, when photographing a flower, you can place the focus point directly over the part of the flower you want to emphasize.
Wide-Area AF
Wide-area AF allows the camera to search across a larger portion of the frame.
This can be useful when photographing subjects that move unpredictably.
For example, it can help when photographing children or pets that don’t remain in one place.
Zone AF
Zone AF provides a balance between precision and tracking.
You select a particular area of the frame, and the camera searches within that zone.
This can be useful for sports and wildlife photography when you know approximately where your subject will appear.
Face Detection and Eye AF
Face Detection and Eye AF are particularly useful for people photography.
Rather than manually placing an AF point over the subject’s face, the camera can detect the face and, on supported cameras, prioritize the eye.
This is especially useful for portraits because the eyes are often the most important area to keep sharp.
Use Focus Lock When You Need a Specific Composition
Sometimes you want your subject to be positioned away from the center of the frame.
Focus lock can help.
A common technique is:
- Position the focus point over your subject.
- Activate autofocus.
- Lock the focus.
- Recompose the photograph.
- Take the picture.
This allows you to focus on the subject first and then create your desired composition.
However, be careful when using this technique with a very wide aperture or extremely shallow depth of field.
Recomposing after focusing can slightly change the distance between the camera and subject, which may move the subject outside the sharpest part of the depth of field.
When depth of field is extremely shallow, placing the AF point directly over the intended area can be more reliable.

Use Live View to Check Focus
Live View can be extremely useful when precise focus is important.
This is particularly helpful for:
- Macro photography
- Landscapes
- Product photography
- Still life
- Architecture
Many cameras allow you to magnify the Live View image so you can inspect fine details.
For example, when photographing a flower, you can magnify the image and check whether the center of the flower or individual petals are actually sharp.
This is often much more reliable than judging focus from the full-frame image alone.
When Should You Use Manual Focus?
Autofocus is extremely useful, but there are situations where manual focus can give you greater control.
Consider switching to manual focus when:
- AF repeatedly focuses on the wrong area.
- The subject has very little contrast.
- You’re photographing through glass or a fence.
- You’re doing precise macro photography.
- You’re shooting in extremely dark conditions.
- You want complete control over the focus point.
Many mirrorless cameras offer focus magnification and focus peaking, which can make manual focusing much easier.
A simple manual focus technique
Turn the focus ring slowly while watching the subject.
Find the point where the important detail appears sharpest.
If your camera provides focus peaking, use it as an additional guide, then fine-tune the focus manually.
Focus Tips for Different Types of Photography
The best focus technique depends on what you’re photographing.
Portrait Photography
For portraits, the eyes are usually the most important point of focus.
If your camera has Eye AF, use it when appropriate.
A wide aperture such as F2 or F2.8 can create attractive background separation, but remember that the depth of field may become very shallow.
If you find that only one eye is sharp when you want more of the face in focus, try stopping down slightly.

Landscape Photography
Landscape photography often requires a greater depth of field.
A starting point around F8 to F11 can be useful, depending on the scene.
Use a stable shooting position or tripod when necessary and carefully choose where to focus.
Live View magnification can also help you check important foreground and background details.

Sports Photography
Sports photography requires both accurate autofocus and fast shutter speeds.
Use Continuous AF to track moving subjects.
Depending on the scene, experiment with different AF areas.
A smaller AF area can be useful when following a single athlete, while a larger zone can be helpful when the action is unpredictable.
Burst shooting can also increase your chances of capturing the decisive moment.

Wildlife Photography
Wildlife photography often combines long focal lengths, subject movement, and challenging lighting.
Use Continuous AF when tracking moving animals.
Eye or subject detection can also be useful when supported by your camera.
Because telephoto lenses can produce a shallow depth of field, pay close attention to where the camera places focus.
A fast enough shutter speed is also important for preventing movement from making an otherwise correctly focused photograph appear blurry.
Low-Light Photography
Autofocus can become more difficult when there isn’t enough light.
Try focusing on an area with stronger contrast.
If autofocus continues to struggle, consider manual focus and use your camera’s focus magnification or focus-peaking features if available.
A wider-aperture lens can also be useful in low-light conditions because it allows more light to reach the camera sensor.

Close-Up and Macro Photography
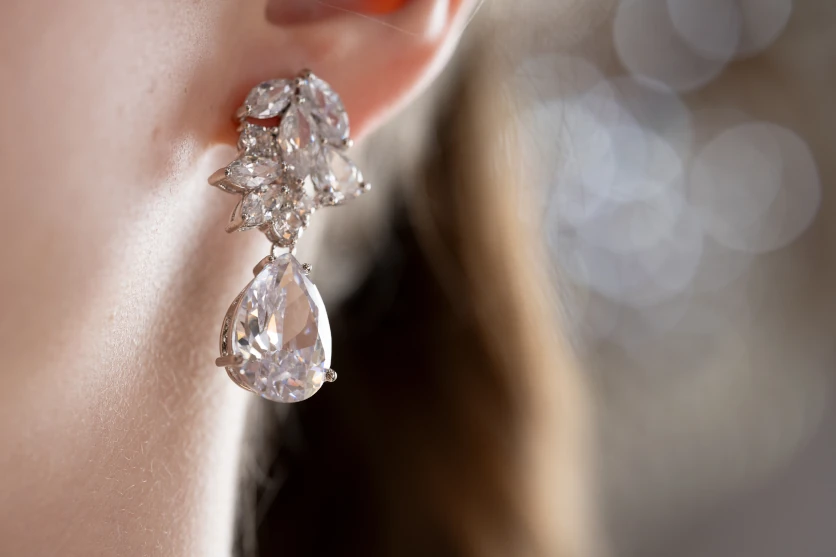
Close-up photography presents a unique focus challenge because the depth of field can become extremely shallow.
A tiny change in camera position can move the focus away from the intended detail.
When possible:
- Use a tripod.
- Use a precise AF area.
- Try manual focus.
- Magnify the Live View display.
- Stop down the aperture when you need more depth of field.
- Use an appropriate macro or close-focusing lens.
For extremely detailed subjects, careful focusing can be just as important as lens sharpness.
How Your Lens Affects Focus
Your lens choice can influence how easy it is to achieve sharp focus.
When choosing a lens, consider more than just focal length.
Focal Length
Different focal lengths provide different perspectives and working distances.
Wide-angle lenses
Wide-angle lenses are useful for:
- Landscapes
- Architecture
- Environmental photography
- Travel photography
They can provide a broad field of view and, depending on the shooting conditions, make it easier to keep a larger area of the scene within the depth of field.
Standard lenses
Standard focal lengths provide a natural perspective and are useful for everyday photography, portraits, travel, and street photography.
Telephoto lenses
Telephoto lenses are useful when you need to photograph distant subjects.
They’re particularly useful for:
- Wildlife
- Sports
- Events
- Birds
- Distant details
However, longer focal lengths can make camera movement more noticeable, so shutter speed and stabilization become increasingly important.
Aperture and Focus
Aperture affects both exposure and depth of field.
A larger maximum aperture, such as F2 or F2.8, allows more light into the camera and can produce a shallower depth of field.
This can be useful for portraits and low-light photography.
However, if you’re struggling to keep your subject sharp, stopping down the aperture can increase the depth of field.
The best aperture depends on the photograph you want to create.
Minimum Focusing Distance
Minimum focusing distance is particularly important when photographing close subjects.
If your subject is closer than the lens’s minimum focusing distance, the lens won’t be able to focus.
If close-up photography is important to you, look for lenses that provide a useful minimum focusing distance and, where appropriate, high maximum magnification.
For dedicated close-up work, a macro lens can provide even greater control over small subjects.
Autofocus Performance
Autofocus performance matters when photographing moving subjects.
A lens with fast and accurate autofocus can help the camera maintain focus as your subject moves.
This is particularly important for:
- Sports
- Wildlife
- Birds
- Children
- Events
However, autofocus performance depends on the combination of the camera, lens, subject, lighting, and selected AF settings.
Good autofocus equipment still benefits from appropriate camera settings and shooting technique.
A Simple Checklist for Sharper Photos
If your photographs aren’t as sharp as expected, go through this checklist before changing equipment.
Before shooting:
1. Is autofocus enabled?
Check both the camera and lens.
2. Is the camera focusing on the correct subject?
Choose an appropriate AF area.
3. Is the subject moving?
If yes, consider Continuous AF and a faster shutter speed.
4. Is the shutter speed fast enough?
Increase it if you see camera shake or motion blur.
5. Are you too close?
Check the lens’s minimum focusing distance.
6. Is the depth of field too shallow?
Try stopping down the aperture.
7. Is the lighting too dark or low contrast?
Try a higher-contrast focus point or manual focus.
8. Are you using the right lens for the situation?
Consider focal length, minimum focusing distance, aperture, and autofocus performance.
Practice Makes Focusing Easier
Understanding camera focus settings is important, but practical experience is just as valuable.
Try photographing the same subject using different combinations of:
- AF modes
- AF areas
- Apertures
- Shutter speeds
- Focal lengths
- Shooting distances
Then compare your results.
You’ll quickly begin to understand how small changes in camera settings affect sharpness and depth of field.
Most importantly, don’t assume that every blurry photograph means your lens or camera has a problem.
Sometimes the issue is simply an inappropriate shutter speed, an AF area that is too broad, an aperture that produces too little depth of field, or a subject that is too close.
Once you learn to identify the cause, correcting the problem becomes much easier.
Master Your Focus, One Scene at a Time
Sharp photographs begin with understanding what you want to keep in focus.
Choose the appropriate AF mode for your subject, control your AF area, use a suitable shutter speed, and pay attention to depth of field.
When autofocus struggles, don’t be afraid to use manual focus.
And when photographing close subjects, remember to check your lens’s minimum focusing distance.
With practice, you’ll become more confident in choosing the right focus settings for portraits, landscapes, sports, wildlife, macro photography, and everyday shooting.
The result isn’t simply more photographs that are sharp—it’s greater control over what the viewer notices first in your image.
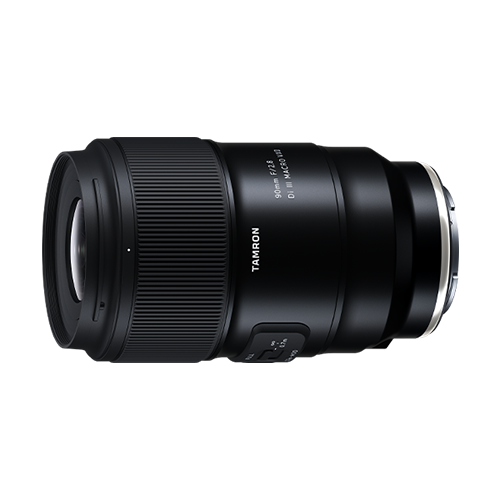
TAMRON products mentioned in this article