Wild Bird Photography Tips: How to Photograph Birds and Choose the Right Lens
Wild birds can be fascinating subjects to photograph. Their colors, shapes, behavior, and movements provide countless opportunities for creating unique images.
However, photographing wild birds is also challenging.
Unlike subjects that remain in one place, birds can move suddenly, fly away without warning, and appear in difficult lighting conditions. Small birds can be particularly difficult to photograph because they are easily startled and may remain far away from the photographer.
This makes preparation and patience important parts of wild bird photography.
Choosing an appropriate telephoto lens can help you photograph birds from a comfortable distance, while the right autofocus settings can make it easier to track their movements. Shutter speed also plays an important role, particularly when photographing birds in flight.
At the same time, bird photography isn’t only about capturing technically sharp photographs. Observing the bird’s behavior, understanding its environment, and anticipating what it might do next can help you capture more natural and interesting moments.
In this guide, we’ll explore how to photograph birds in the wild, including how to choose a bird photography lens, recommended camera settings, autofocus techniques, composition ideas, and tips for photographing different types of birds.
We’ll also discuss responsible bird-photography practices so you can enjoy photographing birds without disturbing them or their environment.
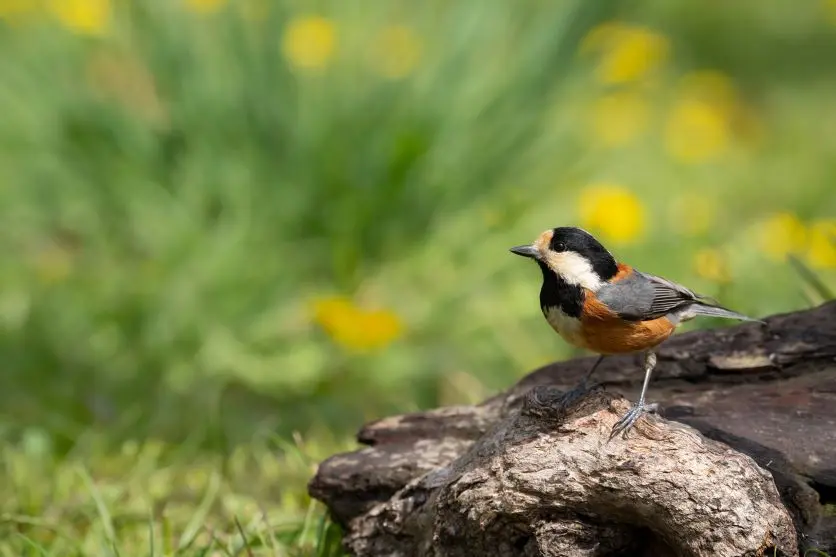
What Makes Wild Bird Photography Challenging?
Birds are often cautious around people.
Even when a bird appears to be sitting still, it may fly away if you approach too quickly.
Birds can also move unpredictably. A bird that has been sitting on a branch for several minutes can suddenly take flight, change direction, or disappear behind vegetation.
This makes anticipation an important part of bird photography.
Instead of simply reacting to movement, observe the bird before taking photographs.
Watch where it looks.
Pay attention to the direction of its body.
Look for repeated behaviors.
If a bird repeatedly returns to the same branch, for example, you can prepare your composition and focus before it returns.
This allows you to spend less time searching for the bird through the viewfinder and more time concentrating on the moment you want to capture.
Choose the Right Lens for Bird Photography
Lens selection is one of the most important considerations when photographing wild birds.
Because birds are often far away, a telephoto lens allows you to fill more of the frame without approaching the subject.
A focal length of 400mm or longer can be particularly useful for photographing distant wild birds. A longer focal length lets you maintain a greater working distance while still capturing details such as feathers, eyes, and facial expressions.
However, you don’t always need the longest lens available.
The ideal focal length depends on the size of the bird, how close you can get, and the environment in which you’re photographing.
Why a Telephoto Lens Is Useful
A telephoto lens provides a narrower angle of view than a wide-angle lens.
This allows you to isolate a bird from its surroundings.
For example, a bird sitting high in a tree may appear very small when photographed with a wide-angle lens.
With a 500mm or 600mm lens, you can fill much more of the frame with the bird.
A telephoto lens also allows you to maintain distance.
This is important because getting too close can disturb the bird and cause it to leave.
The longer focal length therefore isn’t only about magnification. It also allows you to photograph the bird while respecting its space.
Ultra-Telephoto Lenses for Wild Birds
For photographers who regularly photograph distant birds, an ultra-telephoto lens can be extremely useful.
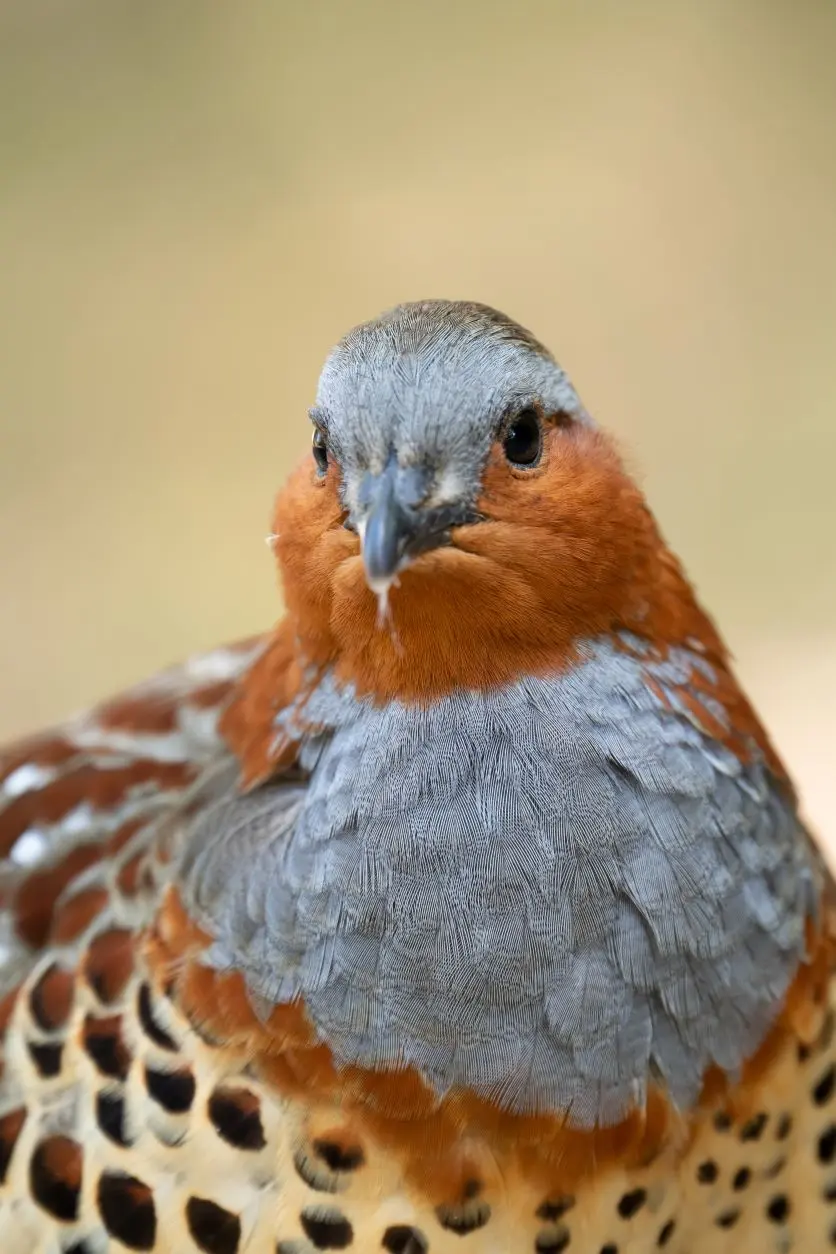
Lenses reaching 400mm, 500mm, or 600mm provide substantial reach.
This is particularly helpful when photographing:
- Small birds
- Birds high in trees
- Birds across lakes
- Birds in open fields
- Birds in flight
- Distant wildlife
A longer focal length can also help create a narrow field of view and isolate the bird against a soft background.
Medium Telephoto Lenses Can Also Be Useful
Long lenses aren’t the only option.
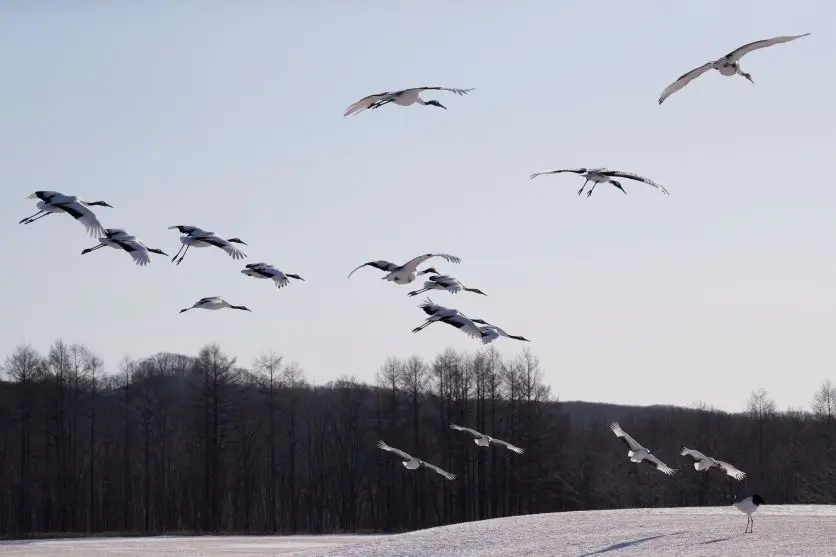
Instead of filling the entire frame with the bird, leave some space around it.
This can be especially effective when photographing:
- Flocks of birds
- Birds surrounded by foliage
- Birds standing beside water
- Birds against mountains
- Birds in large open spaces
Showing the environment can provide context and create a stronger sense of place.
TAMRON’s bird photography guidance similarly recommends using different focal lengths depending on whether the goal is a detailed bird portrait or a wider environmental composition.
Consider the Camera’s Sensor Size
Your camera’s sensor size also affects the angle of view.
When the same focal length is used on a full-frame and APS-C camera, the APS-C camera provides a narrower field of view.
This can be useful when photographing distant birds because the subject can occupy more of the frame.
However, the actual focal length of the lens does not change.
The difference is in the field of view produced by the camera and lens combination.
If you’re photographing small birds at long distances, understanding this relationship can help you decide which camera and lens combination fits your needs.
Other Useful Equipment for Bird Photography
A telephoto lens is only one part of a bird-photography setup.
Tripod
A tripod can be useful when using a large telephoto lens for extended periods.
It provides additional stability and can make it easier to hold a consistent composition while waiting for a bird to appear.
However, a tripod can restrict movement.
If a bird suddenly flies in a different direction, it may take longer to reposition the camera.
For this reason, a tripod can be particularly useful when you’re waiting for a predictable behavior or photographing birds from a fixed position.
Monopod
A monopod can provide some of the support of a tripod while allowing greater freedom of movement.
It can be useful when carrying a larger telephoto lens for a long period.
Binoculars
Binoculars can be surprisingly useful.
Before taking photographs, use them to locate birds and observe their behavior.
You can learn where they are moving, where they tend to perch, and what they do before taking flight.
This information can help you anticipate the next photograph.
Recommended Camera Settings for Bird Photography
There is no single camera setting that works for every bird-photography situation.
The ideal settings depend on whether the bird is stationary, walking, taking off, flying, or interacting with another bird.
Shutter speed is particularly important because even a stationary bird can make small movements.
Use Shutter Priority for Moving Birds
Shutter Priority mode can be a useful starting point for bird photography.
You select the shutter speed while the camera determines an appropriate aperture.
This allows you to prioritize motion control.
For example, when photographing a bird in flight, you can choose a fast shutter speed to reduce motion blur.
When photographing a stationary bird, you can use a slower shutter speed if lighting conditions permit.
TAMRON’s bird-photography guidance also recommends Shutter Priority as a practical starting point for fast-moving birds.
Shutter Speed for Birds in Flight
Birds in flight require particularly fast shutter speeds.
A setting around 1/2000 to 1/3000 second can be useful when your goal is to freeze rapid wing movement.
However, don’t treat these values as fixed rules.
A larger bird gliding through the air may require a different shutter speed from a small bird rapidly flapping its wings.
The direction of movement also matters.
Experiment with your shutter speed and review the results.
Shutter Speed for Stationary Birds
When photographing a bird sitting on a branch, you can generally use a slower shutter speed.
Depending on the bird’s movement, focal length, and stabilization, approximately 1/200 to 1/800 second may be sufficient in many situations.
However, remember that a bird may move its head, wings, or body even when it appears stationary.
If the bird is actively moving, increase the shutter speed.
Use a Wide Aperture When Light Is Limited
A wide aperture allows more light to reach the sensor.
This can be useful when you’re using a fast shutter speed in cloudy conditions, early morning, late afternoon, or shaded environments.
A wide aperture can also create a soft background that separates the bird from its surroundings.
However, extremely shallow depth of field can make it more difficult to keep the entire bird sharp.
Use a Smaller Aperture for More Detail
An aperture around F5.6 to F10 can provide greater depth of field and make it easier to keep more of the bird in focus.
This can be useful when photographing a relatively stationary bird.
However, if you need a very fast shutter speed, you may need to open the aperture to maintain sufficient exposure.
The important thing is to balance aperture, shutter speed, and ISO according to the situation.
Adjust ISO as Needed
Bird photography often requires fast shutter speeds.
As a result, ISO may need to be increased, particularly when photographing birds in shaded environments.
ISO 1600 or 3200—or higher—may sometimes be necessary.
Higher ISO can introduce noise, but a sharp photograph at a higher ISO is generally preferable to a blurred photograph caused by an insufficient shutter speed.
In bright sunlight, lower ISO settings can help preserve detail and image quality.
Use Continuous Autofocus
Continuous autofocus, commonly called AF-C, is useful when photographing moving birds.
The camera continuously adjusts focus as the subject changes position.
This can be particularly helpful when photographing birds in flight.
Instead of focusing once and waiting, the camera can continue tracking the subject as it moves.
If your camera provides bird or animal subject detection, you can also experiment with those features.
The exact names and capabilities vary between camera systems, so check your camera’s manual for the available autofocus modes.
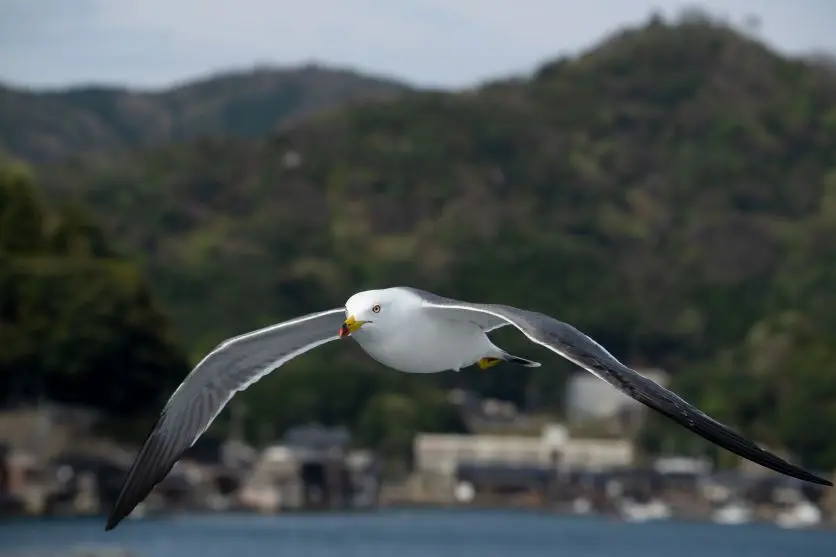
Choose the Right Focus Area
Your focus-area setting can make a significant difference.
Zone AF for Birds in Flight
A zone focus area can give the camera enough space to detect and follow a bird moving unpredictably through the frame.
This can be useful for birds in flight.
The larger focus area gives you more flexibility when tracking a moving subject.
Smaller Focus Areas for Birds Among Branches
A smaller focus area can be more useful when photographing a bird surrounded by branches and leaves.
If you use a large focus area, the camera may focus on a nearby branch instead of the bird.
A smaller focus area allows you to target the bird more precisely.
This can be particularly useful for small birds that appear between branches.
Focus on the Bird’s Eye
The eyes are one of the most important areas to keep sharp.
When photographing a bird’s face, try to place focus on the eye.
A sharp eye can make the photograph feel much more engaging.
This can be challenging with small birds, particularly when they’re moving.
Anticipate the bird’s behavior and begin focusing slightly before the moment you expect to photograph.
If your camera supports bird-eye or animal-eye detection, try it and see how reliably it works with the species and environment you’re photographing.

Use Continuous Shooting
Birds can change position in a fraction of a second.
Continuous shooting allows you to capture several frames during an action.
This can be useful when:
- A bird takes flight
- A bird lands
- A bird spreads its wings
- A bird catches food
- Two birds interact
- A bird shakes its feathers
- A bird dives into water
Don’t simply hold the shutter continuously for every situation.
Instead, use short bursts when you anticipate an important moment.
This makes it easier to review your photographs afterward and reduces unnecessary images.
Composition Tips for Wild Bird Photography
Technical settings are only part of creating a strong bird photograph.
Composition can change how the viewer experiences the image.
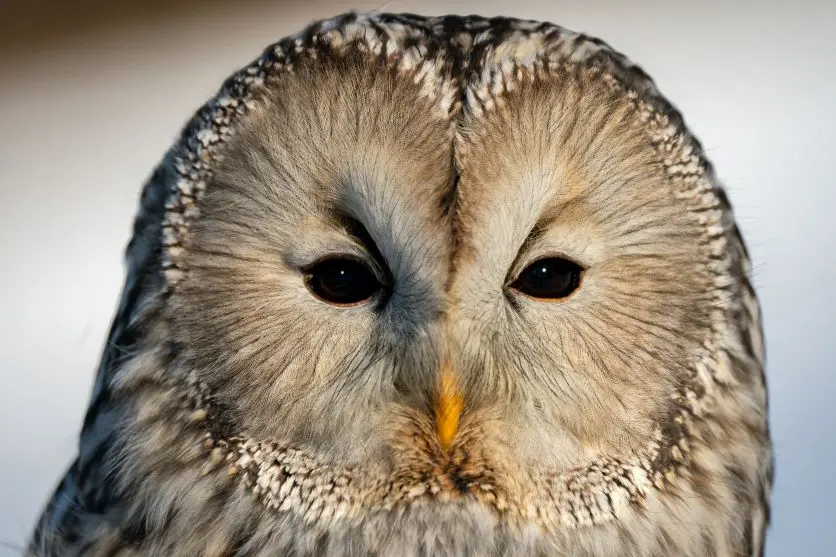
Try a Centered Composition
Placing the bird in the center of the frame can work well when you want to emphasize its appearance.
This approach is particularly useful for bird portraits.
A soft background can help make the centered subject stand out.
Although centered compositions are sometimes considered simple, they can be effective when the subject itself is visually strong.
Use the Rule of Thirds
The rule of thirds can help create a more balanced environmental photograph.
Place the bird near one of the intersections created by dividing the frame into thirds.
Then leave space around the bird.
For example, if the bird is looking toward the left, place it toward the right side of the frame and leave more space in front of its gaze.
This can make the photograph feel more natural.
Leave Space in the Direction of Flight
When photographing a bird in flight, consider where the bird is going.
Leave some empty space in front of it.
This gives the photograph a sense of movement and direction.
If the bird is flying toward the right side of the frame, for example, leaving space on the right can make the composition feel more open.

Try Diagonal Composition
A diagonal composition can add energy to a photograph.
This works particularly well with birds in flight.
If the bird is moving diagonally through the frame, position it so that its direction of movement creates a visual line.
This can emphasize speed and dynamism.
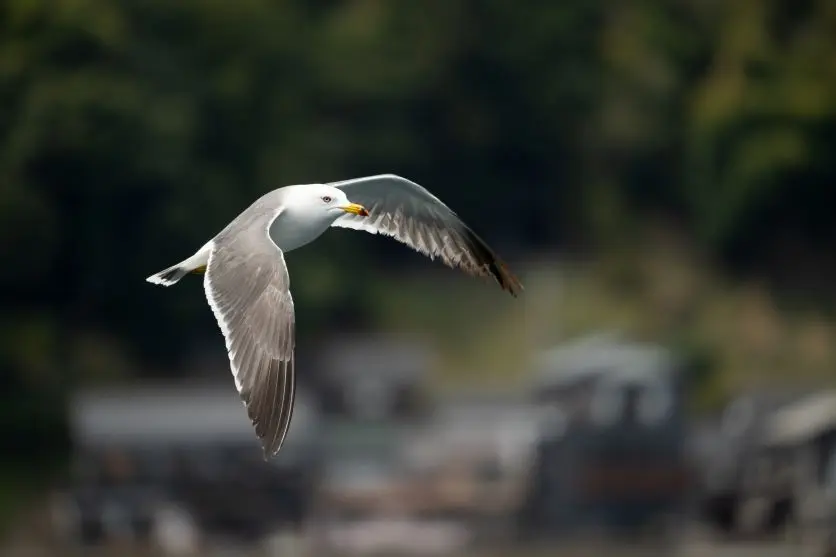
Show the Bird’s Environment
Don’t feel that every bird photograph needs to be a tight portrait.
Sometimes the environment is an important part of the story.
A bird standing beside a lake, sitting in a forest, or flying over a mountain landscape can communicate more about its habitat.
Use a shorter focal length when you want to include more of the environment.
How to Photograph Different Types of Birds
Different birds and situations require different approaches.
Photographing Large Wild Birds
Large birds such as herons, cranes, and swans can be relatively accessible subjects for photographers beginning to explore bird photography.
Their larger size makes them easier to locate and track.
You can photograph the entire bird or use a long telephoto lens to capture its expression and feather details.
Pay attention to the background.
A clean, contrasting background can help emphasize the bird’s shape and colors.
You can also use a wide aperture to create soft background blur.
Photographing Perched Birds
A bird sitting on a branch may appear easy to photograph, but patience is still important.
Observe the bird before approaching.
Look for patterns in its behavior.
Does it repeatedly return to the same branch?
Does it look in a particular direction before flying?
Does it move between several nearby perches?
Understanding these behaviors allows you to anticipate the photograph rather than constantly chasing the bird.
Avoid moving closer too quickly.
If the bird becomes uncomfortable, it may leave.
Stay at a suitable distance and allow the bird to behave naturally.
Photographing Birds in Flight
Birds in flight can be one of the most challenging subjects.
Start by choosing an area where birds regularly pass through.
A clear sky can make focusing easier, while a background of trees or buildings can make tracking more difficult.
Use Continuous AF and an appropriate focus area.
A zone focus area can be useful for unpredictable movement.
Use a fast shutter speed when you want to freeze wing movement.
A shutter speed around 1/2000 second or faster can be a useful starting point, depending on the bird and desired effect.
Keep both eyes open when possible.
One eye can remain aware of the surrounding environment while the other looks through the viewfinder.
This can make it easier to anticipate where the bird will move.
Photographing Birds Near Water
Water provides many opportunities for creative bird photographs.
Swans, ducks, kingfishers, herons, and other waterside birds can be photographed with reflections and ripples in the composition.
Try lowering your camera position.
Shooting closer to the water level can make the bird appear more prominent and create a stronger sense of depth.
You can also use reflections as part of the composition.
Look for moments when the water is calm.
A bird’s reflection can complement the subject and create symmetry.
Photographing Birds Diving Into Water
Birds diving into water can create dramatic action photographs.
The splash can add energy and movement.
A very fast shutter speed can help freeze the water droplets.
A setting around 1/3000 second can be a useful starting point when your goal is to capture a splash sharply, although the ideal speed depends on the lighting and movement.
Use continuous shooting and begin tracking before the bird enters the water.
Timing is critical.
The moment immediately before contact, the instant of impact, and the moment the bird emerges can all produce different photographs.
Photographing Small Birds
Small birds are particularly challenging.
They can be difficult to see, move quickly, and often remain high in trees or deep among vegetation.
A long telephoto lens can help you maintain distance while filling more of the frame.
Rather than chasing the bird, observe where it repeatedly lands.
It may have favorite branches, feeding areas, or water sources.
Once you understand the bird’s routine, you can position yourself and wait.
Patience can be much more effective than constantly moving closer.
Use the Background to Separate the Bird
A bird can easily become lost against a complicated background.
Look for backgrounds with relatively simple colors and textures.
A patch of sky can create a clean background.
Soft foliage can provide a natural green background.
Water can create a smooth, reflective background.
You can also use a wide aperture to blur distracting elements.
The goal isn’t always to remove the environment completely.
Instead, use the background to support the subject.
Pay Attention to Light
Lighting can completely change a bird photograph.
Soft morning or late-afternoon light can produce gentle shadows and warm colors.
Strong midday light can create higher contrast.
Backlighting can make feathers glow and reveal their edges.
Try positioning yourself according to the direction of the light.
If the sun is behind the bird, you may be able to create a silhouette or rim-light effect.
If the light comes from the side, feather texture can become more visible.
Photograph During Golden Hour
The low-angle light around sunrise and sunset can create beautiful backgrounds.
The warm tones can complement the bird’s colors.
However, birds are active at different times depending on their species and habitat.
Rather than choosing a time only because of the light, observe when the birds are most active.
The best combination is good light and interesting behavior.
Choose a Lens Based on Your Shooting Style
When choosing a bird photography lens, consider more than maximum focal length.
Focal Length
Long focal lengths are useful because birds are often distant.
A lens reaching 400mm or more can provide useful reach.
For very small or distant birds, 500mm or 600mm can provide even greater magnification.
However, a shorter telephoto lens can be more flexible when photographing larger birds or birds that are relatively close.
Maximum Aperture
A wider maximum aperture allows more light to reach the sensor.
This can be useful when shooting at high shutter speeds or in low light.
It can also provide stronger background separation.
However, a lens with a smaller maximum aperture can still be very useful in bright outdoor conditions.
Consider the lighting conditions in which you normally photograph.
Autofocus Performance
Birds move quickly.
A lens with responsive autofocus can make it easier to track moving subjects.
Look for a lens that can focus quickly and maintain focus as the subject moves.
Quiet autofocus can also be useful when photographing wildlife because minimizing noise can help you avoid unnecessary disturbance.
Image Stabilization
Long telephoto lenses magnify camera movement.
Image stabilization can therefore be useful when shooting handheld.
It can help reduce the effect of camera shake and make it easier to compose with a long lens.
However, remember that image stabilization doesn’t freeze the movement of a bird.
If the bird is moving quickly, you still need an appropriate shutter speed.
Size and Weight
Bird photography can involve walking long distances and carrying equipment for extended periods.
A very large telephoto lens can provide excellent reach but may become tiring.
A lighter lens can make it easier to move quickly and respond to unexpected opportunities.
Consider how you actually plan to photograph.
If you mostly photograph from a fixed location, weight may be less important.
If you hike through forests and wetlands looking for birds, portability may become much more important.
Responsible Bird Photography
Photographing wild birds comes with an important responsibility.
The goal should always be to photograph birds without unnecessarily disturbing them.
Avoid approaching nests.
Do not chase birds in an attempt to get a photograph.
Avoid revealing the locations of rare or vulnerable birds publicly when doing so could put them at risk.
Do not feed wild birds simply to attract them into a photograph.
Don’t alter vegetation or the environment to create a cleaner composition.
Avoid using flash on wild birds.
Also be considerate of other photographers, visitors, landowners, and local regulations.
The Wild Bird Society of Japan’s bird-photography etiquette similarly emphasizes avoiding nests, chasing birds, feeding wildlife, altering habitats, disturbing nature, and using strobes.
A photograph is never more important than the welfare of the animal.
Be Patient
One of the most important skills in bird photography isn’t a camera setting.
It’s patience.
You may spend a long time waiting without taking a single photograph.
That’s part of the experience.
Observe the environment.
Listen for birds.
Watch their behavior.
Look for patterns.
The longer you spend observing, the more likely you are to recognize when something is about to happen.
Instead of chasing every bird you see, choose a location and wait.
You may eventually capture a moment that you could never have created by simply approaching the bird.
Final Tips for Wild Bird Photography
Wild bird photography can be challenging, but that challenge is part of what makes it rewarding.
Start by choosing a lens that matches the birds and environments you photograph.
A telephoto lens reaching 400mm or more can provide useful reach for distant subjects, while shorter telephoto lenses can be more flexible for larger birds and environmental compositions.
Learn to control shutter speed according to the bird’s movement.
For birds in flight, fast shutter speeds can help freeze wing movement. For stationary birds, slower shutter speeds may be sufficient when conditions allow.
Use Continuous AF when tracking moving birds and choose an appropriate focus area for the environment.
A wider zone can help when photographing birds in flight, while a smaller focus area can be useful when branches and other obstacles surround the bird.
Whenever possible, focus on the eye.
Pay attention to composition as well.
A centered composition can emphasize a bird’s appearance, while the rule of thirds can help incorporate the surrounding environment. When photographing birds in flight, leaving space in the direction of movement can make the photograph feel more dynamic.
Don’t limit yourself to bird portraits.
Photograph birds interacting with water, flying across the sky, sitting among trees, feeding, or simply existing within their natural habitat.
These environmental photographs can tell a more complete story.
Most importantly, remember that wild birds are not models.
Give them space, observe their behavior, and avoid actions that may cause stress or disrupt their natural activities.
With the right lens, appropriate camera settings, careful observation, and patience, you can capture beautiful photographs while experiencing the birds and their natural environment responsibly.
TAMRON products mentioned in this article