- [How to Photograph Illuminations] Tips for taking beautiful photos and choosing the right lens
- January 31, 2025
[How to Photograph Illuminations] Tips for taking beautiful photos and choosing the right lens
Illuminations that light up the winter nights are not only beautiful subjects, but also fantastic subjects that evoke warmth and an emotional atmosphere. To capture their beauty and inspiring impression in a photograph, some tricks are necessary. In this article, we will introduce some tips for photographing illumination that even first-time photographers can put into practice.
Scenes where illumination looks good and tips for photographing
To get the most out of illumination, it is important to match it to the scene being photographed. Here we introduce four typical scenes and tips for shooting each.
A panoramic view of illumination
Even a simple composition that fills the entire image with illuminations can be impressive, depending on your creativity. In addition, by keeping the background simple, the shapes and colors of the illumination itself will be more impressive. Try taking pictures from different angles, directions, and distances, and try to keep the composition from becoming mundane.
Nightscape and Illumination
Combining a city nightscape with illuminations creates a gorgeous photo filled with beautiful light. F8 to F11 is a good F-number range to capture the light in sharp detail. Considering the difference in light intensity between the illumination and the night scene, use manual mode and shoot at ISO 100 to ISO 400. If the illumination appears too dark, you may want to adjust the exposure compensation to the positive side. If a tripod is available, it is also recommended to try long exposures with shutter speeds of 15 to 30 seconds to broaden the range of expression.
Illumination in a landscape
Illumination in natural scenery, such as in combination with trees, rivers, and canals, is also attractive. It is advisable to use a Wide Angle lens and make adjustments to F8 to F11 and ISO 100 to ISO 400.
Seasonal subjects are also beautiful and impressive. Try combining illumination with autumn leaves or snowy landscapes. Start with a shutter speed of about 1 second or 1/100th of a second, and adjust as you see fit.
Portraits
In portrait photography, where the portrait is superimposed on the person and illumination, the key is to keep the F-number close to wide open and to create background blur; ISO sensitivity should be around ISO 400 to ISO 1600, and shutter speed should be around 1/50th to 1/200th of a second. In addition, backlighting and ball blur, as described below, can be utilized to create more impressive photographs. However, backlighting, in particular, tends to darken the expression of the subject, so it is a good idea to adjust the exposure compensation to the positive side.
Tips for capturing beautiful illumination
In addition to basic photographic knowledge, lens selection is also important to capture beautiful illumination as you envision it. Here are some tips for taking beautiful pictures, from lens selection to exposure settings.
Use a Wide Angle or Standard lens
When photographing illumination, it is best to first try a Wide Angle lens or a standard lens.
A Wide Angle lens (focal length of about 35 mm or less) is ideal for capturing an expanse of space or an entire landscape in a single photo. Even with illuminations, where photographing space is often limited, you can capture the entire scene from a short distance. Also, since perspective is emphasized, dynamic expressions can be created by adjusting the angle and height at which the camera is positioned. For example, shooting from a low angle from a low position can emphasize the grandeur of illumination.
On the other hand, a standard lens (focal length of around 50 mm) has an angle of view close to the effective field of view of humans, allowing you to capture a natural impression of the scene as you see it. This lens is particularly well suited for portraits and illuminated snapshots.
Guideline for exposure settings
To capture the beauty of illumination as seen by the naked eye, it is important to capture the scenery as a clear image. Here, we will explain the key points of exposure settings.
Shooting mode
First, you should try using aperture priority mode. In this mode, you can set any F-number (aperture value) and the shutter speed will automatically adjust to ensure proper exposure. Since bokeh control is important in illumination, we recommend starting with this mode.
As you become accustomed to shooting, if the brightness is not balanced or you want to adjust the focusing as you wish, try manual mode as well. Manual mode is especially suitable when you want to intentionally overexpose or blur the image, such as with long exposures or multiple exposures.
F value (aperture value)
The F value setting will vary depending on the photo you want to express. If you want to take pictures with a soft atmosphere by taking advantage of bokeh, an F value close to maximum aperture (e.g., F2 to F4) is suitable. This will create a larger background blur and make it easier to capture the illumination in a bright light. A F-number close to maximum aperture is also recommended when the light level is insufficient and the picture appears dark.
On the other hand, if you want to capture the lights of the illumination or the entire nightscape sharply, use a slightly stopped-down F-number of about F8 to F11 as a guide. In this way, the entire image will be in focus from the front to the back, giving a clear impression.
Shutter speed
When shooting hand-held, use a shutter speed of 1/50th to 1/200th of a second to minimize camera shake. On the other hand, if you want to express the movement of light, such as the trajectory of car lights, use a tripod and set a long exposure of about 5 to 30 seconds.
ISO sensitivity
As a rule of thumb, start with ISO 100 or ISO 400 and increase the sensitivity as needed. In dark environments, ISO 1600 to ISO 3200 may be appropriate. Adjust as you see how the photo turns out. However, if the ISO sensitivity is raised too high, roughness may begin to appear in the details of the image, so it is necessary to increase or decrease the sensitivity while keeping a good balance between the two.
Exposure Compensation
Exposure compensation adjusts the overall brightness balance of a photo. It is a good idea to use this function when shooting illumination, as it can make the overall impression darker. For example, if the illumination light seems weak, adding a correction of about +1EV will create a more spectacular light expression.
White balance
The white balance setting can change the color and mood of a photo. For example, when set to “sunlight,” the entire image takes on an orange-tinged color, giving the photo a warm atmosphere. On the other hand, “light bulb” gives a cool bluish look. If you have a preferred expression, try shooting while changing the white balance accordingly. Also, if you shoot in RAW format, you can fine-tune the white balance later.
Angle and composition to enhance beauty
For impressive photos, you also need to think about angles and composition. For example, if you shoot from a low position looking up, the illuminations will look like they are spreading out in front of you. If the image looks flat, it is important to move closer or further away.
Also, by overlaying foreground and background blur on the illuminations, which are the subject of the photo, you can create a three-dimensional photo with depth. If there are puddles or window glass, you can capture the illuminations reflected on them to take a unique photo.
If you want to create a well-balanced composition overall, it is a good idea to keep the rule of thirds in mind.
Add creativity with a little ingenuity
After you have mastered the basic points of photography, let’s go a step further and try creative expression. Here are four ways to make illuminations more attractive.
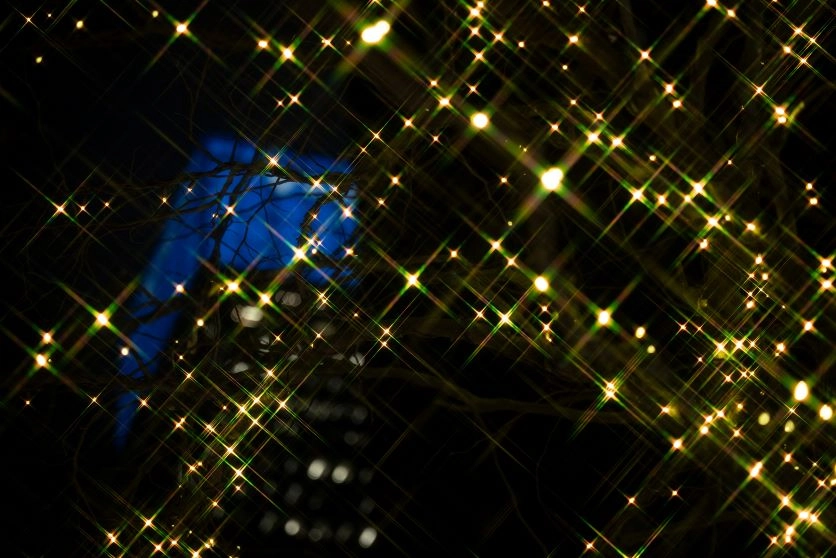
Expressing fantastic beauty with ball bokeh
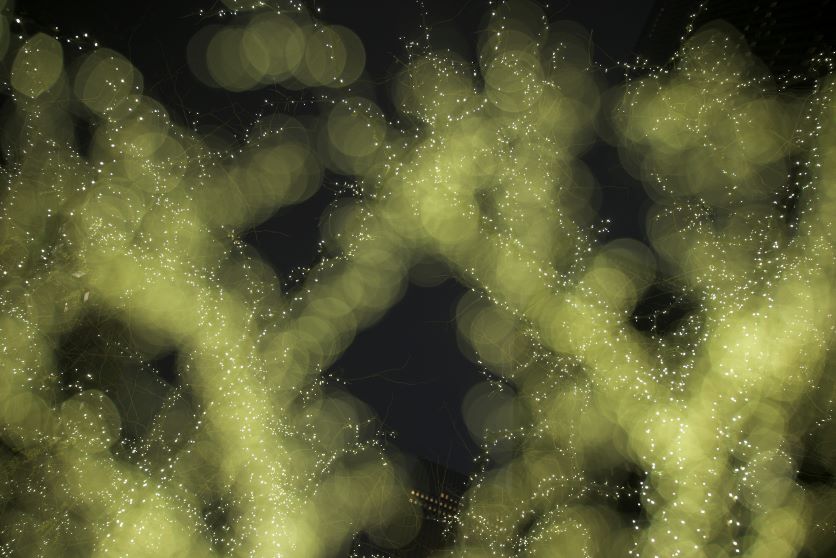
TAMRON 28-75mm F2.8 G2 (Model A063) Focal length: 28mm Exposure: F2.8 Shutter Speed: 1/125sec ISO: 400
Ball bokeh softens the light of illuminations and gives it a warm impression. To create bokeh balls, use a F-number close to the maximum aperture and put some distance between the subject and the illumination in the background. Focus firmly on the subject in the foreground. This will make the illumination in the background appear round and blurred, creating a fantastic atmosphere. If the bokeh balls are too bright, adjust them by adding exposure compensation.
Using filters to change the impression of light
Using filters can greatly change the atmosphere of illuminations.
Cross filters are lens filters that draw out lines of light radially from a strong point light source and accentuate the brilliance. When used when photographing illuminations, the light will sparkle in a cross shape, creating a gorgeous and impressive atmosphere for the entire photo.
Soft filters also blur the outlines of the light, creating a rounded, soft atmosphere overall. You can also change the color tone by using color filters. For example, using a warm-colored filter will create a warm and impressive photo.
By using filters in this way, you can try out various expressions of light.
Highlight illuminations with long exposure
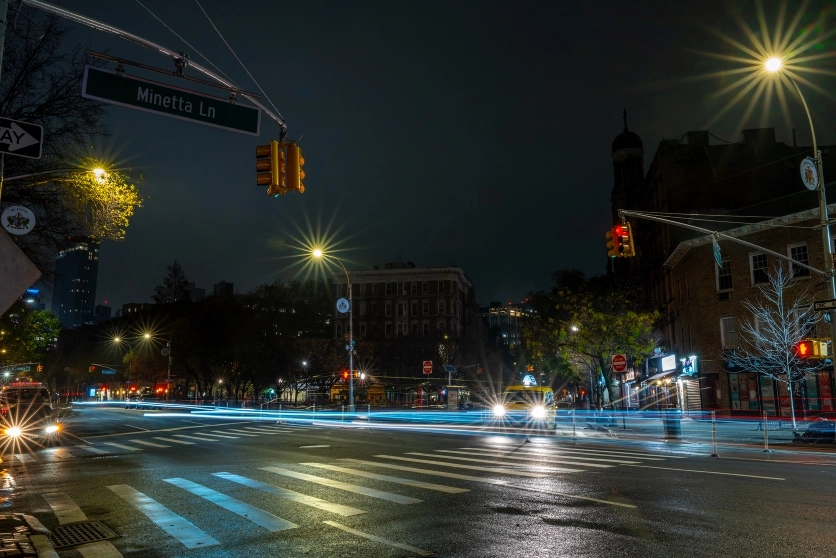
TAMRON 28-75mm F2.8 G2 (Model A063) Focal length: 28mm Exposure: F18 Shutter Speed: 20sec ISO: 80
By changing the way you capture not only illuminations but also the surrounding subjects, you can make the illuminations stand out even more as a subject.
For example, by using long exposure to express car lights as light trails or to capture passersby as blurred images, you can emphasize the beauty of the illuminations as a contrast.
When using long exposure, it is essential to use a tripod to prevent camera shake. Try shooting with a shutter speed of about 15 to 30 seconds and an ISO sensitivity of about ISO100 to ISO400. If possible, using a remote shutter will further reduce camera shake and produce beautiful photos.
Create artistic works with multiple exposures

TAMRON 28-75mm F2.8 G2 (Model A063) Focal length: 28mm Exposure: F2.8 Shutter Speed: 1/125sec ISO: 400
Multiple exposure is a function that overlaps multiple images into one photo, and is available on some interchangeable-lens cameras. For example, by taking a photo with the illuminations in focus in the first shot and overlapping a photo with the illuminations out of focus in the second shot, you can create a fantastic illumination photo with overlapping large and small lights. Let’s try various expressions through trial and error.
How to choose a lens suitable for shooting illuminations
From here, we will introduce the characteristics of lenses suitable for shooting illuminations and points to consider when choosing them.
Maximum aperture
When shooting illuminations, the best lens is one that can take bright photos even in dark environments. We recommend a lens with a small maximum aperture, such as F1.4, F2 to F4. These lenses make it easier to secure light even at night and can produce beautiful bokeh.
Focal length
A Wide Angle lens is recommended to capture the entire illumination landscape. By using a Wide Angle lens, you can take impressive photos that include the spread of the illuminations and the surrounding environment.
On the other hand, if you want to take portraits or snapshots with a narrower angle of view, a standard lens (around 50mm) is suitable. A standard lens will give you a natural sense of perspective and make it easier to balance the subject and background.
Lightness and Compactness
Since you will often be out and about for long periods of time, a light and compact lens will come in handy. Lightweight lenses have the advantage of being easy to carry and less tiring to shoot for long periods of time. They also have the advantage of being less prone to camera shake when shooting handheld. Try holding the lens in your hand to check its weight and compactness.
Autofocus (AF) Performance
When shooting illuminations, AF performance in dark places is important. When choosing a lens, it is a good idea to check whether it can focus quickly and accurately even in dark places, and its ability to track moving subjects. On the other hand, there are also scenes where manual focus is required depending on the subject and environment. It is a good idea to check the ease of use of the focus ring, various switches, and other controls and their layout.
Image Stabilization Mechanism
A lens with an image stabilization mechanism makes it easier to reduce camera shake when shooting handheld. In addition to the effectiveness of the image stabilization, you should also check whether the effectiveness can be adjusted. Doing so will make it easier to try creative photography, such as taking photos that deliberately take advantage of camera shake.
Enjoy shooting illuminations, from the basics to advanced!
When photographing illuminations, you can create attractive photos by combining a wide range of elements, from basic settings to creative techniques. First, try taking lots of photos, keeping in mind the settings and points introduced in this article. Once you get used to shooting to a certain extent, try some applied photography, such as taking photos with night scenes or taking photos that make use of bokeh.

Lens Featured in this Impression
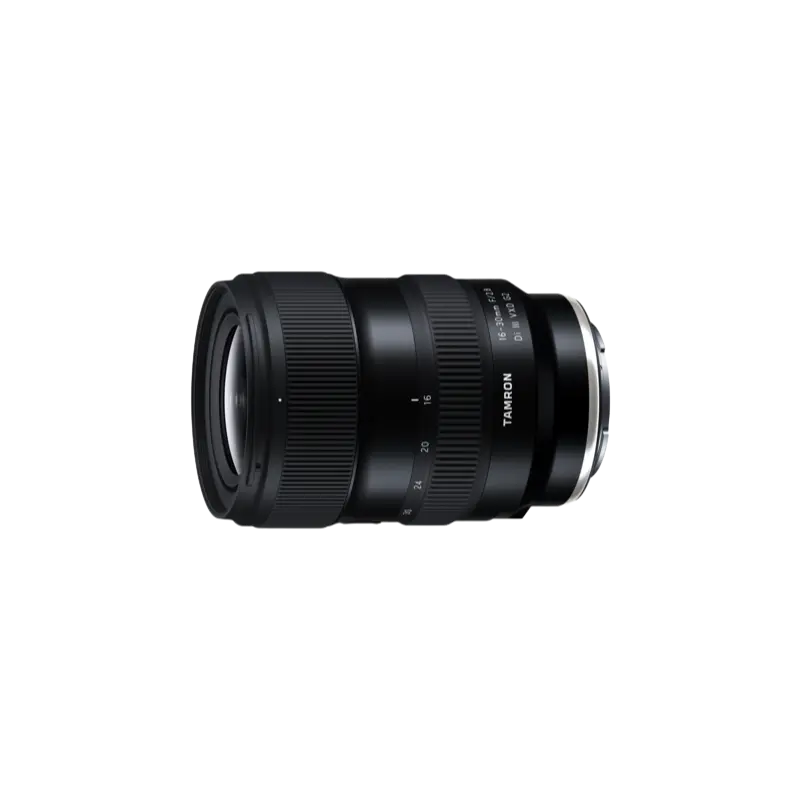
16-30mm F/2.8 Di III VXD G2 (Model A064)
Expanding upon the success of the highly acclaimed TAMRON 17-28mm F/2.8 Di III RXD (Model A046), the G2, 2nd-generation emerges as an advanced 16-30mm F/2.8 Di III VXD G2 (Model A064). While broadening the zoom range, it maintains a compact, lightweight design and delivers exceptional image quality. In addition, it features improved autofocus performance and has been updated to the latest lens design, enhancing overall operability. It’s also compatible with TAMRON Lens Utility™, allowing you to customize practical functions for both photography and videography. Retaining the mobility and versatility of its predecessor, the 16-30mm F2.8 G2 unlocks new creative possibilities. Experience the unique creative expressions that only a fast, ultra wide-angle lens can offer.
Learn more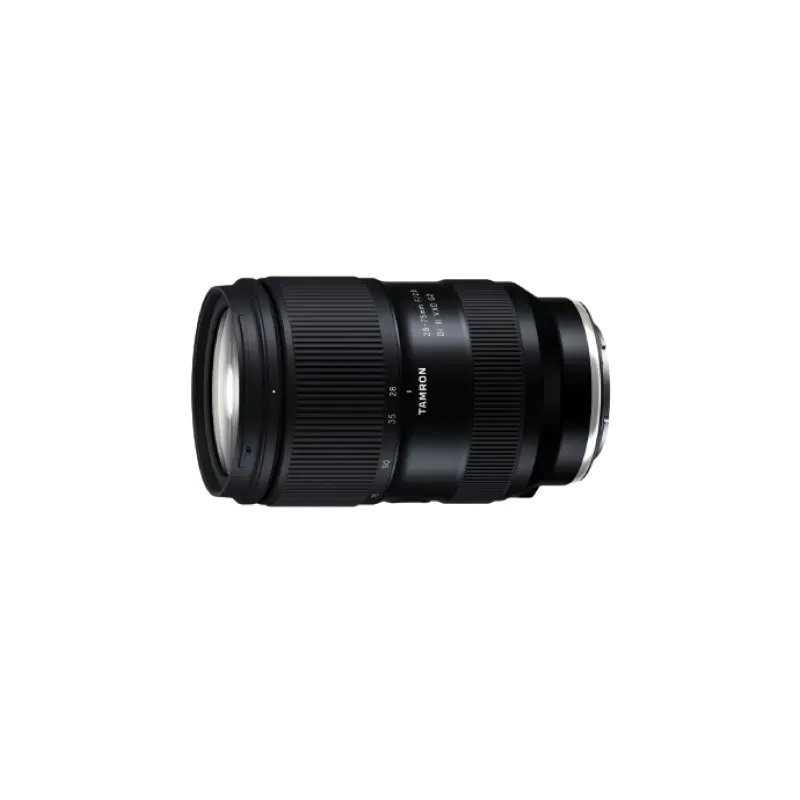
28-75mm F/2.8 Di III VXD G2 (Model A063)
28-75mm F/2.8 Di III VXD G2 (Model A063) is the second-generation fast-aperture standard zoom lens for Sony and Nikon full-frame mirrorless cameras, offering significantly improved optical and autofocus performance and new function customization.
Learn more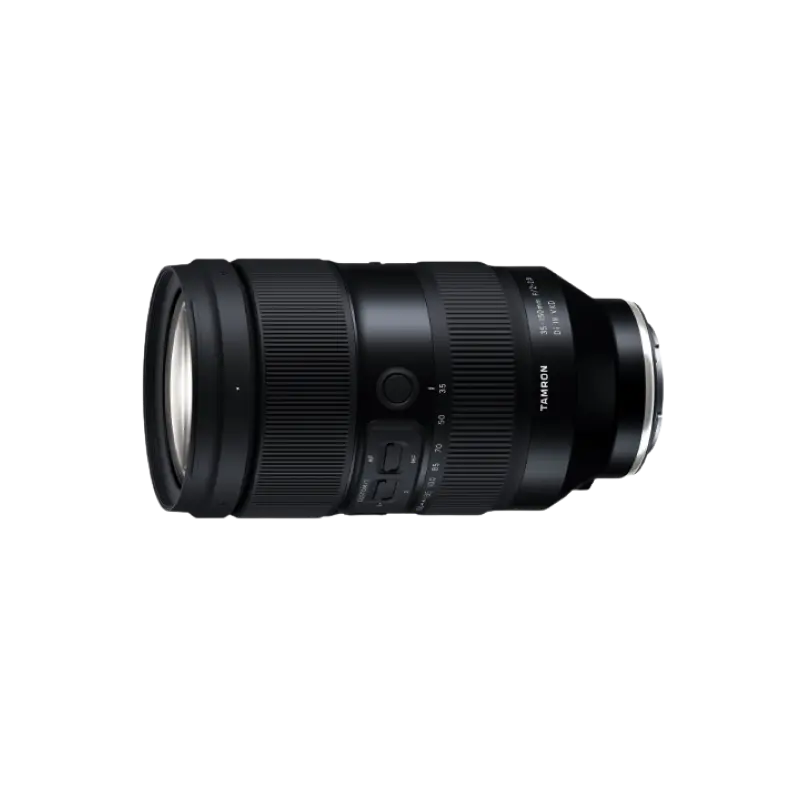
35-150mm F/2-2.8 Di III VXD (Model A058)
The 35-150mm F/2-2.8 Di III VXD (Model A058) is a high resolution travel zoom lens that covers everything from the 35mm wide angle to the 150mm telephoto focal length, the first zoom lens achieving an aperture of F2 at the wide angle end. It has a groundbreaking fast-aperture and utilizes the linear motor focus mechanism VXD (Voice-coil eXtreme-torque Drive), thereby achieving high speed, high precision autofocusing. The innovative lens design enabled us to greatly improve the lens's grip and functionality. The software, developed in-house, enables to easily customize functions and to update firmware.
Learn more
28-300mm F/4-7.1 Di III VC VXD (Model A074)
28-300mm F/4-7.1 Di III VC VXD (Model A074) is a compact and versatile all-in-one 10.7x zoom lens for Sony E-mount. The lens boasts class-leading high image quality, and is equipped with high-speed AF VXD and VC. Go from wide-angle to long telephoto in an instant and capture every moment of the world around you.
Learn more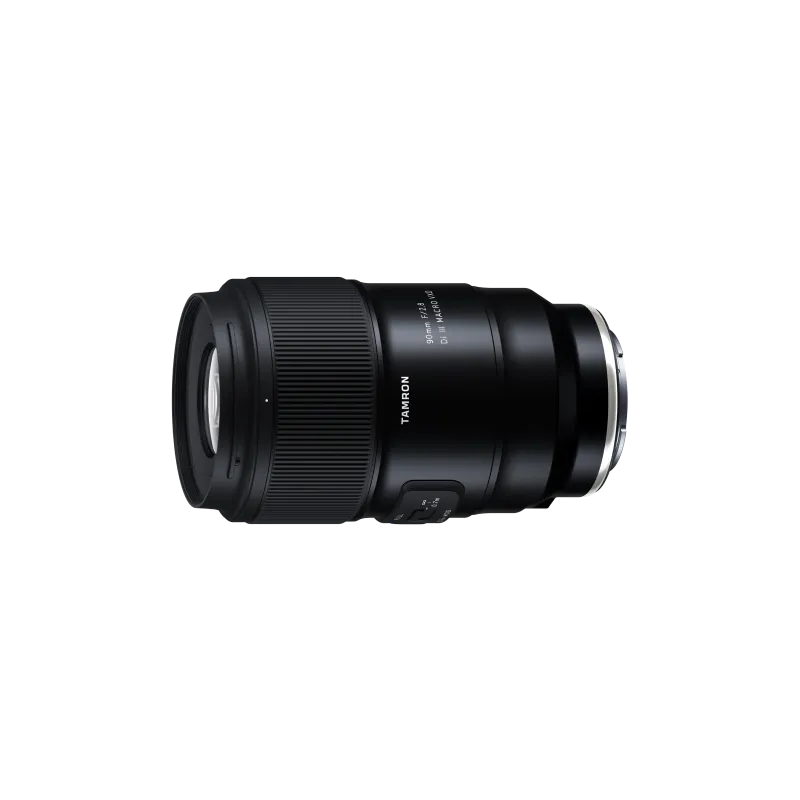
90mm F/2.8 Di III MACRO VXD (Model F072)
The 90mm F/2.8 Di III MACRO VXD (Model F072) is the mirrorless version of the TAMRON 90mm macro lens, beloved for many years. It offers outstanding resolution and optical performance, featuring TAMRON’s first 12-blade circular aperture for stunning bokeh and starburst effects. Its lightweight, compact design ensures easy portability, and the new hood with sliding window simplifies filter use. The lens is also compatible with TAMRON Lens Utility™ and has high-speed, high-precision AF, expanding possibilities for photography and videography. This lens blends TAMRON's legacy of brilliance with advanced technology, marking a new chapter in the 90mm macro lens history.
Learn more